Conditional logic takes people on a unique path through your forms. Whether you want to show and hide certain fields or allow customers to pay now or later, there are many ways to keep your forms streamlined and efficient. You’ll find our powerful conditional logic builder available throughout the form builder wherever you see a “When” option available within a field’s settings.
Conditional logic can also power workflows in multiple ways, such as determining when to send an email-based workflow link for a form’s entry, or when an action is allowed to take place on your form. Roles can also influence your workflow’s logic by applying roles within the conditional logic builder, or updating Show This Field settings using the For Roles option.
Below you’ll find a number of helpful scenarios for using conditional logic on your forms.
Showing and hiding fields or sections
Some questions on your form may require additional information, but you’d rather not overwhelm people with extra fields that they don’t need to complete. With conditional logic, you can automatically show and hide fields or sections depending on what people select. To show and hide fields:
- Select the field you want to show and hide, and find the Show This Field - When option in the field settings.
- In the conditional logic builder, specify the conditions that will trigger the field to appear.
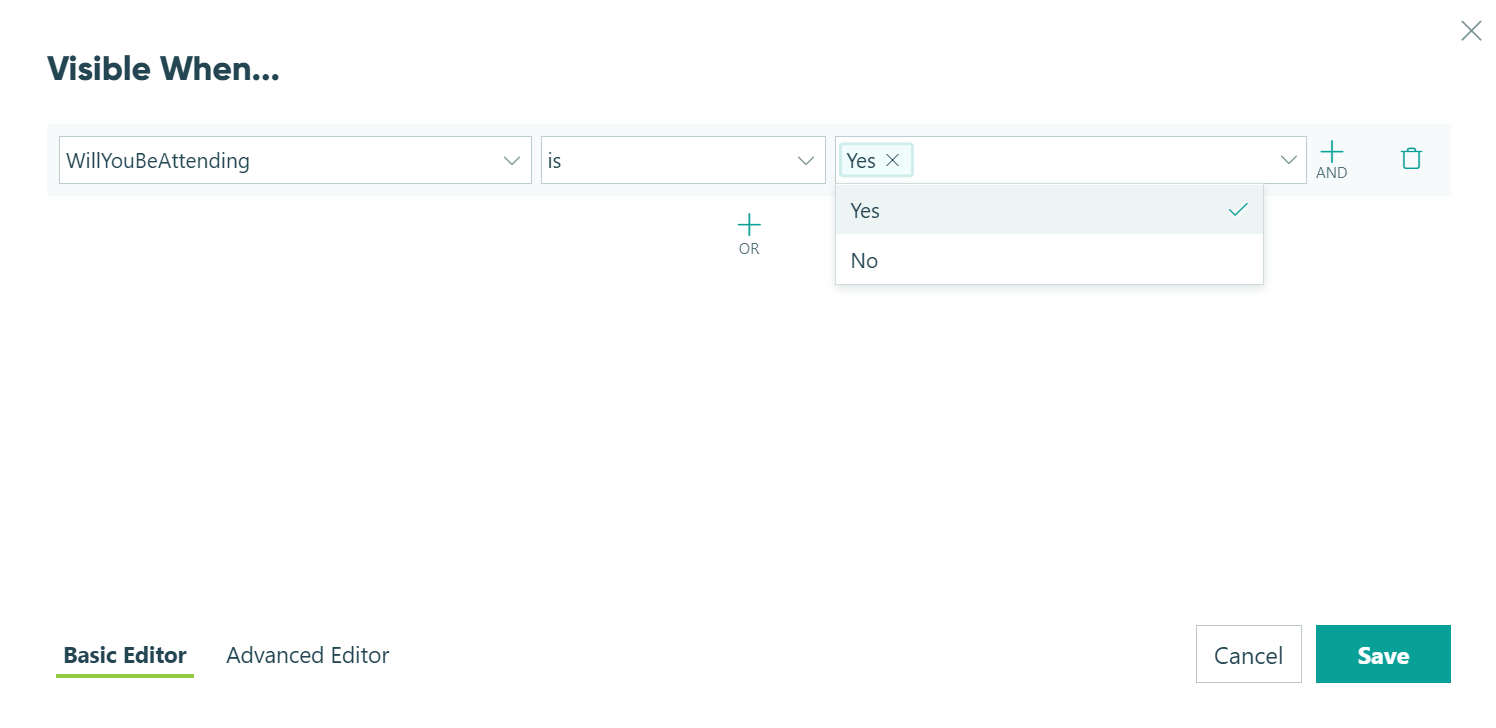
- Make sure to save your changes.

Showing pages on multi-page forms
When your form has a lot of pages, you don’t want to confuse your users by showing them pages they may not need. Usually that would mean you’d need to build a separate form, which takes too much time and separates related data. With conditional page branching, you can send each of your users on a completely different path depending on what they answer. To conditionally show a page:
- Add a page break, then select When from the Show Next Page section in the field settings.
- In the conditional logic builder, you can set the page to only be visible when the user selects a specific option in the Choice field, ex:
=WhichPositionAreYouInterestedIn = "Sales Director"
Now, the “Sales Director” page only appears when the user selects Sales Director from the drop-down list.
Learn more about multi-page forms.
Email routing
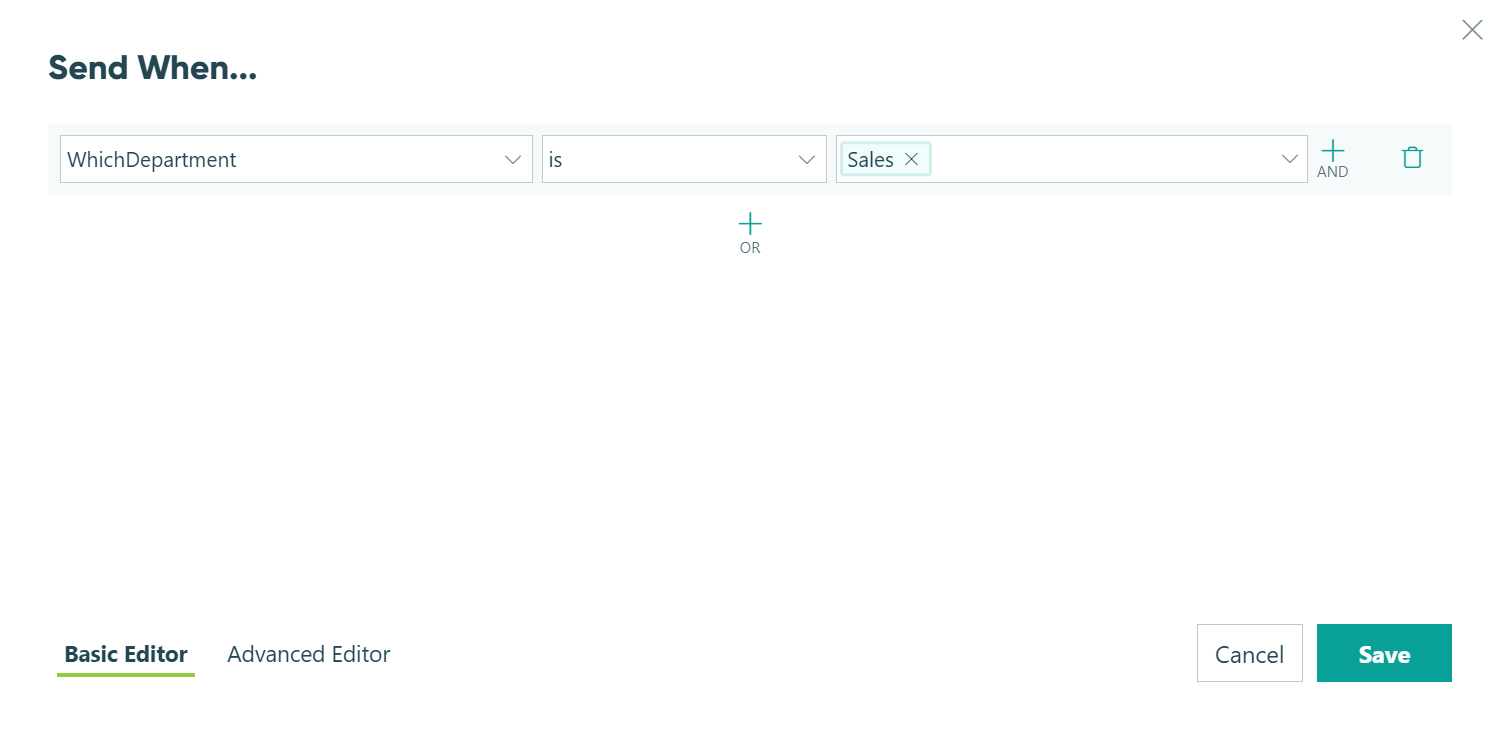
Email routing enables you to control who gets notified when an action is performed on your form. For example, you can set up a contact form to send an email notification to various people depending on the department the user selects. Or, you can send an email to update a user when their submission has been approved.
To set up conditional email notifications:
- Open the Workflow menu on your form’s Build page.
- Open the settings for the form action that triggers the email and select the email notification.
- Specify who’s receiving the email, the subject of the email, and optionally include a custom message.
- Under Send, select “When” to open the conditional logic builder.
- Specify the criteria that should trigger the email to send.
Text piping
To reference text from a Repeating Section, you must first target the repeating data in a separate Calculation field. Learn more about referencing repeating data.
Text piping (also known as “question piping”) allows you to carry user input from one field to the next depending on the options they select. You can use text piping to create more dynamic, personalized forms with more focused follow-up questions. For example, personalize your survey forms by asking specific follow-up questions that reference earlier fields on the form. To set up text piping:
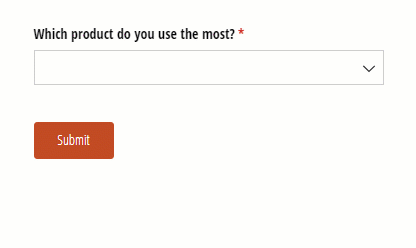
Add a Choice field to your survey form (ex: ‘Which product do you use the most?’)
Create a follow-up Choice field. In the field settings, use the Insert Field option to insert the answer from the previous Choice field into the field label (ex: ‘You chose
[WhichProductDoYouUseTheMost]! Please rate this product.’)

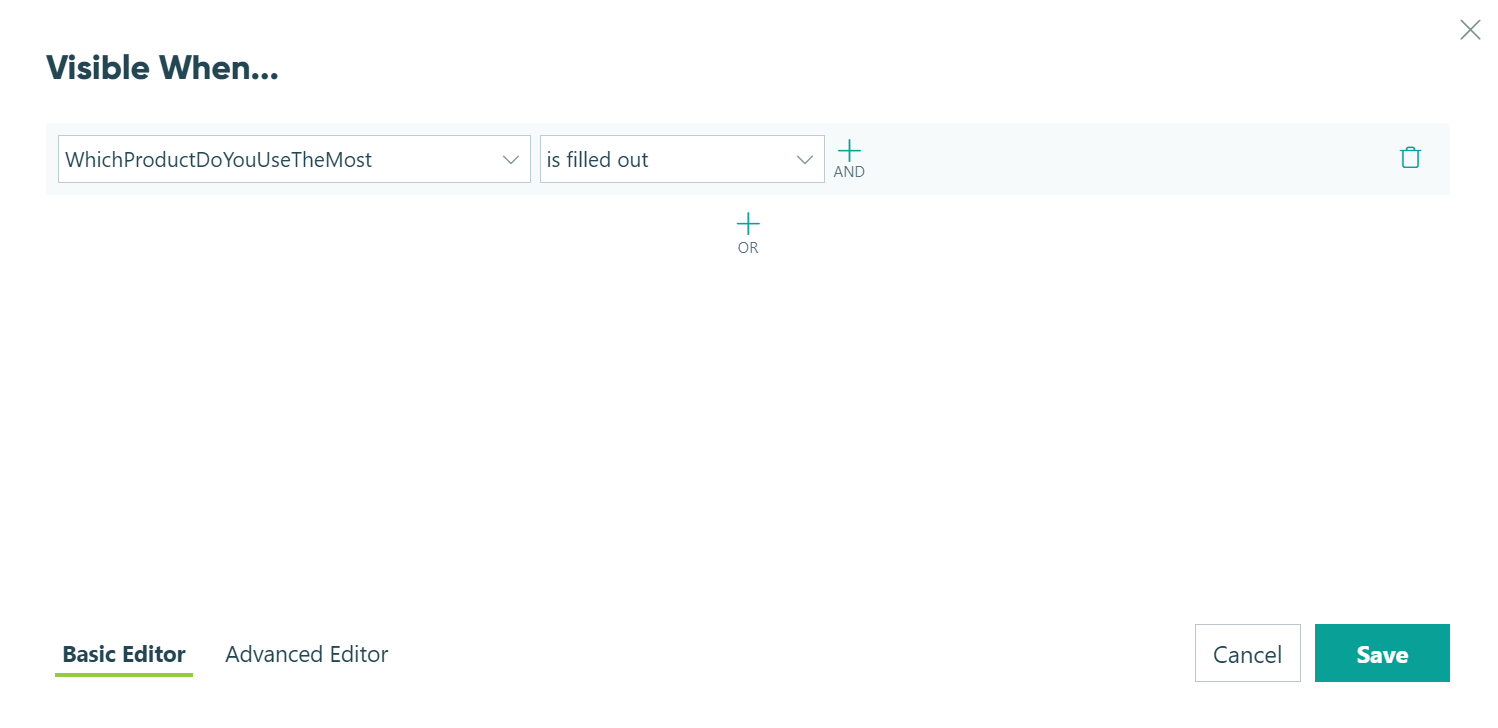
Set the follow-up Choice field to only appear after the previous Choice field is filled out (ex:
=(WhichProductDoYouUseTheMost != null)
Now, when the user selects their most used product, the product name will automatically populate in the next field:
Requiring payment
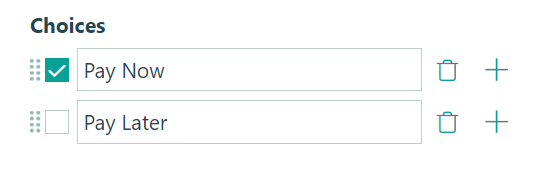
When it comes to payment, you can use conditional logic to offer a variety of circumstances in which your customers are required to pay. For example, if you want to give your customers the option to pay now or later, you can add a choice field with conditional logic. You can then determine that if a customer selects Pay Now, the payment becomes required. If they select Pay Later, you can allow them to submit their order without payment.
Requiring fields
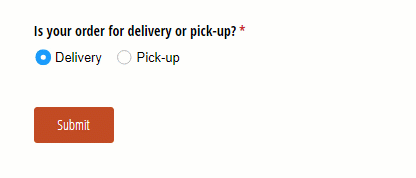
Set your fields as always, never, or sometimes required under specific conditions to make sure you get your data when you need it. For example, when a user specifies that they would like to pick up their delivery, create a Phone field so you can notify them when their order is ready — and the field is only required and appears when they choose Pick-up. To require a field:
- Go to the field settings box of the field you want to require, and find the “Require This Field” option.
- Set the the conditions under which the field needs to be required, ex:
=IsYourOrderForDeliveryOrPickup = "Pick-up"
The selected field will now only be required under those exact conditions.
Validating fields
With the Custom Error option (located in the settings area of almost every field type), you can specify certain conditions that will cause a custom error message to display underneath a field. Using both advanced and conditional logic, you can add any number of rules for validating your fields. To set your own custom error rules:
Select the field you want to validate, then find the “Show Custom Error” option at the bottom of the field settings box.
After the conditional logic builder appears, set the conditions under which you want your field to result in an error.

After you set your conditions, include an error message in the second box.
Learn more about the Custom Error option.
Conditionally allow an action
You may want to specify conditions around when a form action can be performed, as well as who can perform it, in order to set up your workflow to run as efficiently as possible. These conditions can be based on roles, statuses, or a combination of the two.
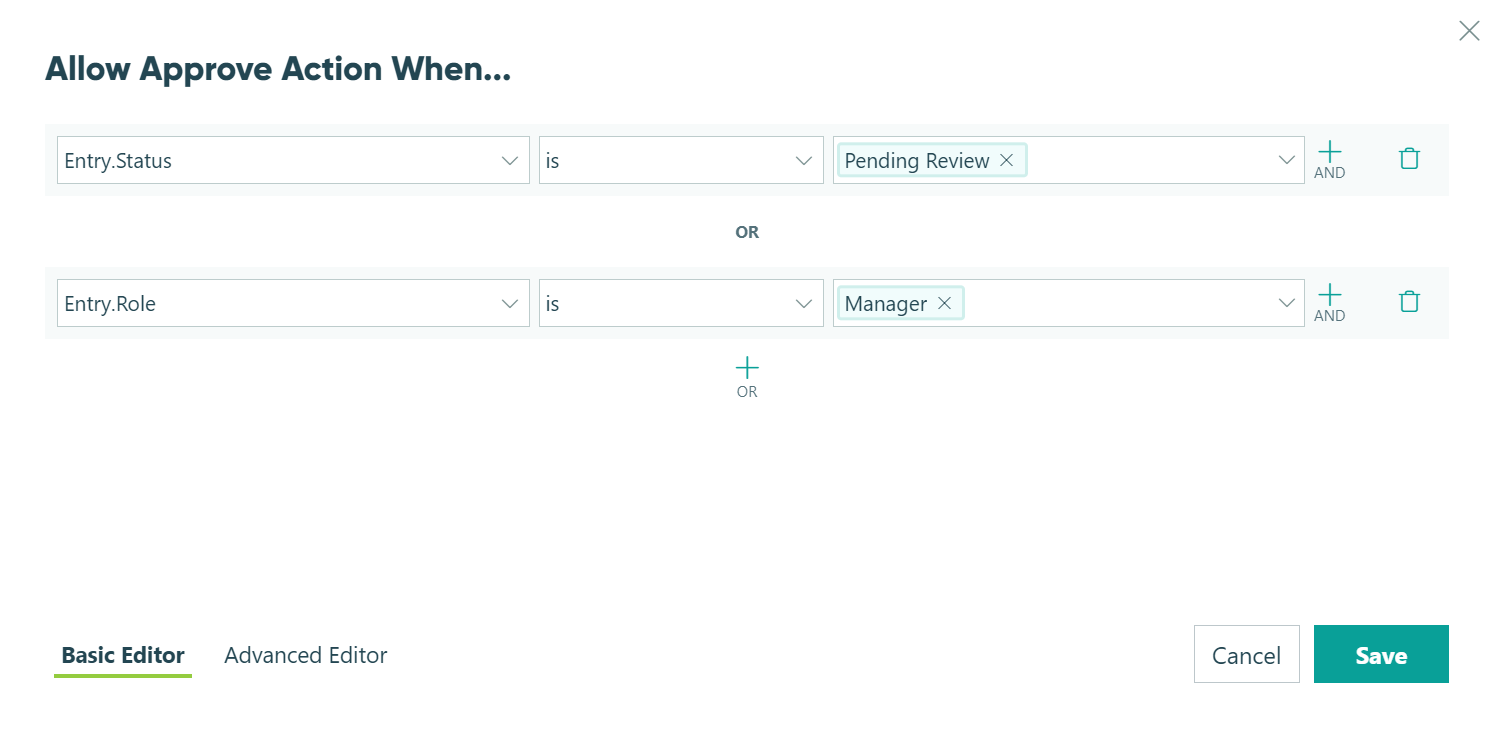
For example, say you have an Expense Report Form where you only want the Approve action to show for Managers when the form is in a Pending Review status. Once you’ve created a Manager role and a Pending Review status, you can then create an action titled Approve and then apply logic to only allow the action for those specific conditions:
- Open the Action Settings for your Approve action.
- Under Allow Action, select “When”.
- Use the conditional logic builder to set conditions that allow the Approve action when the entry status is Pending Review for Managers working with the entry.
Conditionally assign a status
Statuses can be conditionally assigned to automatically move a form’s entry from one status to another. You can trigger a status change in a number of ways, such as based on a specific field’s value or simply updating a status when a specific action takes place.
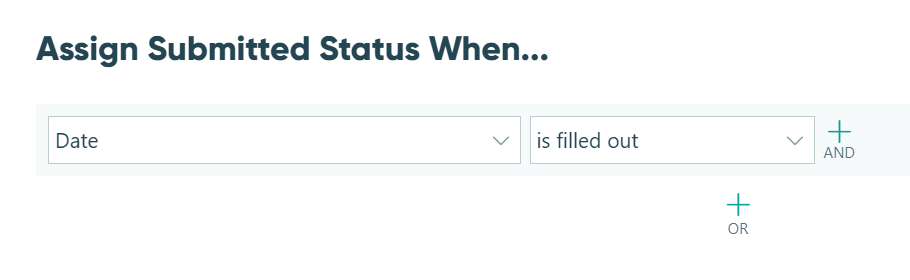
For example, on an Expense Report Form you may want to automatically assign a status of Submitted when a Submit form action is performed. Once you’ve created the Submitted status, you can apply logic to conditionally assign it:
- From your Workflow menu, click on the Submitted status to edit the status.
- Under Automatically Assign Status, select “When” to open the conditional logic builder.
- Set conditions that will assign a Submitted status when the Submit action is performed.
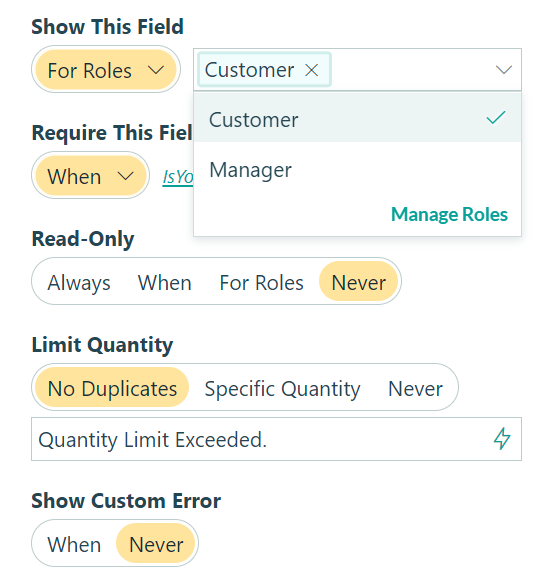
Conditionally show fields or sections based on role
Roles can improve efficiencies within a workflow by conditionally allowing certain fields and/or sections on a form to be shown based on role. To access this logic:
- Click on the field or section where you’d like to apply role-based logic.
- Under Field Settings or Section Settings, select For Roles under Show This Field.
- Select the role(s) you’d like to show the field or section for.