When you need a bit more control, you can download a standard template as a Word document and use our simple yet powerful merge syntax to completely customize your generated document.
Creating custom documents
To build a custom document:
- Open the Manage Document Templates dialog, which is accessible from your form’s confirmation options, notification emails, individual entries, and the share entry dialog.
- Find Template Type, and select Custom. You will be presented with the option to download your document template as a Word document.
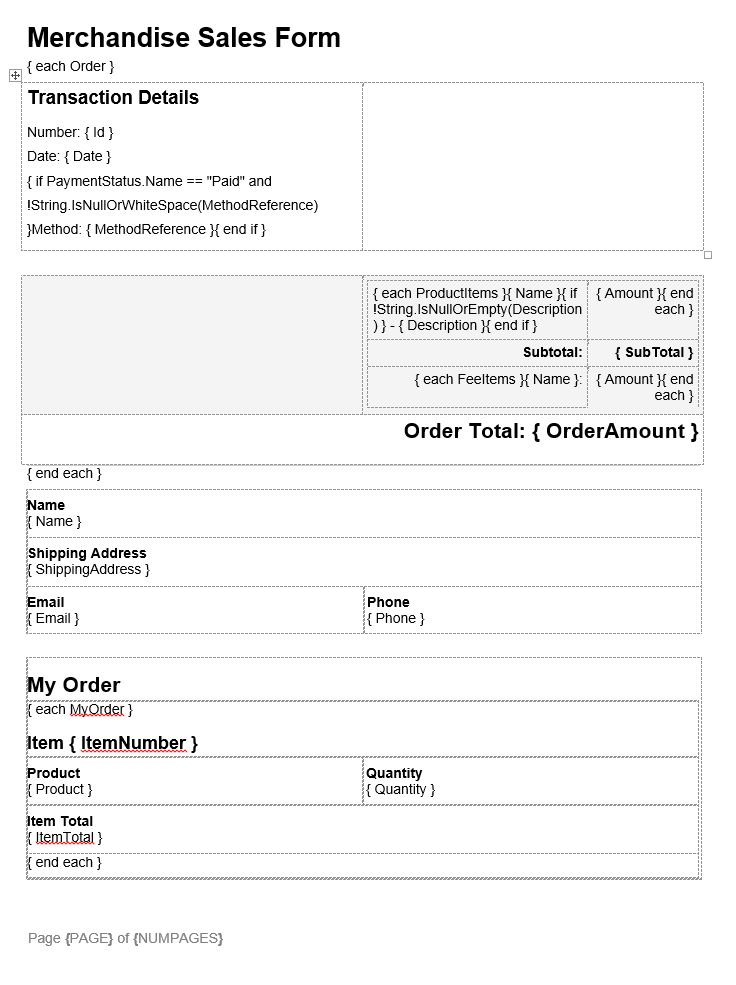
- In Word, your form’s field names will appear as plain text, with field tokens next to them in brackets. You can adjust field names, rearrange fields, change font size/type/color, and much more. You can even write expressions in Cognito calculation syntax.
- When you’re finished customizing your template in Word, press the Upload button to upload your document. If it contains any errors that might prevent it from working correctly, you can download an annotated version of the template that points out each error. The uploaded document must be smaller than 5MB.
- Set the output format as PDF file, or Word document. If your document contains a custom font, make sure to upload the font file as well. To upload a different document, simply select the trash icon to delete the existing one.
- After uploading your template, you can open/save your new custom document. By default, the billing mode for your template will be set to Test, meaning that your generated document will include a Cognito Forms watermark. Your organization is not charged for test documents. Once you’re finished testing your document template, change the billing mode to Live.