Zapier, a platform that connects hundreds of different web applications, has saved our customers countless hours by allowing them to create extensive workflows with their forms. For example, you can use Zapier to automatically update line items in Google Sheets whenever you update an entry in Cognito Forms; or you can generate custom documents from your form entries and send them to your Google Drive account after submission.

In Zapier, the event that starts a Zap (the link between your applications) is called a trigger, while the event that the Zap performs is called an action. Previously, a Zap could only have a single trigger (ex: submitting a new entry in Cognito Forms) and a single action (ex: using the submitted entry data to create a new subscriber in MailChimp). Last year, however, Zapier introduced Multi-Step Zaps; giving users the ability to set multiple actions for a single Zap. So, instead of creating separate Zaps that perform different actions using identical triggers, you can lump together multiple actions to create more efficient and sophisticated workflows!
Setting up Multi-Step Zaps
When it comes to your forms, Multi-Step Zaps can be helpful in a variety of ways. In a previous blog post, I explained how to easily create a lead capture form and then set a Zap that automatically updates your CRM software to create a new lead whenever a new form entry is submitted. But what if you also wanted to use that same data to create a new subscriber in MailChimp? Instead of setting up another Zap with the exact same trigger, Multi-Step Zaps make your life a little bit easier.
Set the trigger
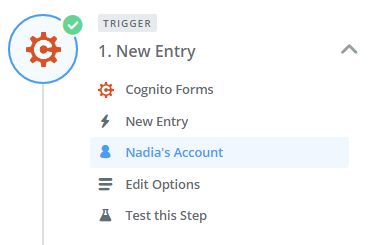
To begin making our Multi-Step Zap, we need to set our trigger:
- Choose Cognito Forms as the Trigger App.
- Choose New Entry as the Trigger.
- Select your Cognito Forms account and organization.
- Select your form and test the connection.
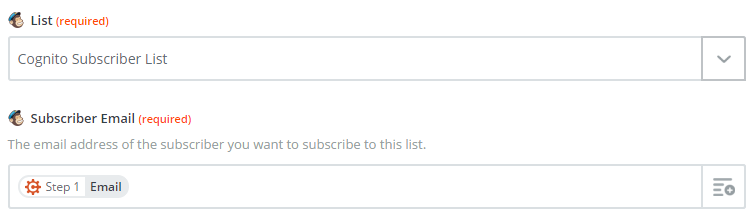
Set action 1
To set the action that occurs in MailChimp:
- Choose MailChimp as the Action App.
- Choose Add/Update Subscriber as the Action.
- Connect your MailChimp account.
- Select the list that you want to add your new subscribers to, along with the field on your form that contains their email address.
- Test the connection.
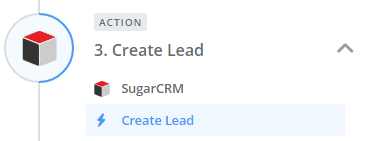
Set action 2
To set the action that simultaneously occurs in SugarCRM:
- Choose SugarCRM as the Action App.
- Choose Create Lead as the Action.
- Connect your SugarCRM account.
- Test the connection.
Test Out Your Zap!
Now, when your Lead Capture Form receives new entries:
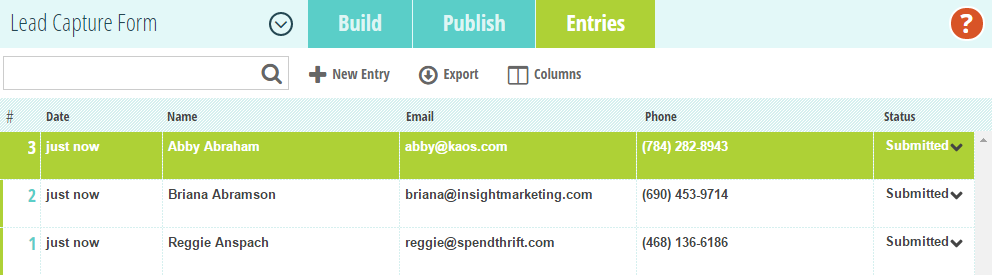
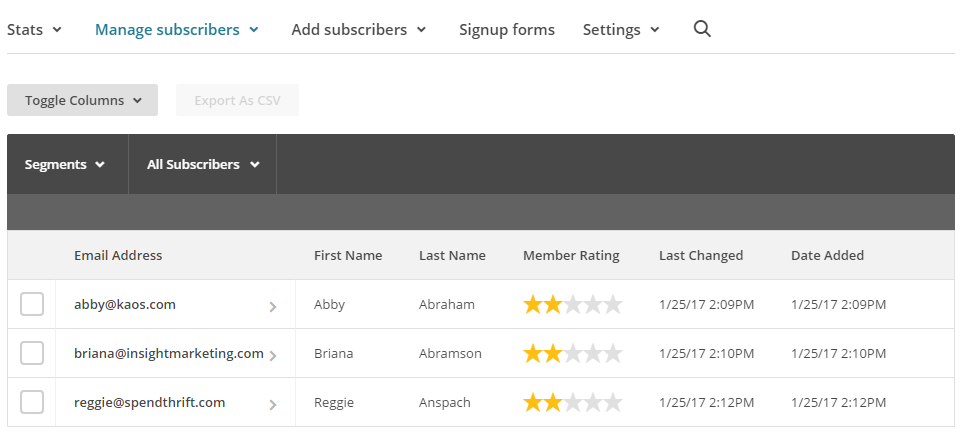
The submitted entries will become new subscribers in your MailChimp account:
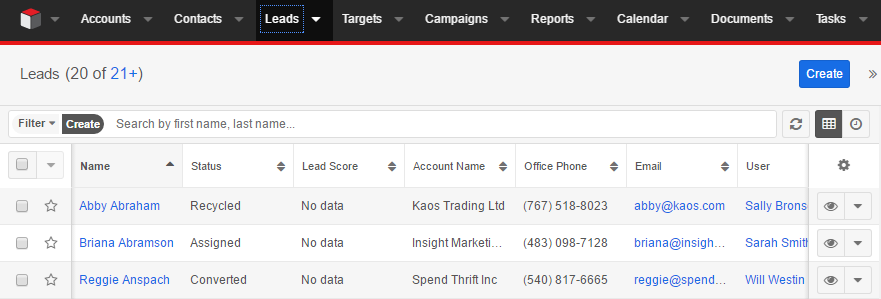
Simultaneously, the Leads section in your SugarCRM account will update as well:

Nadia Afshar
Nadia, the Technical Writer for Cognito Forms, develops documentation, support content, and how-to videos. No matter your experience – with her help, you'll be able to take full advantage of the product. In her spare time, Nadia enjoys listening to French house, drinking coffee, and talking about herself in third person.