Use Your Forms to Automate Manual Processes and Set Limits During Event Planning
Event planning on any scale is an enormous undertaking. There’s almost no limit to the number of variables in constant flux and details the organizer has to keep up with.
There is, however, an often-overlooked assistant just waiting to be put to work: The event registration form itself.
Your RSVP form can do a lot of the administrative work previously done by event staff. Automating this work helps streamline tasks and reduce pressure on the entire team. If yours is a team of one, this makes your registration form even more impactful.
Five easy ways to turn tasks over to your registration forms.
1. Set an expiration date for your form
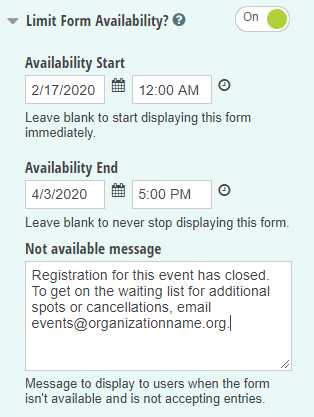
If you’re not already setting your registration forms to expire at a predefined date and time, you’ll want to start. This simple step will prevent people from signing up after you’ve confirmed the number of attendees and other details with your venue or caterer. And it takes less than a minute to set up.
In Cognito Forms, you can set forms to expire using “Limit Form Availability” in the Form Settings. Simply choose a start and end date for your form. You’ll also want to write a friendly message that will pop up whenever someone tries to complete your registration form after its expiration date. Let them know that event registration is closed and what, if any, steps they should now take.
2. Set quantity limits on your registrations
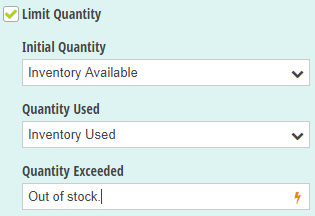
With many events, the space you reserve limits the number of attendees you can accommodate. In these cases, you can set quantity limits right from the outset on your registration form. When your event is sold out, it’s sold out.
Just like when you set an expiration date, you’ll want to include a friendly error message to those who try to purchase tickets in excess of the quantity available. If there are other arrangements they can make, or an upcoming event that they may be interested in participating in, this is a great place to mention that.
3. Customize email confirmations.
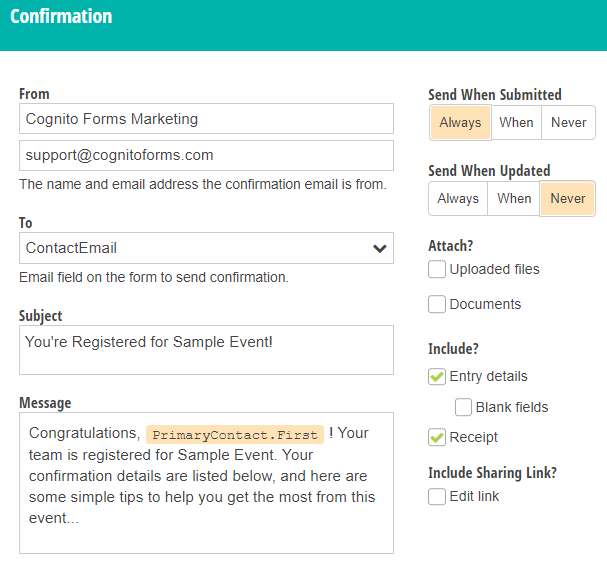
Turn on your Confirmation Emails so everyone who registers for your event will automatically receive an email from you. Then, set up that email to provide attendees with all the information they’ll need on the day of the event.
As time goes by between registering and attending your event, many attendees will forget the smaller details. By placing them in the confirmation email, you put those details right on the attendee’s phone, which can help limit the number of last-minute phone calls you get.
You may include:
- A map image and directions
- A link to the address in Google
- Parking information
- Dress code
- Food and beverage information
- Start and end time
- The number of attendees in the registrant’s party
- Any other pertinent information
4. Optimize notification emails
In addition to emailing confirmation to your attendees when they register, the system will also sent notification emails out to you – or whomever you designate. This is another opportunity for automation.
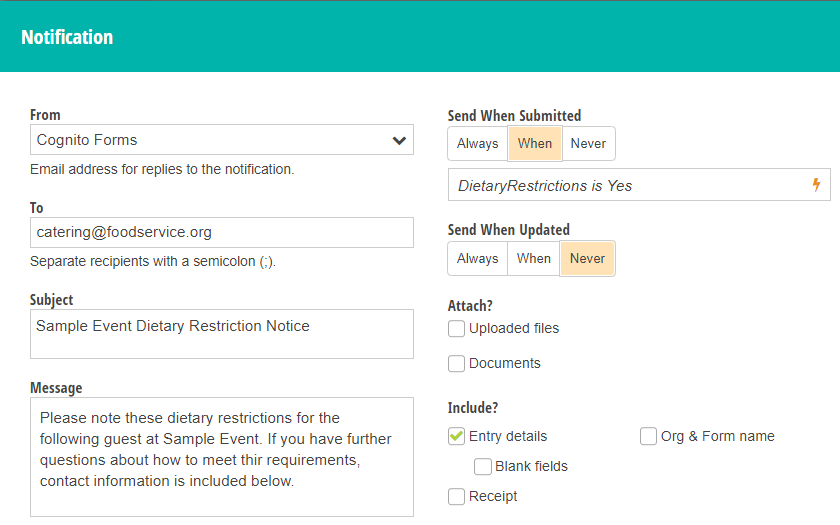
Consider who on your team is managing attendees, and who needs to be aware of special dietary needs and other requests. Then set up your notification emails to automatically route to the appropriate people using conditional logic.
It’s easy. Just go to your Notification Emails for your form and set them to route based on how fields such as “Do you have special dietary requirements?” are filled out. This ensures the necessary information gets to the appropriate person immediately – every time someone registers for your event.
Use notification emails to alert the right staff members about:
- Guests’ special dietary restrictions
- Any food and drink guests will bring (e.g. to a Super Bowl party)
- Special seating requests
5. Accept payment directly via your form
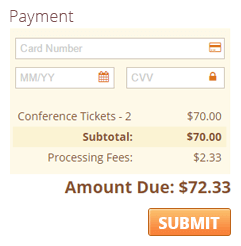
When payment is separate from registration, event planners all-too-often see a gap between the number of people who registered and those who actually paid. This can create a myriad of confusion and untold complications in determining who’s actually attending an event and who isn’t.
Eliminate this confusion by combining registration and payment into one simple and clean transaction. Simply connect your payment provider and add a payment field to your form.
Here’s a bonus tip – Did you know you can share your registration forms on Facebook?
While it’s common to send registration forms via email and embed them on websites – it’s also common for people to promote events via Facebook.
While Facebook event pages are wonderful for promotion, they’re not as good for determining how many people will actually be attending your event. For that, you’ll want to share your form right on Facebook.
You can share your form to:
- Your News Feed
- A Friend’s Timeline
- A Group
- An Event Page
- Another Page Your Manage
- A Private Message
You can easily do this with a single click in Cognito Forms from your form’s Publish page, just below the embed codes and share link.
These tips should help make your next event easier to manage, helping you enjoy it as much as your guests.