Custom email notifications are triggered by actions taken on your form, like Submit or Update. You can use emails to send confirmations for entry submissions, notify someone of a form’s status change, share a workflow link, and more.
Email notification content can be customized and include details such as entry data, payment information, or uploaded files. Once an email has been triggered, you can review the entry audit log to see when it was sent, the attached files, and the email delivery status.
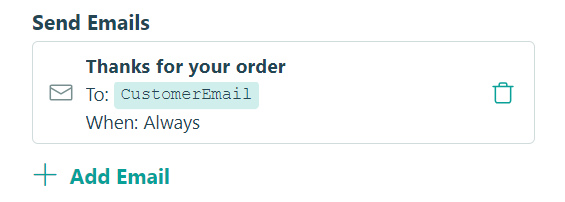
Send emails
Organizations on the Pro, Team, and Enterprise plans can create multiple emails per action.
When setting up email notifications, you’ll first want to consider which form action you’d like to set up a notification for. For example, you may want to send a confirmation email to a form user once they click Submit on your form.
With Workflow, you can send multiple email notifications for the same form action. For example, a confirmation email can be sent when someone clicks Submit, and a second email can be sent to notify a manager that their approval is needed.
To create an email notification for an existing action:
-
Open your form’s Build page and go to the Workflow menu.
-
Open the Action Settings for the relevant action.
-
To edit an existing email notification, click on the email icon under Send Emails. To add a new email notification, click + Add Email.
-
Customize the email in the dialog that pops up (see below for customization help).
-
Repeat these steps for each action on your form that you would like to trigger an email notification.
To delete an email notification, click the trashcan icon next to the email notification.
Customize emails
Set up a verified email domain to send email notifications on behalf of your website domain. Otherwise, email notifications are sent from notifications@cognitoforms.com.
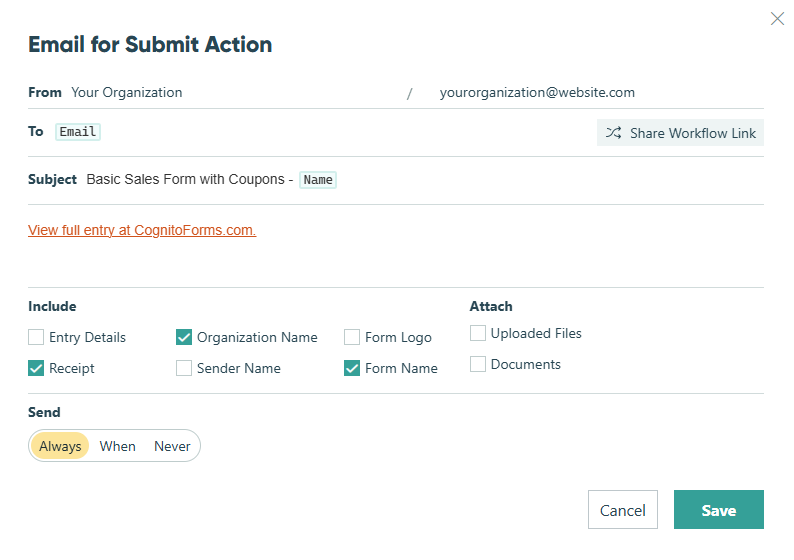
You can customize each email notification’s content, optionally include entry details and attachments, and even conditionally determine when each email should be sent.
From
The left side of this field defaults to your organization’s name and represents the display name the email is to be from. The right side defaults to your organization’s reply-to email address as the email to be sent from. You can input another static email, or click into the field to use the Insert Field option to populate an email from a field on your form.
To
Input the email address to send the email notification to. You can use the Insert Field option to prefill an email address from your form, or you can manually enter an email. Separate multiple email addresses using a semi-colon (up to 8 email addresses total).
Please note that you cannot insert Email field values from inside repeating sections or tables.
Subject
Create a subject line for your email. Using the Insert Field option, you can click into the Subject field to populate it with data from the form’s entry, such as Name or Date.
Message
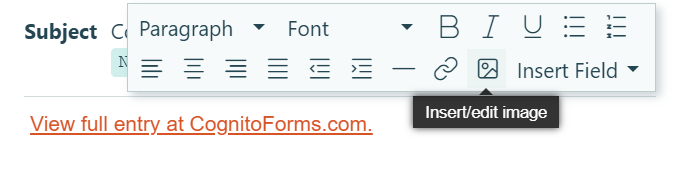
Create the body of the email. Click into the Message field to access the formatting options and insert images or links. You can also use the Insert Field option to include entry data and workflow links.
Include
We do not recommend including entry details in notification emails if your form is capturing sensitive data.
- Entry details – Include the form entry data (excluding internal fields) in the notification email. The entry data is displayed based on the role selected in the included workflow link. When no workflow link is selected, entry details will reflect the Public role.
- Blank fields – When you include entry details, you also have the option to include blank fields. This option will include any form fields that were left blank in the email.
- Receipt – Include the order transaction details in the email.
- Organization Name – Include your organization’s name in the email header.
- Sender Name – Include the From name in the email header.
- Form Logo – Include your form’s logo in the email. You can upload a logo to your form on the Publish page.
- Form Name – Include your form’s name in the email header.
Attach
- Uploaded Files – Include any files uploaded by form users as attachments to the email notification. Attachments will maintain their original file name and are limited to a total aggregated size of 17MB per email. You can also determine who has access to the attached files based on certain conditions and/or workflow roles.
- Documents – Attach your form’s entry data as either a Word or PDF document to your confirmation message. Checking this box will open up another field to select which document(s) to include. You can customize the format of these documents from the Manage Documents Templates dialog.
Send
Choose when this email notification is to be automatically sent.
- Always – The email notification will be sent every time its related action is performed.
- When – Select this option to open a conditional logic builder to set conditions for when the email will send. When using statuses to trigger email notifications, it’s important to note that status changes triggered from an action will occur before an email notification is sent. This means you’ll want to set your conditions to send for the anticipated entry status associated with the action of sending the email.
- Never – The email notification will never be sent. Use this option to manually disable an email notification from being sent, either temporarily or permanently, and change it back at any time as needed.
Only send when conditions become true?
This option only appears when notifications are set to be sent conditionally. When checked, email notifications will only be sent when the specified conditions become true when an action is performed. For example, if your logic includes =(Order.Choice= "Lunch"), the email won’t send each time the specified choice is Lunch; it will only send the first time this condition becomes true.
Share Workflow Link
If you’d like to include a link to a form’s entry within an email notification, add a role-based workflow link using the Share Workflow Link button next to the To field. Click this button to open the list of roles you’ve added to your form.
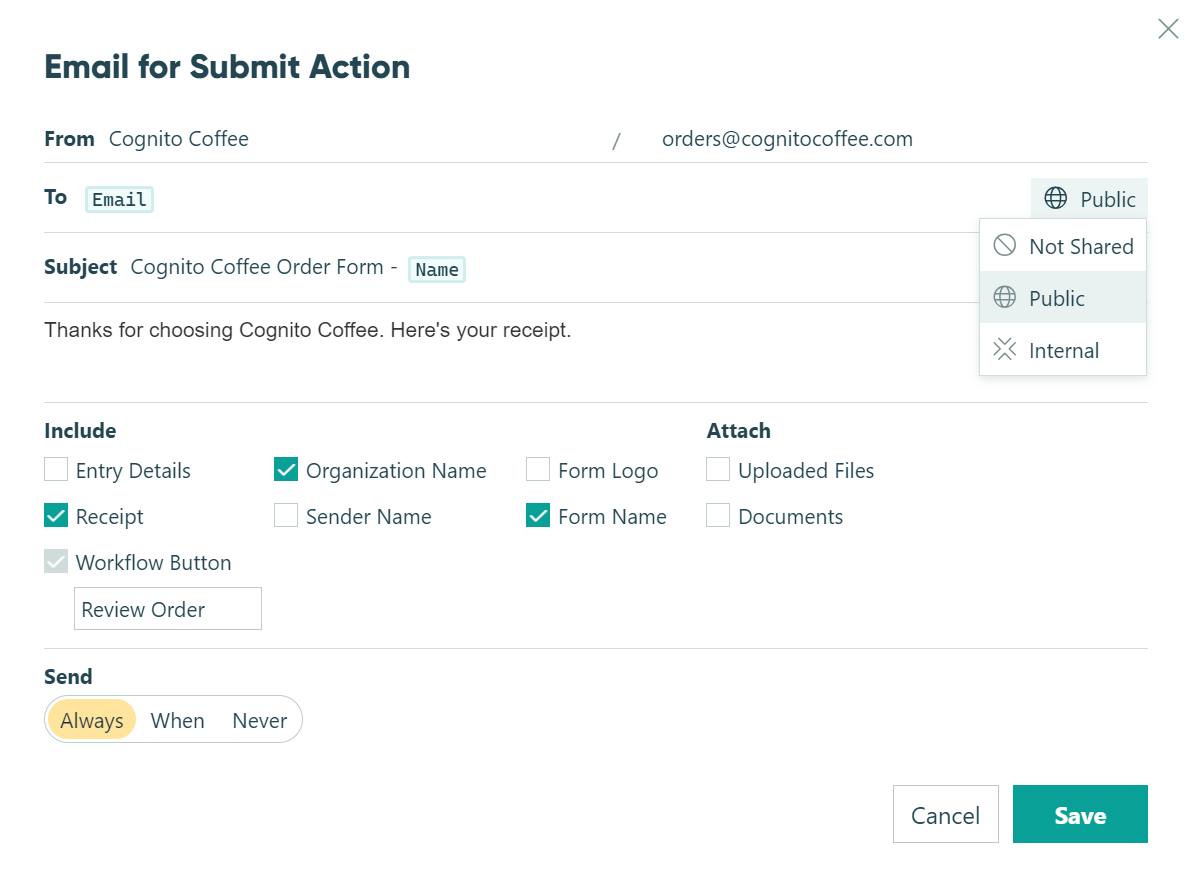
The role you select determines the user’s role when accessing the shared workflow link. For example, you may want to include a Public workflow link within an email notification to the form user’s email address as a confirmation of their entry submission.
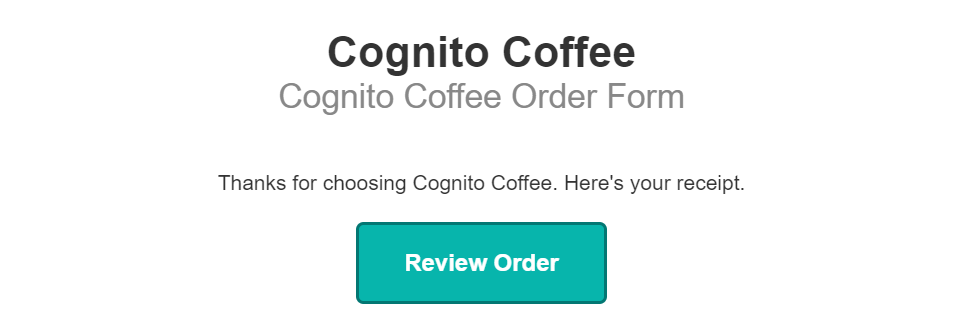
Once you’ve selected a role, you can customize the Workflow Button that appears in the email message (ex: “Review Order”). Workflow Buttons are limited to 40 characters.
If the email notification for your action doesn’t need to include a workflow link, select the Not Shared option.
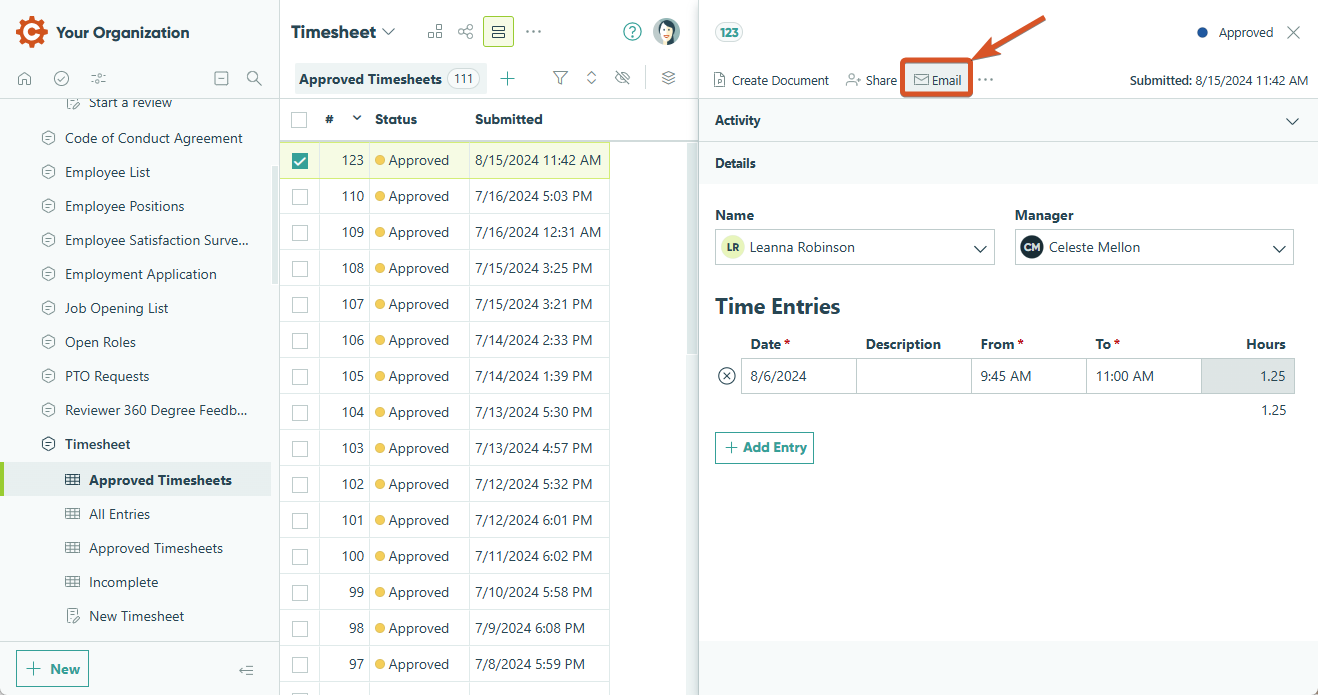
Resending emails
You can manually resend an email notification at any time using the Send Email option in the form entry view.
Custom email notifications are triggered by actions taken on your form, like Submit or Update. You can use emails to send confirmations for entry submissions, notify someone of a form’s status change, share a workflow link, and more.
Email notification content can be customized and include details such as entry data, payment information, or uploaded files. Once an email has been triggered, you can review the entry audit log to see when it was sent, the attached files, and the email delivery status.
Send emails
Organizations on the Pro, Team, and Enterprise plans can create multiple emails per action.
When setting up email notifications, you’ll first want to consider which form action you’d like to set up a notification for. For example, you may want to send a confirmation email to a form user once they click Submit on your form.
With Workflow, you can send multiple email notifications for the same form action. For example, a confirmation email can be sent when someone clicks Submit, and a second email can be sent to notify a manager that their approval is needed.
To create an email notification for an existing action:
-
Open your form’s Build page and go to the Workflow menu.
-
Open the Action Settings for the relevant action.
-
To edit an existing email notification, click on the email icon under Send Emails. To add a new email notification, click + Add Email.
-
Customize the email in the dialog that pops up (see below for customization help).
-
Repeat these steps for each action on your form that you would like to trigger an email notification.
To delete an email notification, click the trashcan icon next to the email notification.
Customize emails
Set up a verified email domain to send email notifications on behalf of your website domain. Otherwise, email notifications are sent from notifications@cognitoforms.com.
You can customize each email notification’s content, optionally include entry details and attachments, and even conditionally determine when each email should be sent.
From
The left side of this field defaults to your organization’s name and represents the display name the email is to be from. The right side defaults to your organization’s reply-to email address as the email to be sent from. You can input another static email, or click into the field to use the Insert Field option to populate an email from a field on your form.
To
Input the email address to send the email notification to. You can use the Insert Field option to prefill an email address from your form, or you can manually enter an email. Separate multiple email addresses using a semi-colon (up to 8 email addresses total).
Subject
Create a subject line for your email. Using the Insert Field option, you can click into the Subject field to populate it with data from the form’s entry, such as Name or Date.
Message
Create the body of the email. Click into the Message field to access the formatting options and insert images or links. You can also use the Insert Field option to include entry data and workflow links.
Include
We do not recommend including entry details in notification emails if your form is capturing sensitive data.
- Entry details – Include the form entry data (excluding internal fields) in the notification email. The entry data displays based on the role selected in the included workflow link. When no workflow link is selected, entry details will reflect the Public role.
- Blank fields – When you include entry details, you also have the option to include blank fields. This option will include any form fields that were left blank in the email.
- Receipt – Include the order transaction details in the email.
- Organization Name – Include your organization’s name in the email header.
- Sender Name – Include the From name in the email header.
- Form Logo – Include your form’s logo in the email. You can upload a logo to your form using the Style Editor.
- Form Name – Include your form’s name in the email header.
Attach
- Uploaded Files – Include any files uploaded by form users as attachments to the email notification. Attachments will maintain their original file name and are limited to a total aggregated size of 17MB per email. You can also determine who has access to the attached files based on certain conditions and/or workflow roles.
- Documents – Attach your form’s entry data as either a Word or PDF document to your confirmation message. Checking this box will open up another field to select which document(s) to include. You can customize the format of these documents from the Manage Documents Templates dialog.
Send
Choose when this email notification is to be automatically sent.
- Always – The email notification will be sent every time its related action is performed.
- When – Select this option to open a conditional logic builder to set conditions for when the email will send. When using statuses to trigger email notifications, it’s important to note that status changes triggered from an action will occur before an email notification is sent. This means you’ll want to set your conditions to send for the anticipated entry status associated with the action of sending the email.
- Never – The email notification will never be sent. Use this option to manually disable an email notification from being sent, either temporarily or permanently, and change it back at any time as needed.
Only send when conditions become true?
This option only appears when notifications are set to be sent conditionally. When checked, email notifications will only be sent when the specified conditions become true when an action is performed. For example, if your logic includes =(Order.Choice= "Lunch"), the email won’t send each time the specified choice is Lunch; it will only send the first time this condition becomes true.
Share Workflow Link
If you’d like to include a link to a form’s entry within an email notification, add a role-based workflow link using the Share Workflow Link button next to the To field. Click this button to open the list of roles you’ve added to your form.
The role you select determines the user’s role when accessing the shared workflow link. For example, you may want to include a Public workflow link within an email notification to the form user’s email address as a confirmation of their entry submission.
Once you’ve selected a role, you can customize the Workflow Button that appears in the email message (ex: “Review Order”). Workflow Buttons are limited to 40 characters.
If the email notification for your action doesn’t need to include a workflow link, select the Not Shared option.
Resending emails
You can manually resend an email notification at any time using the Send Email option in the form entry view.