With over half a million subscribers, QuickBooks Online is by far the most popular online accounting platform in the United States. Among those subscribers are a good number of Cognito Forms customers, who use the two applications alongside each other to perform various tasks and processes. But manually setting up a new customer in QuickBooks every time a customer submits an entry on Cognito Forms can be both tedious and time-consuming.
Here’s where Zapier, a web automation platform, comes into play. Zapier bridges the gap between Cognito Forms and QuickBooks Online (in addition to hundreds of other applications). Instead of going back and forth between two applications, Zapier can automatically take the entry data from your Contact Form and use it to create a new customer in your QuickBooks account. Or, it can take the quantities from your Service Estimate form to add a new estimate.
To Get Started:
Sign up on Zapier
This integration requires a premium subscription to Zapier.
Sign up for a Zapier account to help you connect cloud services, like Cognito Forms and QuickBooks Online.
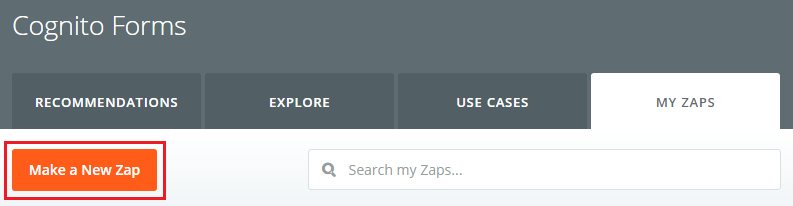
After you sign in to your account, you can click “Make a New Zap” to start creating your first Zap (aka, the integration between your Cognito Forms account and your QuickBooks Online account).
Connect Your Cognito Forms Account
- Select Cognito Forms as your Trigger app.
- Select New Entry as the Trigger.
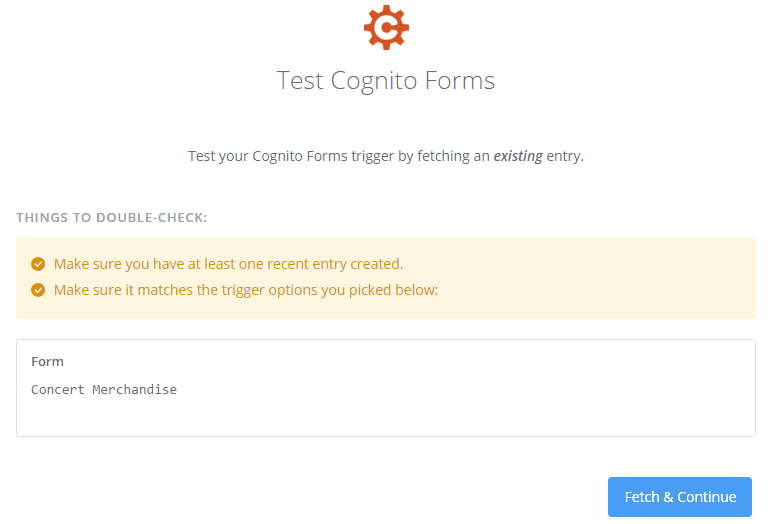
- Connect your Cognito Forms account with Zapier. You can press the test button on the right hand to side to ensure that the connection is secure.
- Select the form you want to use and test it out.
Connect Your QuickBooks Online Account
- After your test is successful, select QuickBooks Online as your Action app.
- Choose the Find Customer action.
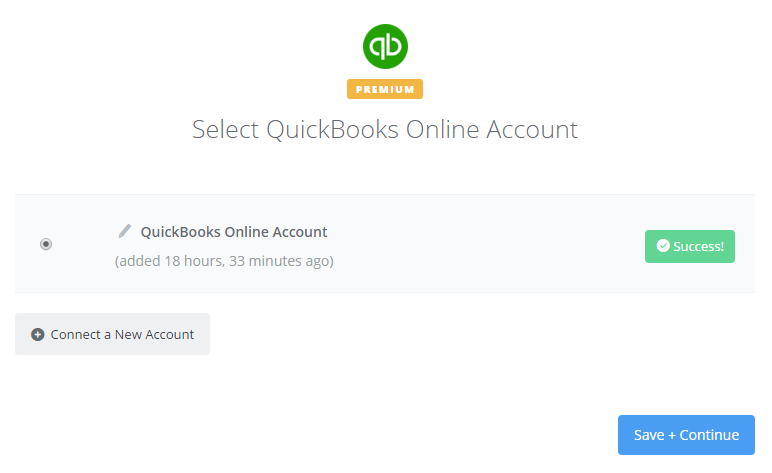
- Connect your QuickBooks Online account.
Creating Customers and Estimates
-
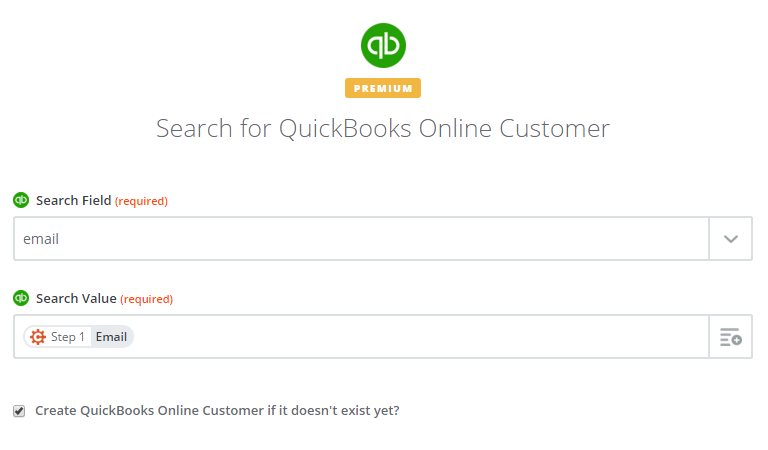
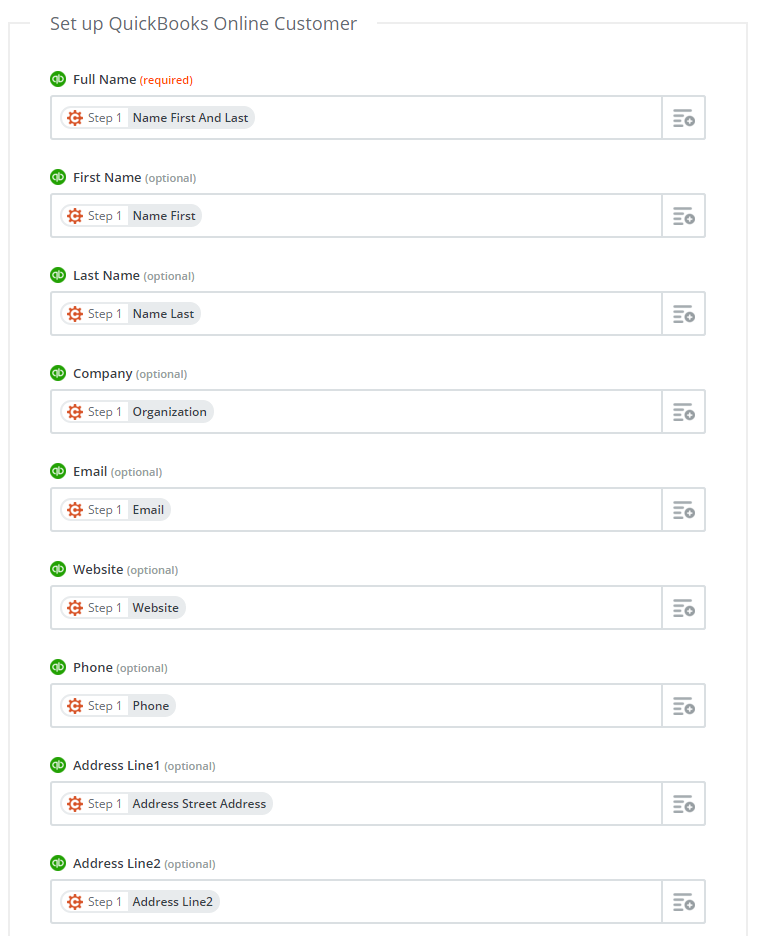
When searching for QuickBooks Online Customers, populate the required fields with the best selections that correspond to your Cognito Form. In addition, if the customer is not found during the search, enable the option to create a new customer based on the search criteria.
-
Map the Required and Optional fields for QuickBooks Online.
-
Test the Find or Create Customer action.
-
After successful testing, choose Add a Step, and then select QuickBooks Online once more.
-
Choose Create Estimate as the trigger.
-
Connect your QuickBooks Online account.
-
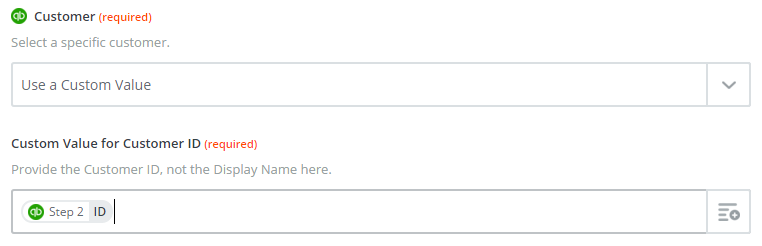
For Customer, choose “Use a Custom Value”.
-
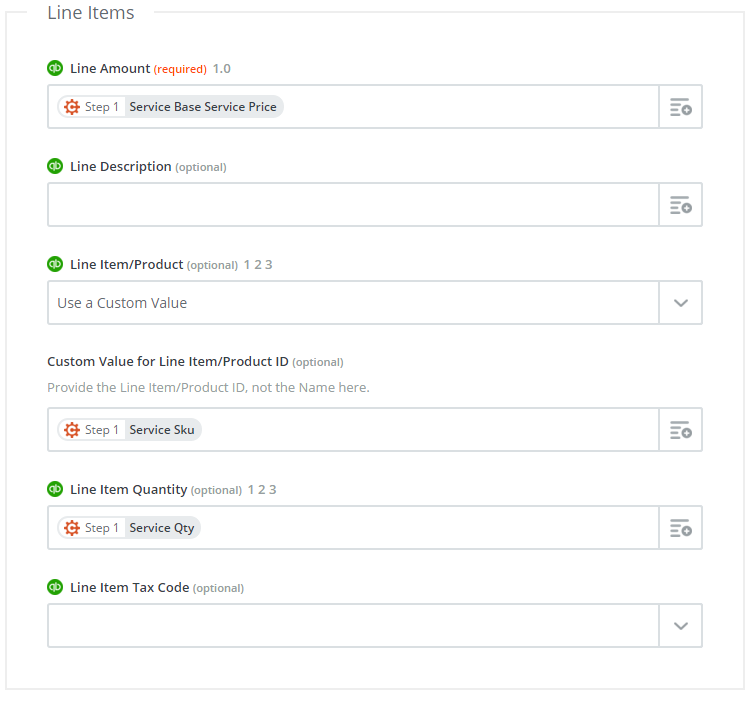
Define the required field and option for Line Items. When utilizing “Line Item/Product”, you will need to define the items ID (the unique value assigned to each Service / Product in QuickBooks Online).
-
Finally, save and enable your new Zap!

Nadia Afshar
Nadia, the Technical Writer for Cognito Forms, develops documentation, support content, and how-to videos. No matter your experience – with her help, you'll be able to take full advantage of the product. In her spare time, Nadia enjoys listening to French house, drinking coffee, and talking about herself in third person.