Our new Workflow Automation feature makes it easy to build powerful, flexible workflows on a single form.
Cognito Forms offers a lot of advanced features - but did you know that you can combine some of those features to build a multi-form workflow? Essentially, a user can fill out a form and submit it, then follow a link from their confirmation email leading to another form that they can complete. This method works especially well for request forms; in this example, we’ll illustrate how a user can send an email request for a letter of reference to two individuals, and then take those individuals straight from their email inbox to a letter of reference form with their contact information already filled in.
Step 1: Create Your Request Form
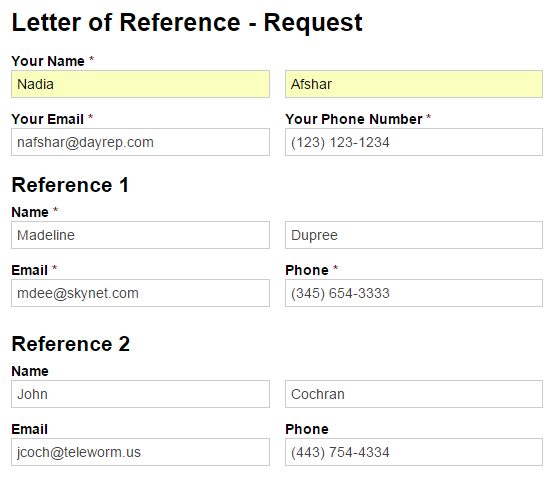
First, we’re going to create a letter of reference request form that collects some basic contact information from the user, as well as their two references:
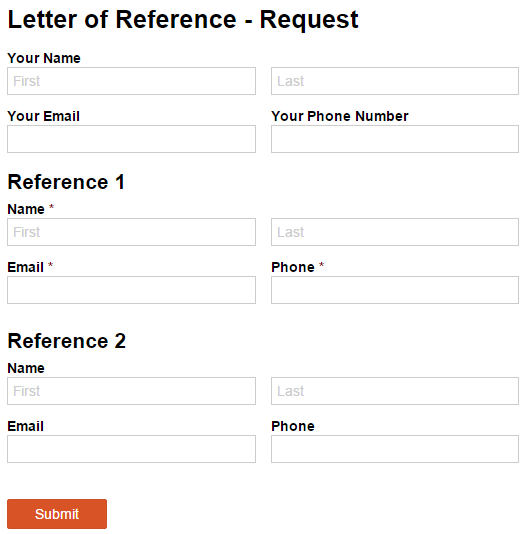
Make sure to set fields to required as needed.
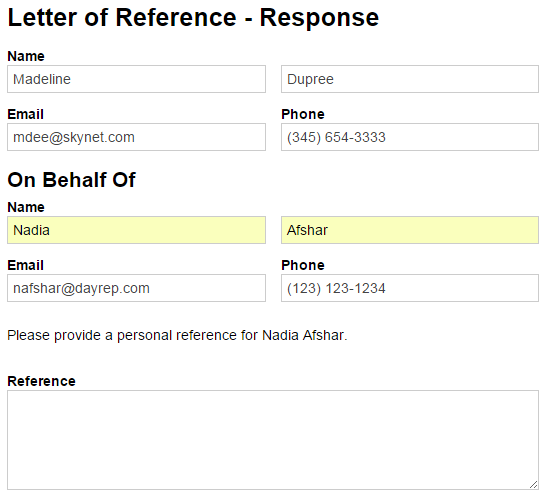
Step 2: Create Your Response Form
Next, we’ll create a second form for responses, so people can fill out their reference letters:
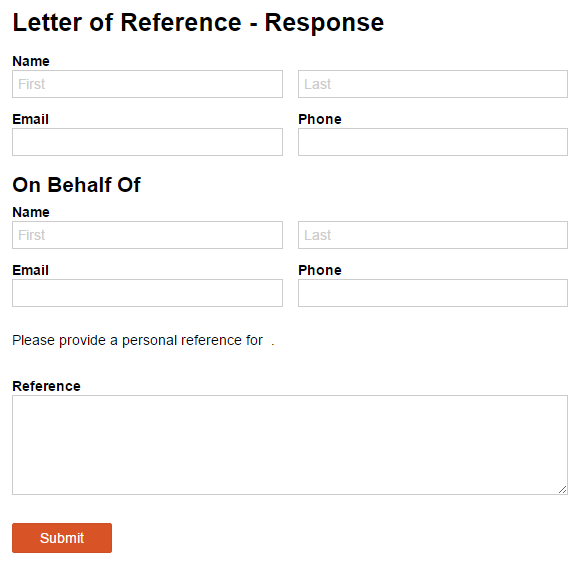
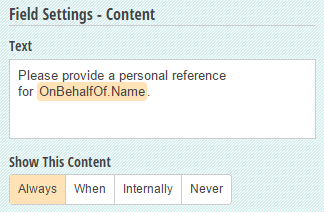
Above the reference section, you can include a content field with some brief instructions, and insert the name of the person requesting the reference:
Step 3: Insert Prefilled Calculation Fields

In this workflow, we want the people receiving the reference letters to already have their contact information (and that of the person requesting the letter) filled in when they click the response link in their email request. Before we can insert this prefilled form link into our references’ emails, we need to add two calculation fields to our request form (one for each reference) that will help specify the data we want to prefill.
For our example, we’ll label these calculation fields “Reference 1 Prefill” and “Reference 2 Prefill.” Also, don’t forget to set the “Show This Field” option as “Never” so your users won’t see them.
In the calculation section, we need to include all the the fields that will be prefilled when someone goes to complete a reference request. First, we’ll include the section name (‘On Behalf Of’), followed by the full name, email, and phone number of the person requesting the letter:
="{OnBehalfOf: { Name: { First: '" + YourName.First + "', Last: '" + YourName.Last+ "' }, Email: '" + YourEmail + "', Phone: '" + YourPhoneNumber + "' }
Then, we’ll include the full name, email, and phone number of the person receiving the request, making the final calculation look something like this:
="{OnBehalfOf: { Name: { First: '" + YourName.First + "', Last: '" + YourName.Last+ "' }, Email: '" + YourEmail + "', Phone: '" + YourPhoneNumber + "' }, Name: { First: '" + Reference1.Name.First + "', Last: '" + Reference1.Name.Last + "' }, Email: '" + Reference1.Email + "', Phone: '" + Reference1.Phone+ "' }"
Use this same calculation in your second calculation field, while replacing “Reference1” with “Reference2” wherever necessary. With these calculations in place, you’ll be able to pull data through a link in the confirmation message.
Check out our help guide to learn more about prefilling forms.
Step 4: Set Up Your Email Confirmations
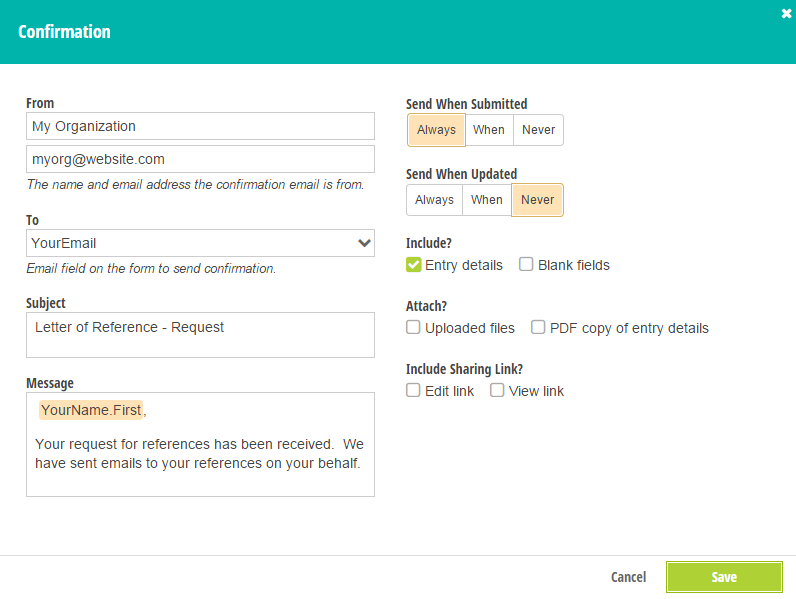
Now, we need to set up three confirmation messages - one for the user, and one for each of the two references:

To start, select the Confirmation Emails option from your form’s Submission Settings. The email for the user will be pretty simple; just include the From address, the To address, a subject, and a message (where you can insert a field containing their name).
Next, we can set up the confirmation emails for our references. These emails need a couple more details than the one we just made; to make them clear and direct, insert the reference’s name into the subject line as well as the message. Plus, make sure to include the user’s name in the message, so the person receiving the request knows who it’s coming from. Lastly, set the “Send when Submitted” option to ensure that this email is only send when the correct reference (either Reference 1 or Reference 2) is filled out:
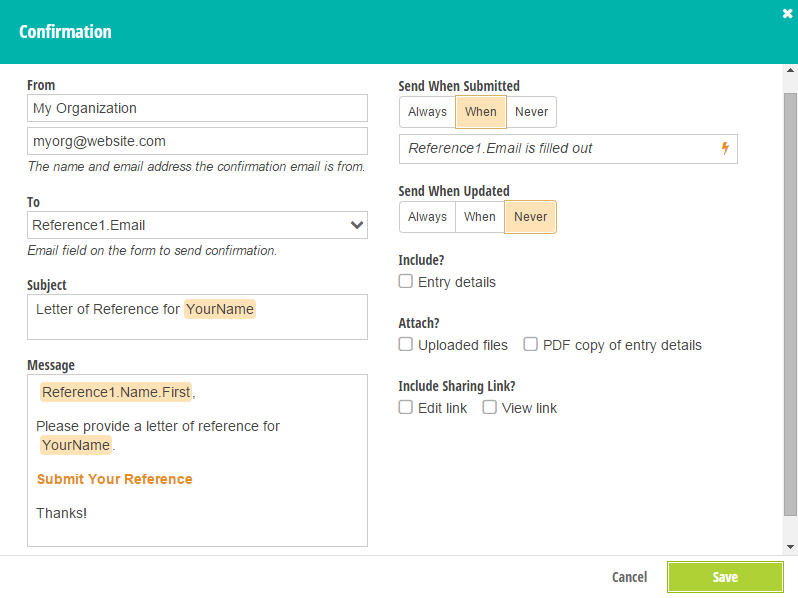
Lastly, you’ll notice that there’s a link in the confirmation message titled “Submit Your Reference.” When the person who receives this request clicks this link, it’ll take them to our response form, with their details (Name, Email, Phone Number) already filled in for them. We’ve already added our calculation fields, Reference 1 Prefill and Reference 2 Prefill, and now we just need to insert the actual link, which will look like this:
https://www.cognitoforms.com/cognitosupport/letterofreferenceresponse?entry=[Reference1Prefill]
This URL is simply a public link to your response form, with a prefilled field token inserted at the end.
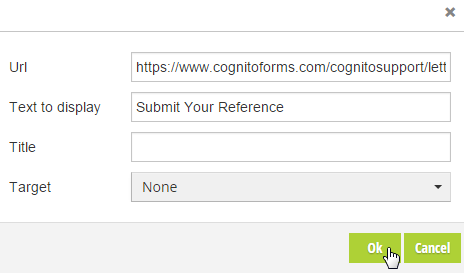
Also, don’t forget to replace “Reference1Prefill” with “Reference2Prefill” when you insert the link into the second reference’s confirmation email. This will ensure that the correct information is prefilled for each person.
Step 5: Test Out Your Forms!
Finally, when the user submits their letter of reference request:
They’ll receive a confirmation email letting them know that their request has been received:

Meanwhile, the two individuals will receive an email explaining who the request is from and a link to a response form:
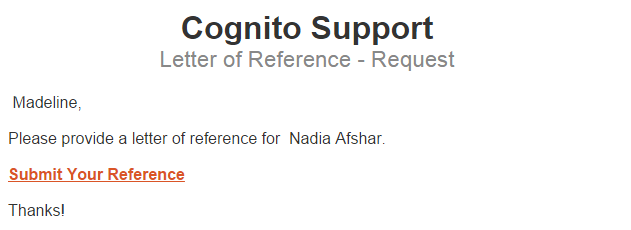
And when they click “Submit Your Reference”, they’ll be taken to a form prefilled with their information and ready to go:
You can, of course, build off this example and add as many references as you would like.
If you have any questions about building a multiform workflow, or about Cognito Forms in general, don’t hesitate to contact us!

Nadia Afshar
Nadia, the Technical Writer for Cognito Forms, develops documentation, support content, and how-to videos. No matter your experience – with her help, you'll be able to take full advantage of the product. In her spare time, Nadia enjoys listening to French house, drinking coffee, and talking about herself in third person.