The ability to send file attachments (such as uploaded files and generated documents) through Microsoft Power Automate is only available to organizations on our Pro, Team and Enterprise plans.
You can use our integration with Microsoft Power Automate to include any uploaded files as attachments when you create a new item in SharePoint.
To send entry data and include uploaded files as attachments to a SharePoint list:
-
Create a new flow. Search for Cognito Forms in the services list and then select a trigger.
-
Add a step using the SharePoint Create item action. Include the Site Address and List Name in SharePoint, as well as the field values to populate the columns in the list:

-
Add a step using the Cognito Forms Get File action. Set the File Id to the Id element for the file upload field. There will be several Id values in the list. Click Show more and scroll the list to find the one near Content, File, Content Type, etc. If you have multiple file upload fields, each will have these sets of fields and will appear in this list in the order they appear on the form.

-
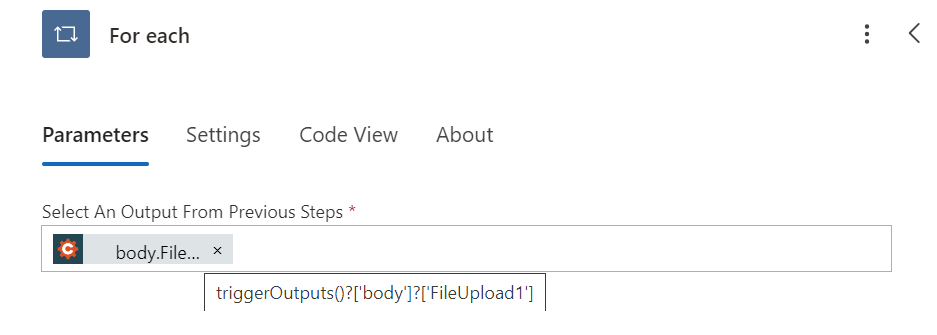
Clicking Id for a file upload field will add a For each action to the flow. Hover your mouse over the name of the field shown below to ensure this is the correct file upload field.
-
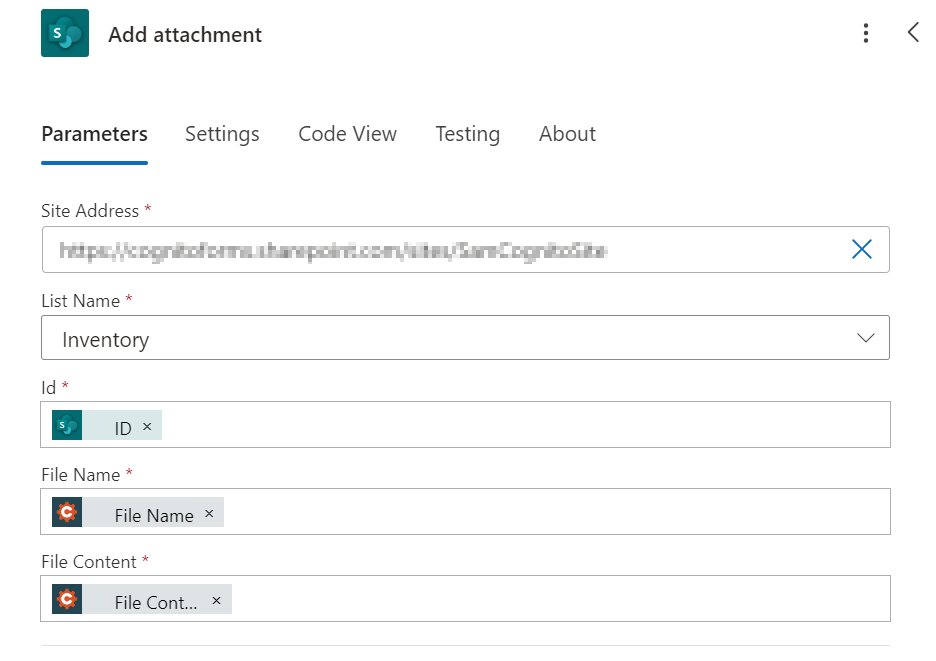
Add a step inside the For each section and select the SharePoint Add attachment action. Enter the same Site Address and List Name as the previous step.
-
Next, select ID from the dynamic content options under Create item (SharePoint) for the Id option. This ID will link the attachment to the item that you just created.
-
Select File Name from the dynamic content options under Get File for the File Name option.
-
Select File Content from the dynamic content options under Get File for the File Content option.
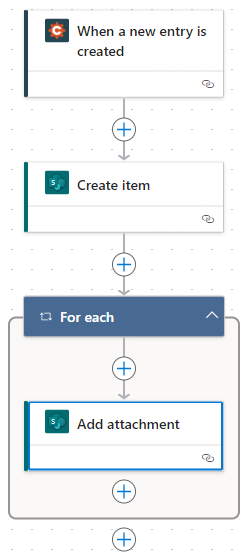
The finished flow should look similar to the one below:
Make sure to save your flow, and test it out by submitting an entry with a file uploaded to the form.