
Skip the custom build. Create a client portal around the workflow you already use without code.
Clients expect fast access to the businesses they work with. They want to upload files, check progress, update information, and find next steps without waiting on an email reply.
of consumers expect customer service to be available 24/7, and 88% expect faster response times than they did a year ago.
Even if your portal isn’t for support, the message is clear: people want fast, always-available ways to get things done.
For service-based businesses, that often turns into status-check emails, missing document reminders, repeated questions, and clients asking, “What happens next?”
A self-service client portal gives clients one place to move forward. They can submit information, upload documents, check status, update details, and complete follow-up steps.
Custom client portals can cost tens of thousands of dollars before maintenance, integrations, and future updates. But many teams don’t need a custom app. They need a client-facing workflow that helps people submit, upload, check status, and complete next steps on their own.
And you don’t need custom development to build one. With the right no-code setup, you can create a portal around your real workflow without spending your whole admin budget on a system that doesn’t fit.
Here’s how to build a client portal without custom development.
What Is a Self-Service Client Portal?
A self-service client portal is a secure online space where clients can handle common tasks on their own. Instead of emailing your team every time they need help, clients can use the portal to submit requests, upload documents, check status, update information, complete follow-up steps, or view past submissions.
A good portal is not just a page with links. It gives clients access to the parts of a process they need to move forward. For example, a client might use a portal to fill out an intake form, upload supporting documents, check whether their request is under review, update contact information, or respond to a follow-up task.
That makes a client portal different from a shared folder or a basic webpage. A shared folder can store files. A webpage can explain information. A portal helps clients take action.
Why Build a Portal Without Custom Development?
Clients are used to managing everyday tasks online, from checking orders to paying bills to updating account details. That expectation now extends to service-based relationships. If a client is working with your firm, clinic, school, nonprofit, agency, or organization, they don’t want to wonder where things stand. They want a clear way to see what’s needed, what’s been submitted, and what happens next.
But building a custom client portal can cost tens of thousands of dollars before maintenance, integrations, and future updates. And after all that, you may still end up with a system that doesn’t quite match the way your team actually works.
That’s why a no-code client portal can make more sense for many businesses. You don’t necessarily need a custom app to organize a repeat client process. You need a client-facing workflow built from the pieces most teams already rely on: forms, file uploads, review stages, access controls, saved progress, and automated follow-up.
For your team, that can mean fewer status-check emails, fewer missing files, less manual follow-up, and a faster path from request to completion. For clients, it means less guessing, fewer delays, and a clearer experience.
The goal is not to build a client portal just to say you have one. The goal is to create a place that fits your real workflow, so clients can complete their part of the process without waiting for a reply.
Do You Need a Portal or Just a Form?
A form works well when someone only needs to submit information once. If the process ends after that submission, a single form may be enough.
A client portal makes more sense when the client needs to come back into the workflow. That might mean uploading more documents, checking status, updating information, viewing past submissions, making a payment, or completing a follow-up task.
Use a form for one-time collection. Use a portal when the relationship or process keeps moving after the first submission.
| Client need | A form may be enough | A portal is better |
|---|---|---|
| Submit information once | Yes | Usually no |
| Upload files later | Limited | Yes |
| Check status | No | Yes |
| Update records | No | Yes |
| Complete follow-up tasks | Limited | Yes |
| View past submissions | No | Yes |
How to Build a No-Code Self-Service Client Portal
A client portal should make the process easier for clients and your team. Start with one real workflow, then build the portal around the parts clients need to complete.
Start with one workflow


Start with one client-facing process at a time. Aim for a workflow that creates repeat follow-ups, such as intake, document collection, request tracking, profile updates, or payments.
Once that process works well, expand from there. This keeps the first version manageable and helps you build on a real need rather than guessing what clients might want.

Build around the client’s next step
A useful portal should make it obvious what the client can do next. That might mean completing a form, uploading a missing document, checking a status, updating a record, making a payment, or reviewing past submissions.
If clients log in and still have to email your team to figure out what to do, the portal isn’t solving the right problem.
Show clients only what they need


Clients don’t need every internal note, review step, or routing detail. They need the parts that help them move forward. Showing less can make the portal more useful. Keep the experience focused on the forms, files, statuses, tasks, resources, and records that matter to the client.
Make access easy to understand
A portal only works if clients know how to use it. Keep the entry point simple, explain what they can do inside the portal, and make the next step obvious once they’re there.
Clients should not have to guess whether they need to upload a file, update a record, check a status, or complete another form. The clearer the portal feels, the less likely they are to fall back on email.
Use clear status labels


Avoid vague labels like “pending” when possible. Use statuses that answer the client’s real question: “What happens next?”
Statuses like “Received,” “Under Review,” “Needs Information,” “Approved,” and “Complete” are clearer because they tell clients where they stand and whether they need to take any action. Clear statuses reduce follow-up because clients can see where things stand without asking.

Make follow-up easy
If something is missing, don’t start a new email thread. Give clients a clear way to update the same submission, upload the missing file, or complete the next task.
That keeps the work connected to the original request and helps your team avoid duplicate records, scattered attachments, and manual tracking.
Check security before launch
Before you send clients into the portal, make sure access and security are set up correctly. Clients should only be able to see the forms, files, records, and next steps meant for them.
Review login settings, multi-factor authentication, access controls, and how permissions change when someone no longer needs access. If you work with sensitive information in healthcare, education, legal, financial, or government workflows, confirm the platform supports the standards your organization needs, such as SOC 2 Type II, HIPAA compliance, GDPR, encryption, and other compliance requirements.
Treat security as part of testing: confirm who can see what, what data is protected, and whether the setup matches the information clients will submit.
Start with a template
A template gives you a structure you can customize instead of building every form, view, and step from scratch.
You can start with client portal templates, then customize the forms, statuses, Entry Views, and follow-up steps around your workflow.
Once you have the workflow mapped out, decide which client-facing capabilities belong in the portal. Most portals don’t need every feature on day one — they need the right actions for the process clients are already trying to complete.
See how one small team saved 250 hours by automating client follow-ups.
What Can a No-Code Client Portal Help Clients Do?
Client portals can support many different Workflows, but the strongest ones are built around the tasks clients need to complete most often. You don’t need a separate portal for every scenario. You need one self-service space that gives clients the right capabilities for the process they’re in.
Complete intake
Intake is often the first step in a client relationship. A portal can give clients one place to submit the information your team needs before work can begin.
This works well for:
- Client onboarding
- Patient intake
- Student enrollment
- Program applications
- Member registration
- Lead qualification
The main benefit is clarity. Instead of sending instructions manually or collecting information across multiple emails, you can guide clients through the first step in one place.
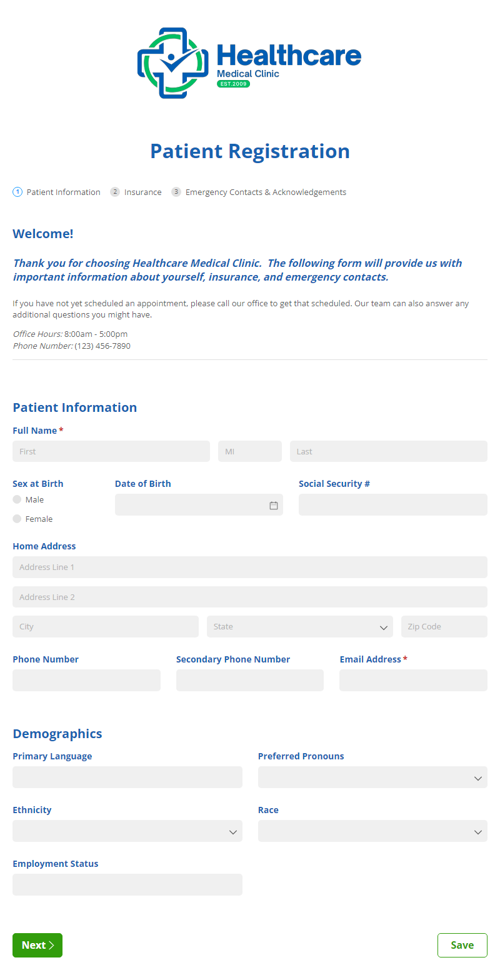
Patient Portal Template Bundle
- Collect patient details before appointments
- Let patients update information securely
- Keep intake and follow-up in one place
Upload documents
A portal can give clients a clear place to upload files as part of a larger workflow. Files stay connected to the right person, request, or submission instead of getting buried in email attachments or shared folders.
This works well for:
- Tax documents
- Insurance cards
- Signed agreements
- Application materials
- Project files
- Vendor paperwork
Document uploads also make follow-up easier. Clients know exactly what to upload, your team knows what has been received, and missing files are easier to spot.
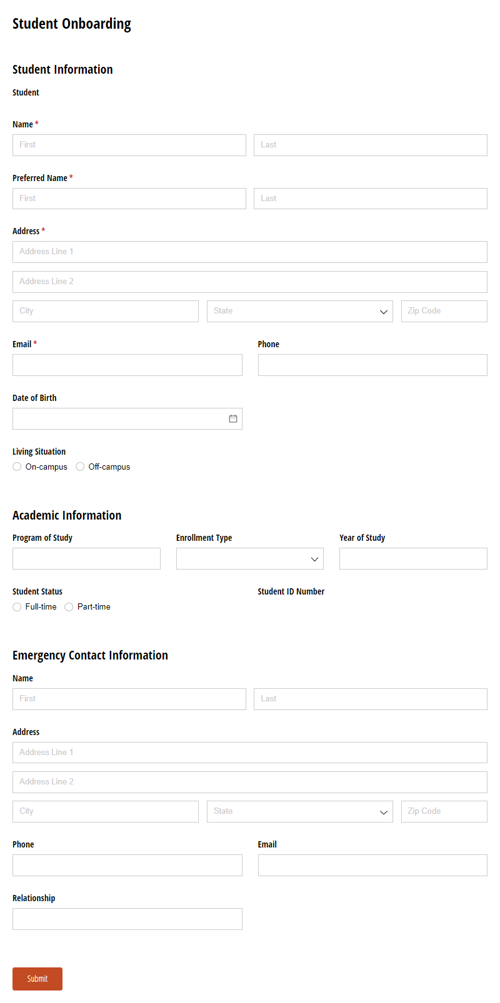
Student Portal Template Bundle
- Collect required documents online
- Keep files connected to each submission
- Reduce follow-up for missing attachments
Submit requests
A client portal can help people ask for help, request a service, or start a new workflow without sending a vague email. Instead of sorting through scattered messages, your team can collect the details you need upfront.
This works well for:
- Support requests
- Records requests
- Maintenance requests
- Quote requests
- Change orders
- Project requests
For your team, that means cleaner information from the start and an easier path to routing, review, and follow-up.
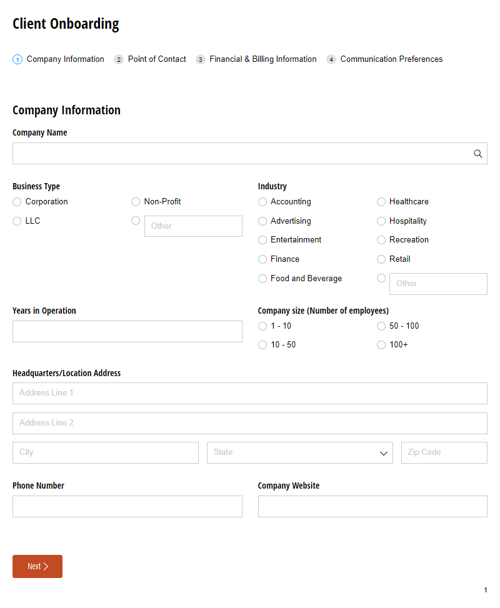
Client Portal Template Bundle
- Let clients submit new requests
- Track status and next steps
- Give clients one place to manage work
Update profiles and records
A portal becomes more useful when clients need to return later to update information or manage an ongoing relationship. They can keep details current without waiting for someone on your team to send a new form or link.
This works well for:
- Client profiles
- Member profiles
- Student records
- Patient information updates
- Project updates
- Renewal forms
For ongoing relationships, that self-service access can save time on both sides.
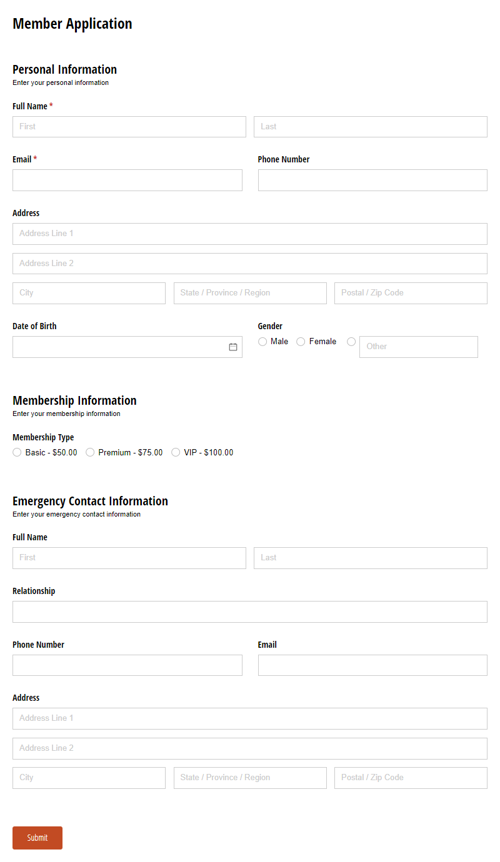
Member Portal Template Bundle
- Let members update profile details
- Support renewals and ongoing records
- Keep member information current
Make payments
A portal can also support payments when money is part of the workflow. This is especially useful when the payment needs to stay connected to a form submission, request, registration, or invoice.
This works well for:
- Client invoices
- Membership dues
- Student fees
- Event registrations
- Donations
- Service payments
That gives clients a simpler way to pay and gives your team a cleaner way to track what was paid, who paid, and what needs to happen next.
Build a No-Code Client Portal Around Your Real Workflow
A client portal doesn’t need to begin as a custom development project. The most useful version starts with one workflow your team already manages: requests, forms, documents, statuses, records, resources, payments, and follow-up tasks.
With Cognito Forms, you can build secure, form-first client portals where clients can submit forms, upload files, view past submissions, check progress, update records, complete tasks, and access relevant resources.
Start with one workflow, customize a template, and expand from there.
FAQ
Yes. If your workflow fits no-code building blocks like forms, file uploads, Workflow statuses, notifications, templates, Entry Views, and client access, you can build a useful client portal without custom development. Cognito Forms’ guide to building a client portal
A form collects information at one point in time. A client portal lets people return to view or update information, upload documents, check status, complete tasks, access resources, and view past submissions. If your process ends after one submission, a form may be enough. If the client needs to stay involved, a portal is usually a better fit.
A customer portal usually helps people manage account-related tasks, like checking order status, viewing shipping information, updating billing details, accessing support tickets, or managing subscriptions. A client portal is usually built around an ongoing working relationship where the client needs to collaborate with your team over time.
Client portals often focus on requests, documents, project or application status, follow-up tasks, records, resources, and past submissions. The difference is less about the label and more about the workflow.
A client portal should include the tasks clients contact you about most often. That may include request forms, file uploads, status updates, profile updates, follow-up tasks, past submissions, payments, or workflow-specific resources. Start with the workflow that creates the most manual follow-up for your team.

Miranda Peterson
Miranda is a Marketing Specialist at Cognito Forms who loves turning complex ideas into content that’s clear, helpful, and human. Outside of work, you can find Miranda enjoying local coffee shops, spending time in nature with her husband and two children, reading on her Kindle, or cooking for a group of friends.