Use a File Upload field to enable users to upload files (such as PDFs and images) as part of their form submission. Once an entry has been submitted, you can select the file in the entry information to view it. Additionally, organizations on Pro, Team and Enterprise plans can download uploaded files in bulk.
You can enable data encryption on your form to ensure that uploaded files are encrypted at rest.
Label
The label will display as the title of the field or the question that is being asked on the form. You can select the icon on the right to hide the label on the form. You also can use the pop-up formatting toolbar to insert values from other fields on the form.
Values from protected fields cannot be inserted into the field label.
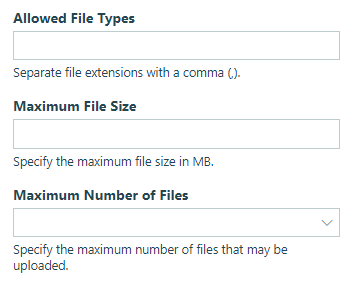
Allowed File Types
If you restrict the allowed field types to just image files (jpgs, pngs, etc.), the uploaded files will be included as pictures in any generated PDF documents.

The types of files that can be uploaded can be restricted. For example, if you want to restrict your users to only upload PDFs, simply type in PDF. Multiple file extensions can be added, but must be separated by a comma.
The default restrictions are executable files, including: action, apk, app, bat, bin, cmd, com, command, cpl, csh, dll, exe, gadget, htm, html, inf1, ins, inx, ipa, isu, job, js, jse, ksh, lnk, msc, msi, msp, mst, osx, out, paf, pif, prg, ps1, pyd, pyw, pyz, pyzw, reg, rgs, run, scr, sct, sh, shb, shs, u3p, vb, vbe, vbs, vbscript, workflow, ws, wsh, and wsf.
File Name
By default, files uploaded via the File Upload field retain their name (ex: picture.png) and cannot be renamed.
Maximum File Size
The maximum file size allowed for a single uploaded file is 100MB for organizations on the Individual plan and 250MB for organizations on the Pro, Team, and Enterprise plans.
Specify the maximum file size for a single uploaded file. You can also use a simple calculation to limit the total size of all uploaded files combined.
In email notifications, the limit for file attachments is a total of 17MB. If a file exceeds this amount, you will need to log in to your Cognito Forms account in order to view or download it.
Maximum Number of Files
File uploads are unlimited by default. To set a maximum, select a limit between 1-20 files from the dropdown.
You can also set a custom limit:
- Select Show Custom Error - When in the field settings.
- Use the .Count property to set a custom limit, like 25:
=if FileUploadField.Count() > 25
Make sure to replace ‘FileUploadField’ with your actual file name. - Add a custom error message (ex: “File limit exceeded.”)
Help Text
Help text can be used to assist the user by providing additional instructions. Help text will display directly under the field. Use the formatting toolbar to format text, insert hyperlinks and images, and populate values from other fields on the form.
Values from protected fields cannot be inserted into the help text.
Show This Field
By default, fields will always display on the form. However, you may want to hide specific fields or sections based on certain conditions, such as a selected value of another field on the form.

These conditions also determine whether uploaded files are included as attachments in your form’s email notifications. The files will be included when Show This Field is set to: 1) show Always, 2) show When and the specified conditions are met, or 3) show For Roles and the matching workflow link is included in the email.
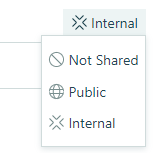
For example, if the File Upload field only shows for Internal roles, the files will not be attached unless you include a Workflow link for the Internal role in the email.
- Always – Field is always shown.
- When – Field will only display when specific conditions are met. After selecting this option, the conditional logic builder dialog will display allowing you to select when the field or section should be displayed.
- For Roles – Field will display only when accessed via a role-based workflow link specific to the role(s) selected.
- Never – Field will never display.
Require This Field
Requiring a field will make sure the user provides a response. When a field is required, an error message will display, and the form cannot be submitted until a value has been added to the field. Required fields are indicated by a red asterisk next to the label. By default, fields are never required.
- Always – Field is always required. User must provide a response in order to submit the form.
- When – Field is required only when specific conditions are met. After selecting this option, the Conditional Logic Builder dialog will display allowing you to select when the field is required.
- For Roles - Field is required only when accessed via a role-based workflow link specific to the role(s) selected.
- Never – Field is not required. This is the default behavior.
Read-Only
Set fields and sections as read-only to create simple workflows with your forms. All fields can be made read-only, with the exception of fields that are already read-only by default (Calculation, Price, Content, Page break, etc.).
- Always – Field is always read-only.
- When – Field is read-only when specific conditions are met. After selecting this option, the Conditional Logic Builder dialog will display allowing you to select when the field is read-only.
- For Roles – Field will be read-only when accessed via a role-based workflow link specific to the role(s) selected.
- Never – Field allows user input. This is the default behavior."
Custom Error
You can set a custom error message that will display under your field when specified conditions become true. The conditional logic builder will allow you to add any number of rules for validating your field. Learn more about the custom error option.