Embed a contact form, payment form, intake form, or multi-step workflow directly into any WordPress page using the free Cognito Forms plugin or a simple embed code.
Build Time & Skill
20-30 min
Intermediate
What you'll learn
How to identify the right embedding method for your WordPress setup, configure your form's appearance, and get a form live on your site — whether you're using the Block Editor, Classic Editor, Elementor, Divi, Beaver Builder, or another builder.


WordPress powers more websites than any other platform, but its native form tools are limited — especially when you need conditional logic, payment collection, file uploads, e-signatures, or multi-step workflows. Cognito Forms fills that gap with a free plugin built specifically for WordPress, plus embed code options that work with virtually any page builder. No matter how your WordPress site is set up, there’s a method that fits.
- Your form submissions are stored in one organized place. Cognito Forms stores every submission in a secure dashboard, in additional to email notifications. So, even if a notification email gets lost, the entry isn’t. A log of every person who filled out your form is waiting for you when you need it.
- Forms that look professional out of the box. No need to learn how to code or use complex software. Cognito Forms gives you user-friendly, professional forms from the moment you create your form.
- User-friendly form-building with easy formatting. Build forms quickly with a drag-and-drop WordPress form builder equipped to handle more than a basic contact form. If you do get stuck, Cognito Forms user guides and customer support team are there to help.
Which Embedding Method Is Right For You?
WordPress isn’t one thing. It’s a platform with multiple editors and builder options, and the best way to embed your form depends on which one you’re using. Take a moment to identify your setup before jumping into the steps.
| If you’re using… | Use this method |
|---|---|
| Block Editor (Gutenberg): WordPress default since 2018 | Method 1: Cognito Forms Plugin |
| Classic Editor: Older WordPress editor or Classic Editor plugin | Method 1: Cognito Forms Plugin |
| Elementor, Divi, or Beaver Builder | Method 2: Embed Code in Your Page Builder |
| Any other builder or custom theme | Method 3: Embed Code (Universal) |
Step-by-Step: How to Embed a Form on Your WordPress Site
No matter which embedding method you use, all WordPress setups start with the same two steps in Cognito Forms. Then, Step 3 branches into the method that matches your editor or builder. Choose and follow only the path that applies to you.
Step 1: Configure how your form appears on your site
Before embedding, take a second configure how your form looks. This step is the same regardless of which embedding method you use. To access these settings, hover over the form name in the Cognito Forms sidebar and select Publish Form.
From the Form Styles tab on the Publish page, you have a few options to get your form looking good before adding it to your site:
- Customize your form’s style: Change button colors, choose a font style, add your logo, and more.
- Field styles: This option controls the visual style of your form’s fields. There are several options that tend to work well for most setups, but you can also select Chameleon to automatically match your site’s fonts and colors. See below for more information on Chameleon mode.
- Hide form header when embedded: Check this box to hide the logo, title, and description when your form is embedded. These elements will still appear when someone visits the form via a direct URL.
- Adjust embedded form margins: Set the margin around your embedded form anywhere between 0 and 80 pixels to control spacing within your page layout.

Chameleon field styles
For the most seamless visual integration, enable Chameleon mode. Your site’s design is a core part of the customer experience, so Chameleon mode automatically adopts the surrounding page’s fonts, colors, and styles for you, with no CSS knowledge required.
To enable Chameleon mode:
- From the form’s Publish page, select the Form Styles tab.
- Expand the Field Style dropdown and select Chameleon.
- Click Save and your form will now inherit your site’s styling automatically.
Note: Chameleon field styles work only with Seamless embedding and when using the Cognito Forms WordPress Plugin. If you plan to use an Iframe embed, see the Custom CSS section below.
Step 2: Copy your form’s embed code
Skip this step if you’re embedding with the plugin. It handles embed code selection automatically when you choose a form from the dialog.
If you’re embedding your form using the form’s embed code, it’s time to grab the code you’ll paste into WordPress. Here’s how:
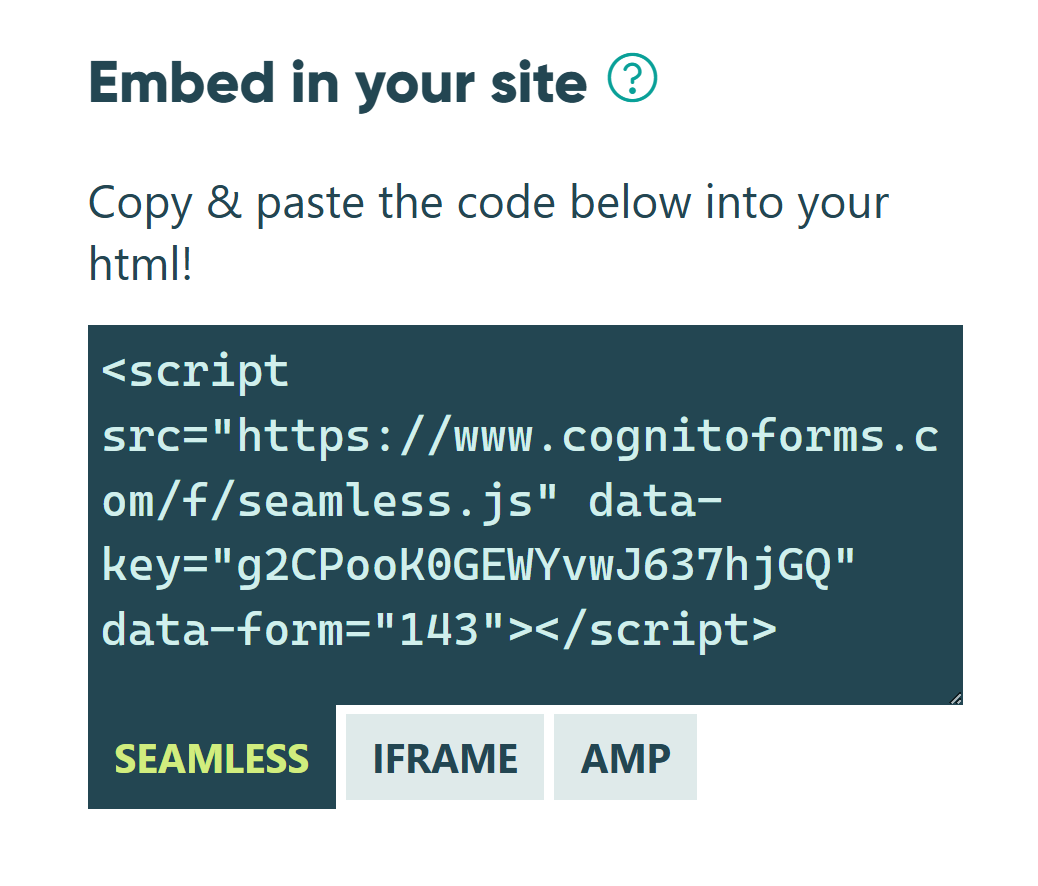
- From the form’s Publish page, click the Publish Code tab.
- Under Embed in your site, select the type of embed code you want to use.
- Click inside the code’s text box to copy it to your clipboard. This is what you’ll paste into WordPress.
Seamless vs. Iframe embedding: Which should you use?
For most WordPress setups, we recommend starting with the Seamless embed. Switch to Iframe if you run into styling conflicts with your site’s theme. The main difference between the two is how the form interacts with your site’s existing styles.
| Seamless Embedding | Iframe Embedding | |
|---|---|---|
| Setup | Integrates the form directly into the page, making it look and feel like a natural part of your site | Loads your form inside a contained frame, keeping it visually separate from the surrounding page |
| Best Used When | Recommended for most sites and WordPress themes | Seamless embed causes styling conflicts or display issues |
| Styling | Inherits your site’s styles naturally (especially with Chameleon Mode) | Isolated from page styles; requires CSS to match your site’s styles |
Step 3: Add your form to WordPress
Whether you’re using WordPress’s Block Editor or Classic Editor or building through a different platform like Elementor, Divi, or Beaver Builder, you need to add your form to your site following certain steps.
Method 1: Cognito Forms Plugin (Recommended)
The Cognito Forms WordPress plugin is the easiest path if you’re using the Block Editor or the Classic Editor. It connects directly to your Cognito Forms account and lets you select and embed any form.
Install and activate the plugin:
- In your WordPress dashboard, go to Plugins.
- Search for “Cognito Forms” and click on the option that matches our logo.
- Click Install and activate. If a pop-up appears notifying you of a change to your default site address, click Continue.
- If prompted, connect the plugin to Crowdsignal.

Embed your form
After installing the Cognito Forms WordPress plugin, adding your form in the Block Editor or Classic Editor are both easy to use.
Not sure which editor you’re using? If your post editor looks like a block-based canvas where you click + to add content, you’re using the Block Editor. If it looks like a traditional text editor with a toolbar across the top, you’re using the Classic Editor.
Adding the form with the Block Editor:
After installing the Cognito Forms plugin and when editing with the Block Editor, you’ll see the option to add a Cognito Forms block to the page:
- Open the page where you want to add your form.
- Click + to add a new block and search for “Cognito Forms.”
- Select the Cognito Forms block and then Select Form to open the embed dialog.
- Use the dropdowns to find and select your form, then click Embed.
- Save a draft or publish your changes.

Removing or swapping the form with the Block Editor:
- To remove: Click the form block > click Options (three-dot menu) > select Remove Cognito Forms > save. This removes the form from WordPress, but does not delete it from your Cognito Forms account.
- To swap: Remove the existing block and repeat the embed steps with a different form.
Quick tips using the Block Editor:
- The Block Editor defaults to the Seamless embed. To switch to Iframe (useful if you notice style conflicts with your theme), open the Settings panel (gear icon in the top right) and go to Block > Form Settings > Embed Mode > Iframe.
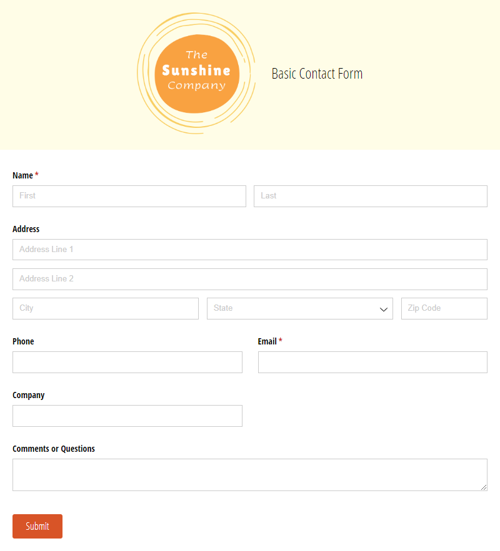
- Your form might show up as a blank placeholder in edit mode, not a live preview. Always preview or publish the page to see the form as visitors will.
Adding the form with the Classic Editor:
After installing the Cognito Forms plugin and when editing with the Classic Editor, a one-click embed button is added to the Classic Editor toolbar:
- Open the page or post where you want to add your form.
- In the Classic Editor toolbar, click the Cognito Forms icon to open the embed dialog.
- Use the dropdowns to find and select your form, then click Embed.
- A gray media placeholder icon will appear in the editor. This confirms the form has been embedded.
- Save a draft or publish your changes.
Removing or swapping the form with the Classic Editor:
- To remove: Delete the gray placeholder icon in the editor and save your changes.
- To swap: Delete the placeholder and repeat the embed steps with a different form.
Quick tip using the Classic Editor:
- Your form may show up as a gray placeholder in edit mode, not a live preview. Always preview or publish the page to see the form as visitors will.
Method 2: Embed code in your page builder
If you’re using Elementor, Divi, or Beaver Builder, use the Iframe embed code pasted into an HTML or Code module. The Seamless embed code also works on the live site, but most page builders won’t preview it in the editor. For this reason, we recommend using Iframe code for a better editing experience.
You can quickly embed, remove or swap out forms using the Elementor builder within WordPress.
Embedding a form into your WordPress site using Elementor:
- Open the page where you want to embed your form.
- Find and select the HTML widget. You can find this widget under the General section, or search for it using the search bar at the top of the menu.
- Click and drag the HTML widget to the section of the page where you’d like to embed your form.
- In Cognito Forms, copy your form’s Seamless embed code or Iframe embed code from the Publish Code tab.
- Back in Elementor, click directly into the HTML widget on your page to open the HTML Code editor. Paste the copied code here to embed your form.
- Save a draft or publish your page.

Removing your embedded form when using Elementor:
- Open your page and hover over your form until blue menu items appear.
- Click the x icon to remove your form.
- Save your work or follow the embed steps above to add a new form.
Quick tip using the Elementor Builder:
- Your form may show up as a placeholder in edit mode, not a live preview. Always preview or publish the page to see the form as visitors will.
You can quickly embed, remove or swap out forms using the Divi builder within WordPress.
Embedding a form into your WordPress site using Divi:
- Open your page and add a new section where you’d like to embed your form.
- Select a Code module from the Module Library.
- In Cognito Forms, copy your form’s Seamless embed code or Iframe embed code from the Publish Code tab.
- Back in the Divi builder, paste your form’s code into the code editor.
- Click the green checkmark to save your work and instantly embed your form.

Removing your embedded form when using Divi:
- Open your page and hover over the Code module until gray menu items appear.
- Click the trashcan icon to remove your form.
- Save your work or follow the embed steps above to add a new form.
Quick tip using the Divi Builder:
- Your form may show up as a placeholder in edit mode, not a live preview. Always preview or publish the page to see the form as visitors will.
You can embed, remove or swap out forms using Beaver Builder within WordPress in just a few steps.
Embedding a form into your WordPress site using Beaver Builder:
- Click the blue + icon (located in the top right) to open the module library.
- Drag an HTML module to the section where you want the form.
- Paste your embed code into the HTML editor.
- Save a draft or publish your page.

Removing your embedded form when using Beaver Builder:
- Open your page and hover over the HTML module until blue menu items appear.
- Click the blue x icon to remove your form.
- Save your work or follow the embed steps above to add a new form.
Quick tip using the Beaver Builder:
- Your form may show up as a placeholder in edit mode, not a live preview. Always preview or publish the page to see the form as visitors will.
Method 3: Embed code with any other WordPress setup
For any WordPress builder or setup not covered above, embed a Cognito Form by pasting your Seamless or Iframe embed code into any HTML block or custom code area. This works as a universal fallback.
- In your WordPress editor, locate an HTML block or Custom HTML area where you want the form.
- Paste your Seamless or Iframe embed code from Step 2 into the block.
- Save or publish your page and view the live site to confirm the form appears correctly.
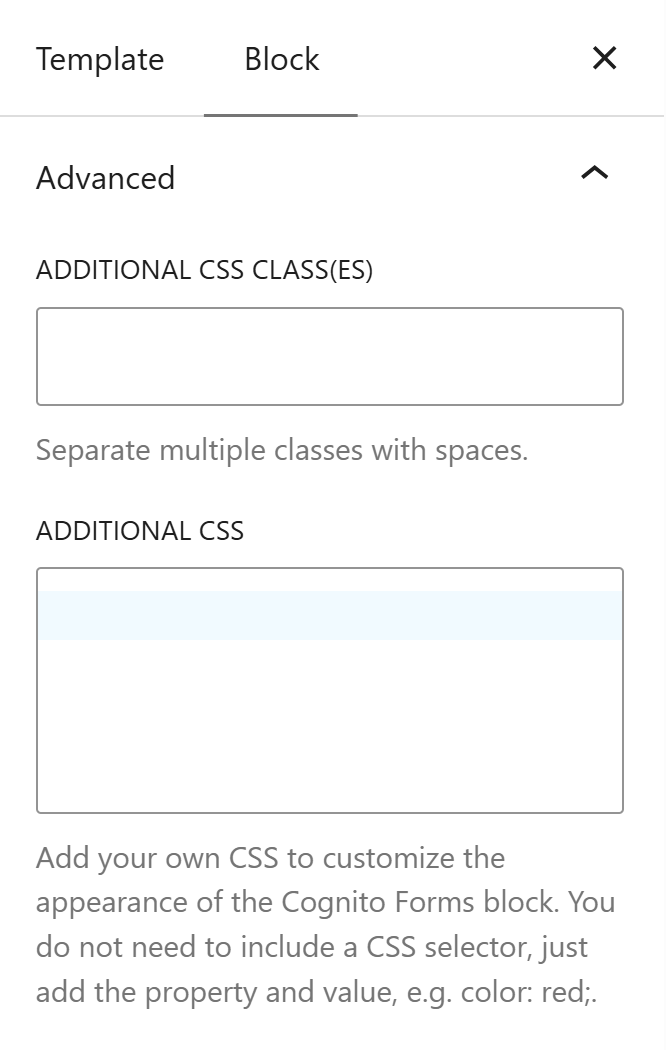
Customizing Your Form’s CSS
If Chameleon Mode doesn’t fully close the gap between your form and your WordPress theme, Custom CSS gives you precise control over specific elements (button colors, fonts, input borders, error messages, and more).
WordPress gives you several ways to add custom CSS depending on your setup:
- Appearance > Customize > Additional CSS: This is the most common location and is available in most WordPress themes. Add your CSS here and it applies site-wide.
- Inline style tag (Seamless embed only): Wrap your Seamless embed code in a
<div>with a unique ID, then add a<style>tag alongside it in the HTML block. This targets only the specific embedded form. - Iframe setCss script: When using the Iframe embed, add the setCss script below the embed code in your HTML block to pass CSS directly into the form.
- Theme custom CSS area: Many WordPress themes include their own custom CSS field in the theme settings. Check your theme documentation for its specific location.
As you adjust your CSS, view style changes by saving and refreshing the browser.
After Embedding: Get More Out of Your Embedded Form
Once your form is live on WordPress, Cognito Forms gives you tools to turn submissions into a fully automated business process.
- Automate your follow-up with Workflow.
Set up multi-step Workflows to assign tasks, trigger approvals, or move entries through a defined status sequence automatically. This is especially useful for service-based businesses where requests require internal review before a response goes out. - Send confirmation and notification emails automatically.
Configure email notifications to go out the moment a form is submitted, such as confirmation emails to the customer and internal alerts to your team. Personalize the content with submission data and set up conditional emails that send different messages based on what someone selected. - Generate documents from form submissions.
Automatically produce PDFs or Word documents from submitted data with Cognito Forms’ custom document templates. This is useful for sending order summaries, service agreements, or invoices without any manual document preparation. - Collect e-signatures directly in your form.
Add a Signature field to collect legally binding electronic signatures for contracts, service agreements, or onboarding documents, without sending files back and forth.
Get Your Form Live on WordPress Today
With Cognito Forms, embedding a form on your WordPress site takes just minutes. Whether you use the plugin for a point-and-click experience or an embed code for your page builder, there’s a path that works. Once your form is live, layer on workflow automation, email notifications, e-signatures, and payment collection to build a process that goes well beyond basic data collection.
Get started in minutes with our fully customizable form templates.
FAQ
WordPress’s Form Block is limited on the ability to show or hide form fields based on selections in previous fields. Embedding a form you built in Cognito Forms gives you this exact functionality, while remaining easy to use. Conditional Logic in Cognito Forms is user-friendly for anyone, even without coding knowledge. Learn more about how to show or hide fields based on answers.
All Cognito Forms submissions (Entries) are easily found under your form’s Entries page. Each form comes with an “All Entries” Entry View by default, but you can also create custom Saved Entry Views that are filtered by Status or any form data, sorted by date or alphabetically, and much more. Learn more about creating sorting and filtering Entry Views in Cognito Forms.