Turn every booking, appointment, or scheduled request from your Cognito Forms submissions into a real Google Calendar event — automatically, with no copying and pasting required.
Build Time & Skill
20-30 min
Intermediate
What you'll learn
How to connect Cognito Forms to Google Calendar through Zapier or Make so form submissions automatically create, update, and delete calendar events for bookings and appointments.
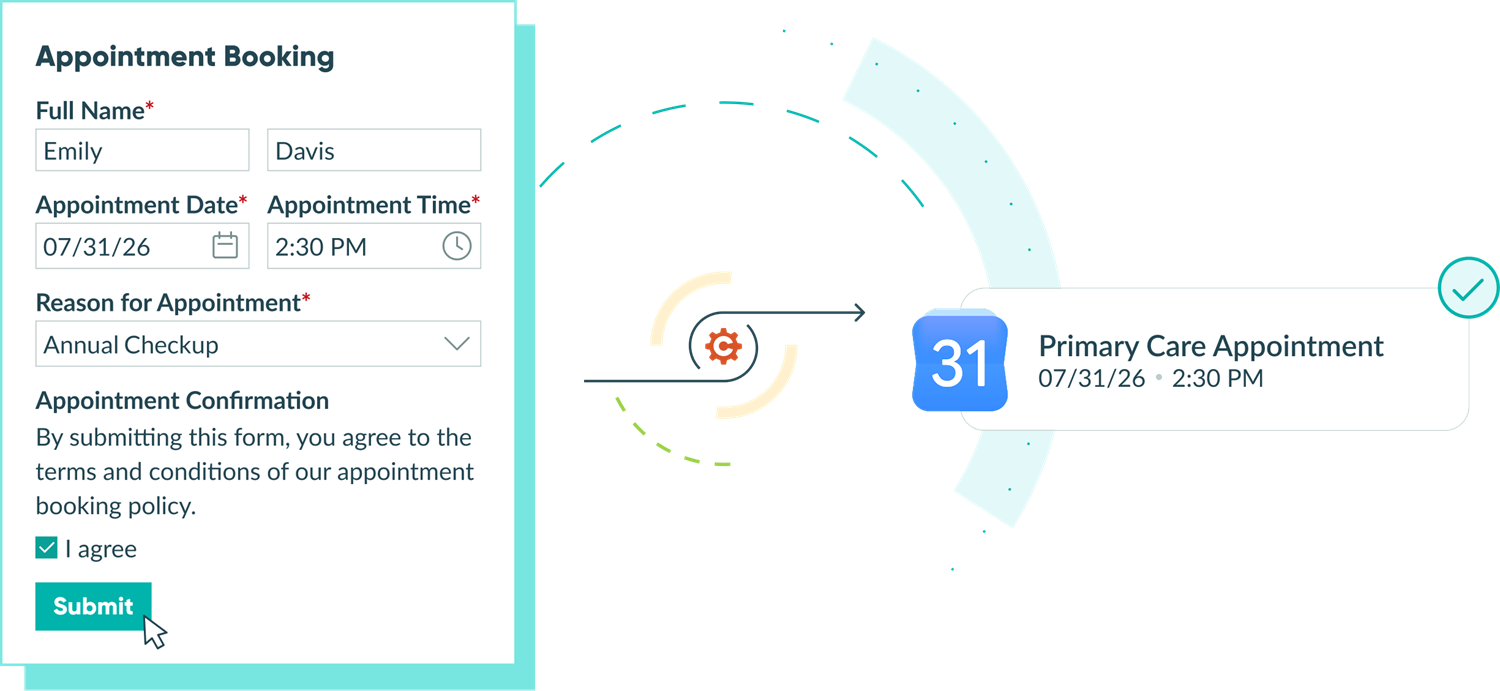
When customers book a time with you through an online form, the last thing you want is to manually add that appointment to your calendar. By connecting Cognito Forms to Google Calendar, every form submission becomes a real, invite-ready calendar event the moment someone hits submit. Updates and cancellations from your customers can flow through, too.
This guide is for service-based teams that book time with clients, like consultants, coaches, healthcare providers, agencies, and anyone running meetings, sessions, or appointments. You’ll build a booking form in Cognito Forms, then use Zapier or Make to push entries into Google Calendar as fully detailed events.
This setup gives you the ability to:
- Avoid manual data-entry errors. Event details are transferred directly from Cognito Forms to Google Calendar, eliminating the risk of typos and missed information.
- Send calendar invitations automatically. As soon as someone submits your form, you can send them a calendar invite with reminders and an optional Google Meet link.
- Keep your calendar up-to-date automatically. When an appointment is booked, rescheduled, or canceled through your form, Google Calendar updates automatically to match.
- Reclaim time for actual client work. Replace hours of manual calendar management each week with a workflow that runs itself.
Key Takeaways
- Cognito Forms syncs with Google Calendar via Zapier or Make, turning form submissions into calendar events automatically.
- A calculation field formats Date and Time fields into the
yyyy-MM-ddTHH:mmformat Google Calendar requires. - Automation handles the full cycle: create, update, and delete calendar events as appointments are booked, rescheduled, or canceled.
- A consistent event name (e.g., “Consultation with [Client Name]”) lets each automation find the right calendar event.
- The result: no manual entry, automatic customer invites, and a calendar that stays in sync.
In Cognito Forms: Build a Form For Customers to Book a Time
Before any automation can run, your form needs to capture the right pieces of information: who the customer is, when they want to meet, and how long the event should be. The setup below gives Zapier or Make the data they need to create a clean, accurate calendar event.

Step 1: Create your form with Date and Time fields
Start by building (or opening) the form customers will use to book time with you. On your Build page, add the basic fields you’ll need to populate the event:
- Add Name and Email fields to capture the customer’s information.
- Add a Date field for the booking date.
- Add a Time field for the appointment’s start time. Name this “Choose a time,” or something similar.
- Add a second Time field for the appointments end time. Name this “End Time,” or something similar.
- Prefill the “End Time” field with a calculation that adds the amount of time needed for the appointment onto your “Start Time” field. Here are three calculations for popular booking durations:
- 30 minutes:
ChooseATime.AddMinutes(15) - 1 hour:
ChooseATime.AddHours(1) - 2 hours:
ChooseATime.AddHours(2)
- 30 minutes:
- Set your “End Time” field’s Show This Field setting to Never or For Roles > Internal, if desired.
- Set the “End Time” field to Read Only > Always.
- Add any additional fields you need, such as phone number, appointment reason, location preference, or notes, depending on the information you want your calendar event to include.
Step 2: Prepare your Date and Time fields for Google Calendar
Google Calendar needs a full start date and time and an end date and time in a single value to create an event. Cognito Forms’ Calculations let you combine your separate Date and Time fields into the format the calendar expects.

Start time calculation
- Add a Calculation field labeled Start Time Calculation, with Type set to Text.
- In the calculation, set it to:
=StartDate.ToString("yyyy-MM-dd") + "T" + StartTime.ToString("HH:mm")- This calculation combines your Date and Time fields while also converting them to a text format that matches how Google Calendar’s data is formatted.
- Be sure to replace ‘StartDate’ and ‘StartTime’ to match the field names on your form.
- Set the field’s Show This Field setting to Never or For Roles > Internal. This ensures the field doesn’t display to the customer filling out the form.
End time calculation
- Add a second Calculation field labeled End Time Calculation, also set to Text.
- In the calculation, set it to:
=StartDate.ToString("yyyy-MM-dd") + "T" + EndTime.ToString("HH:mm")- This calculation combines your Start Date and End Time fields while also converting them to a text format that matches how Google Calendar’s data is formatted.
- Be sure to replace ‘StartDate’ and ‘EndTime’ to match the field names on your form.
- Set the field’s Show This Field setting to Never or For Roles > Internal. This hides the field from the customer filling out the form.
Step 3: Customize your form’s Workflow (optional)
Customers can cancel their appointment time directly from their form submission, using Workflow Actions and Workflow Links in Cognito Forms. This step will set your form up to automatically cancel the Google Calendar event associated with the customer’s submission.
Note: This step only applies if you are wanting to automatically delete events when customers click a “Cancel” Workflow Action button.
Setup a Status and Action

Setup steps:
- Open your form’s Workflow settings.
- Add a new Status for canceled bookings — for example, Canceled.
- Add a Workflow Action button (e.g., labeled Cancel Appointment) that moves the entry to that status when clicked.
- Decide who can see the button and when, using the Allow Action settings. Assuming you want customers to be able to cancel their own appointment, set this logic to: When >
Entry.Role is one of Public, InternalANDEntry.Status is "Submitted"- This lets customers cancel the appointment, only when it’s been scheduled. It also lets your team cancel the appointment on their end (for situations like if the customer called to cancel).
Let customers change their appointment time on their own

Setup steps:
- Open your “Submit” Action and click + Add Email.
- Set up a custom email notification to send to the customer’s email address. Customize the subject and message of the email for your needs. Use the Insert Field option to prefill form data into the email’s content.
- Click the Share Workflow Link and select the Public Role. Adjust the Workflow Button text, if desired.
- This gives the customer a button to return to their entry and self-cancel their appointment using the Action available to them on the form.
In Zapier or Make: Set up your automation(s)
With your form built and your Calculation fields ready, the next step is to connect Cognito Forms to Google Calendar using either Zapier or Make. Both tools work well, so the choice depends on your personal preference. Zapier tends to be more beginner-friendly, while Make gives you finer control and is often more cost-effective for higher-volume workflows. Pick whichever you already use or prefer and follow that path through one or all of the three scenarios below.
Create a new calendar event based on a form
This is the core automation: every time a customer submits your form, a new Google Calendar event is created with their booking details. Set this up first; the Update and Delete automations below rely on the event name pattern you choose here.
How to set this up with Zapier
1. Create a new Zap in Zapier.
2. Choose Cognito Forms as the Trigger App and New Entry as the Trigger Event.
3. Connect your Cognito Forms account, if you haven't already.
4. Select the Form you want to sync.
5. Test the connection with a recent form entry.

1. Create a new Zap in Zapier.
2. Choose Cognito Forms as the Trigger App and New Entry as the Trigger Event.
3. Connect your Cognito Forms account, if you haven't already.
4. Select the Form you want to sync.
5. Test the connection with a recent form entry.
1. Add Google Calendar as the Action App.
2. Select Create Detailed Event as the Action Event.
3. Connect your Google account, if you haven't already.
4. Select the Calendar you want to create a new event in.

1. Add Google Calendar as the Action App.
2. Select Create Detailed Event as the Action Event.
3. Connect your Google account, if you haven't already.
4. Select the Calendar you want to create a new event in.
1. Fields for the calendar event will appear.
2. In each field, use the backslash /
to view the list of Cognito Forms field tokens.
3. For the Start Date & Time field, select the Start Date Calculation you created in Step 1.
4. For the End Date & Time field, select the End Date Calculation you created in Step 1.
5. Fill in the rest of the fields with any information you'd like to automate. For example, prefill the Email field from your form in the Attendees field of your Zap.

1. Fields for the calendar event will appear.
2. In each field, use the backslash /
to view the list of Cognito Forms field tokens.
3. For the Start Date & Time field, select the Start Date Calculation you created in Step 1.
4. For the End Date & Time field, select the End Date Calculation you created in Step 1.
5. Fill in the rest of the fields with any information you'd like to automate. For example, prefill the Email field from your form in the Attendees field of your Zap.
1. From your Create Detailed Event step, click Test step .
2. Check your Google Calendar to see the results, and make changes if needed.
3. Click Publish to turn on your zap!

1. From your Create Detailed Event step, click Test step .
2. Check your Google Calendar to see the results, and make changes if needed.
3. Click Publish to turn on your zap!
How to set this up with Make
1. Create a new Scenario.
2. Add Cognito Forms to the first module.
3. Select the Trigger Watch New Entries .
4. Create a Webhook and connect your Cognito Forms account.
5. Choose the Form you want this Scenario to watch.

1. Create a new Scenario.
2. Add Cognito Forms to the first module.
3. Select the Trigger Watch New Entries .
4. Create a Webhook and connect your Cognito Forms account.
5. Choose the Form you want this Scenario to watch.
1. Add Google Calendar to the next module.
2. Select Create an Event .
3. Create a connection to your Google account.
4. Under the Create an Event dropdown, select In Detail.
5. Select your desired calendar in the Calendar ID dropdown.

1. Add Google Calendar to the next module.
2. Select Create an Event .
3. Create a connection to your Google account.
4. Under the Create an Event dropdown, select In Detail.
5. Select your desired calendar in the Calendar ID dropdown.
1. Set the Event Name
to a custom, static name, or type
/
and choose Cognito Forms entry data to dynamically name the event.
2. Turn on Google Meet Video Conferencing, if desired.
3. Under Attendees, click + Add Attendee. Then, map your form's Name and Email fields to the corresponding textboxes. This will automatically invite your customer to the event.
4. Insert your "Start Date Calculation" field in the Start Date setting and your "End Date Calculation" field in the End Date setting.

1. Set the Event Name
to a custom, static name, or type
/
and choose Cognito Forms entry data to dynamically name the event.
2. Turn on Google Meet Video Conferencing, if desired.
3. Under Attendees, click + Add Attendee. Then, map your form's Name and Email fields to the corresponding textboxes. This will automatically invite your customer to the event.
4. Insert your "Start Date Calculation" field in the Start Date setting and your "End Date Calculation" field in the End Date setting.
1. Click Run Once to start a test.
2. Submit a test entry on your form.
3. Check the test's results in Make and Google Calendar. Change things if needed.
4. When you're finished, Save your changes and set the form to Active .

1. Click Run Once to start a test.
2. Submit a test entry on your form.
3. Check the test's results in Make and Google Calendar. Change things if needed.
4. When you're finished, Save your changes and set the form to Active .
Update a calendar event based on changes made to a form
When a customer reschedules or your team edits an entry internally, your calendar should reflect the new time without anyone moving the event manually. This automation watches for changes on existing entries, finds the matching calendar event, and updates it in place.
For this automation to find the right event later, your Create automation needs to set a predictable. For example, "Consultation with Client Name" or "Form Name for Company". Use the same name pattern in both automations so the lookup/search step can match them.
How to set this up with Zapier
1. Create a new Zap in Zapier.
2. Choose Cognito Forms as the Trigger App and Update Entry as the Trigger Event.
3. Connect your Cognito Forms account, if you haven't already.
4. Select the Form you want to sync.
5. Test the connection with a recent form entry.

1. Create a new Zap in Zapier.
2. Choose Cognito Forms as the Trigger App and Update Entry as the Trigger Event.
3. Connect your Cognito Forms account, if you haven't already.
4. Select the Form you want to sync.
5. Test the connection with a recent form entry.
1. Choose Google Calendar as the Action App.
2. Select Update Event as the Action Event.
3. Connect your Google account, if you haven't already.
4. Select the Calendar you want to update the event in.

1. Choose Google Calendar as the Action App.
2. Select Update Event as the Action Event.
3. Connect your Google account, if you haven't already.
4. Select the Calendar you want to update the event in.
1. When you get to the Event field, select + Add Search Step .
- Zapier will add a Find Event step to the Zap for you.
- This step is used to identify the entry in Cognito Forms and the event in your calendar that correspond and will be used as identifiers.
2. Select the same Calendar that you selected in the Update Action step.
3. For the Search Term field, use the Cognito Forms field tokens to set up the exact name of the event.
-
For example, you could have set up a dynamic Event Name like "
Form NamewithName of Company" in your Create Detailed Event Zap. You would add this same name in this field.
4. Test the connection with a recent event.

1. When you get to the Event field, select + Add Search Step .
- Zapier will add a Find Event step to the Zap for you.
- This step is used to identify the entry in Cognito Forms and the event in your calendar that correspond and will be used as identifiers.
2. Select the same Calendar that you selected in the Update Action step.
3. For the Search Term field, use the Cognito Forms field tokens to set up the exact name of the event.
-
For example, you could have set up a dynamic Event Name like "
Form NamewithName of Company" in your Create Detailed Event Zap. You would add this same name in this field.
4. Test the connection with a recent event.
1. Go back to the Update Event step.
2. In each remaining field, use the backslash /
to view the list of Cognito Forms field tokens.
3. Select the tokens to match each form field to the corresponding event setting.

1. Go back to the Update Event step.
2. In each remaining field, use the backslash /
to view the list of Cognito Forms field tokens.
3. Select the tokens to match each form field to the corresponding event setting.
1. Update any field on your test entry.
2. From your Update Event step, click Test step .
3. Check the results in Google Calendar and make changes, if needed.
4. Click Publish to turn on your zap!

1. Update any field on your test entry.
2. From your Update Event step, click Test step .
3. Check the results in Google Calendar and make changes, if needed.
4. Click Publish to turn on your zap!
How to set this up with Make
1. Create a new Scenario.
2. Add Cognito Forms to the first module.
3. Select the Trigger Watch Updates .
4. Create a Webhook and connect your Cognito Forms account, if you haven't already.
5. Choose the Form you want this Scenario to watch.

1. Create a new Scenario.
2. Add Cognito Forms to the first module.
3. Select the Trigger Watch Updates .
4. Create a Webhook and connect your Cognito Forms account, if you haven't already.
5. Choose the Form you want this Scenario to watch.
1. Add Google Calendar to the next module.
2. Select Search Events , which will locate the event for the corresponding entry.
3. Create a connection to your Google account, if you haven't already.
4. Select the same Calendar that your events are located in.
5. Specify a Query that matches the Event Name set when the event is created.
6. Change the Limit
field to
1
.

1. Add Google Calendar to the next module.
2. Select Search Events , which will locate the event for the corresponding entry.
3. Create a connection to your Google account, if you haven't already.
4. Select the same Calendar that your events are located in.
5. Specify a Query that matches the Event Name set when the event is created.
6. Change the Limit
field to
1
.
1. Add a third module and select Google Calendar again.
2. Select Update an Event .
3. Select the same Google Connection that you used in the Search module.
4. For Calendar ID
, select the
Creator > Email
in the available Google Calendar tokens.
5. Under Event ID , select Event ID in the available Google Calendar tokens. This will make sure to update only the event that matches the event the Search module identified.

1. Add a third module and select Google Calendar again.
2. Select Update an Event .
3. Select the same Google Connection that you used in the Search module.
4. For Calendar ID
, select the
Creator > Email
in the available Google Calendar tokens.
5. Under Event ID , select Event ID in the available Google Calendar tokens. This will make sure to update only the event that matches the event the Search module identified.
Map the remaining fields from Cognito Forms to the appropriate event settings.
- Event Name: Enter the same event name that is set when the event is created, using Cognito Forms field tokens as needed.
- Start Date: Select your form's "Start Time Calculation" field.
- End Date: Select your form's "End Time Calculation" field.

Map the remaining fields from Cognito Forms to the appropriate event settings.
- Event Name: Enter the same event name that is set when the event is created, using Cognito Forms field tokens as needed.
- Start Date: Select your form's "Start Time Calculation" field.
- End Date: Select your form's "End Time Calculation" field.
1. Click Run Once to start a test.
2. Make an update on an entry that already has a corresponding event in Google Calendar.
3. Check the test's results in Make and Google Calendar. Change things if needed.
4. When you're finished, Save your changes and set the form to Active .

1. Click Run Once to start a test.
2. Make an update on an entry that already has a corresponding event in Google Calendar.
3. Check the test's results in Make and Google Calendar. Change things if needed.
4. When you're finished, Save your changes and set the form to Active .
Delete a calendar event when a customer clicks a “Cancel” Workflow Action
If you set up the optional cancellation Workflow Action in Step 3, this third automation closes the loop. When a customer cancels through your form, the automation checks only for entries in the “Canceled” Status. Then, the matching Google Calendar event is removed, so you never show up to a meeting that isn’t happening.
The Filter step in Zapier (and the equivalent setup in Make) ensures this automation only fires on canceled entries. Without it, every form update would attempt to delete the event, including harmless edits like a corrected phone number.
How to set this up with Zapier
1. Create a new Zap in Zapier.
2. Choose Cognito Forms as the Trigger App and Update Entry as the Trigger Event.
3. Connect your Cognito Forms account, if you haven't already.
4. Select the Form you want to sync.
5. Test the connection with a recent form entry.

1. Create a new Zap in Zapier.
2. Choose Cognito Forms as the Trigger App and Update Entry as the Trigger Event.
3. Connect your Cognito Forms account, if you haven't already.
4. Select the Form you want to sync.
5. Test the connection with a recent form entry.
1. Add Zapier's Filter Flow Control.
- This step tells your Zap to only continue to the next step if the Cognito Forms entry matches the condition(s) you set.
2. In the Only continue if settings, add in the following details:
-
Choose field:
Select the Cognito Forms token for
Entry>Status -
Choose condition:
Select
(Text) Exactly Matches - Enter text or enter data: Type in the exact name of your form's Workflow Status that represents a canceled appointment/event.
4. Click Continue and your Zap will automatically test the filter and let you know if the Zap would have continued or not.
- If your zap would have continued: You're good to go! Move on to adding your Action step.
- If your zap would not have continued Make sure the entry you are currently using as you test entry has a Status that matches your condition. If it doesn't, update the test entry's status in Cognito Forms and re-select this entry in your "Update Entry" Cognito Forms Trigger step. Then, check again.

1. Add Zapier's Filter Flow Control.
- This step tells your Zap to only continue to the next step if the Cognito Forms entry matches the condition(s) you set.
2. In the Only continue if settings, add in the following details:
-
Choose field:
Select the Cognito Forms token for
Entry>Status -
Choose condition:
Select
(Text) Exactly Matches - Enter text or enter data: Type in the exact name of your form's Workflow Status that represents a canceled appointment/event.
4. Click Continue and your Zap will automatically test the filter and let you know if the Zap would have continued or not.
- If your zap would have continued: You're good to go! Move on to adding your Action step.
- If your zap would not have continued Make sure the entry you are currently using as you test entry has a Status that matches your condition. If it doesn't, update the test entry's status in Cognito Forms and re-select this entry in your "Update Entry" Cognito Forms Trigger step. Then, check again.
1. Choose Google Calendar as the Action App.
2. Select Delete Event as the Action Event.
3. Connect your Google account, if you haven't already.
4. Select the Calendar you want to delete the event in.

1. Choose Google Calendar as the Action App.
2. Select Delete Event as the Action Event.
3. Connect your Google account, if you haven't already.
4. Select the Calendar you want to delete the event in.
1. Click the + Add Search Step button.
- Zapier will add a Find Event step to the Zap for you.
- This step is used to identify the entry in Cognito Forms and the event in your calendar that correspond and will be used as identifiers.
2. Select the same Calendar that you selected in the "Delete Event" Action step.
3. For the Search Term field, use the Cognito Forms field tokens to set up the exact name of the event.
-
For example, you could have set up a dynamic Event Name like "
Form NamewithName of Company" in your Create Detailed Event Zap. You would add this same name in this field.

1. Click the + Add Search Step button.
- Zapier will add a Find Event step to the Zap for you.
- This step is used to identify the entry in Cognito Forms and the event in your calendar that correspond and will be used as identifiers.
2. Select the same Calendar that you selected in the "Delete Event" Action step.
3. For the Search Term field, use the Cognito Forms field tokens to set up the exact name of the event.
-
For example, you could have set up a dynamic Event Name like "
Form NamewithName of Company" in your Create Detailed Event Zap. You would add this same name in this field.
1. Make sure your test entry has a Workflow Status that represents canceled events.
2. From your Delete Event step, click Test step .
3. Check the results in Google Calendar and make changes, if needed.
4. Click Publish to turn on your zap!

1. Make sure your test entry has a Workflow Status that represents canceled events.
2. From your Delete Event step, click Test step .
3. Check the results in Google Calendar and make changes, if needed.
4. Click Publish to turn on your zap!
How to set this up with Make
1. Create a new Scenario.
2. Add Cognito Forms to the first module.
3. Select the Trigger Watch Updates .
4. Create a Webhook and connect your Cognito Forms account, if you haven't already.
5. Choose the Form you want this Scenario to watch.

1. Create a new Scenario.
2. Add Cognito Forms to the first module.
3. Select the Trigger Watch Updates .
4. Create a Webhook and connect your Cognito Forms account, if you haven't already.
5. Choose the Form you want this Scenario to watch.
1. Add a new module and go to Make's Built-in tools section.
2. Select the Flow Control tool and select the If-else option.
3. Label the condition something like: "Canceled Entries" or "Entries with Canceled Status."
4. Under the Condition
section in the first field, select the Cognito Forms token for
Entry
>
Status
.
5. In the last field under the Condition section, type the name of your Workflow Status that represents canceled entries. In our example, we'd type "Canceled" here.
6. Save your condition.

1. Add a new module and go to Make's Built-in tools section.
2. Select the Flow Control tool and select the If-else option.
3. Label the condition something like: "Canceled Entries" or "Entries with Canceled Status."
4. Under the Condition
section in the first field, select the Cognito Forms token for
Entry
>
Status
.
5. In the last field under the Condition section, type the name of your Workflow Status that represents canceled entries. In our example, we'd type "Canceled" here.
6. Save your condition.
1. Add Google Calendar to the next module.
2. Select Search Events , which will locate the event for the corresponding entry.
3. Create a connection to your Google account, if you haven't already.
4. Select the same Calendar that your events are located in.
5. Specify a Query that matches the Event Name set when the event is created.
6. Change the Limit
field to
1
.

1. Add Google Calendar to the next module.
2. Select Search Events , which will locate the event for the corresponding entry.
3. Create a connection to your Google account, if you haven't already.
4. Select the same Calendar that your events are located in.
5. Specify a Query that matches the Event Name set when the event is created.
6. Change the Limit
field to
1
.
1. Add a third module and select Google Calendar again.
2. Select Delete an Event .
3. Select the same Google Connection that you used in the Search module.
4. For Calendar ID
, select the
Creator
>
Email
in the available Google Calendar tokens.
5. Under Event ID , select Event ID in the available Google Calendar tokens. This will make sure to update only the event that matches the event the Search module identified.

1. Add a third module and select Google Calendar again.
2. Select Delete an Event .
3. Select the same Google Connection that you used in the Search module.
4. For Calendar ID
, select the
Creator
>
Email
in the available Google Calendar tokens.
5. Under Event ID , select Event ID in the available Google Calendar tokens. This will make sure to update only the event that matches the event the Search module identified.
1. Click Run Once to start a test.
2. Change the status to "Canceled" on an entry that already has a corresponding event in Google Calendar.
3. Try another entry and simply update the entry, without changing the status to "Canceled." Make sure your event doesn't get deleted for this one.
4. Check the test's results in Make and Google Calendar for both events. One should have been deleted, and the other should have been left alone (or updated if you have your "Update" Scenario running). Change things if needed.
5. When you're finished, Save your changes and set the form to Active .

1. Click Run Once to start a test.
2. Change the status to "Canceled" on an entry that already has a corresponding event in Google Calendar.
3. Try another entry and simply update the entry, without changing the status to "Canceled." Make sure your event doesn't get deleted for this one.
4. Check the test's results in Make and Google Calendar for both events. One should have been deleted, and the other should have been left alone (or updated if you have your "Update" Scenario running). Change things if needed.
5. When you're finished, Save your changes and set the form to Active .
After Your Integration Is Live: Take It Further
Once your form-to-calendar automation is running, a few Cognito Forms features can make your booking workflow even more powerful:
- Ask the right questions at the right time. With Conditional Logic, you can show or hide form fields based on the type of appointment a customer selects. This means a 15-minute discovery call doesn’t ask the same intake questions as a one-hour consultation.
- Collect deposits, booking fees, or full payments when customers book. Use one of our payment integrations so the booking and payment collection happen in the same flow, without leaving your form.
- Send customers a custom confirmation email the moment they book, with the appointment details and a personal note from you. You can also set up internal notifications, so your team is alerted to every new booking.
- Give returning customers a branded portal where they can view past bookings, reschedule, or request a new appointment without having to start over each time.
Automate Your Booking and Scheduling Workflow Today
Connecting Cognito Forms to Google Calendar removes one of the most error-prone, time-consuming parts of running a booking business. This setup replaces it with an automation that’s simple and works seamlessly. Build your form, set up your calculation fields, connect Zapier or Make, and your team will never have to copy a booking into a calendar again.
Connect Cognito Forms to Google Calendar today.
Connect Cognito Forms to Google Calendar today.
FAQ
Yes, you can do this. However, the setup detailed in this guide does not cover preventing customers from booking a time slot that’s already taken. To learn more about setting up limited time slots, we recommend checking out these guides next:
You can optionally set this up in your Zap or Scenario. You will see a setting to “notify attendees” and this will send them the calendar invite.
No. Deleting an entry directly in Cognito Forms does not automatically delete the matching Google Calendar event. To handle cancellations cleanly, use the Workflow Action setup in Step 3 and the Delete automation above so the customer-facing cancel button drives the calendar removal.
Yes, with small adjustments. Zapier and Make both support Microsoft Outlook (Office 365) Calendar as an Action App, so you can swap Google Calendar for Outlook using the same trigger and search-step pattern. Apple Calendar isn’t directly supported — you’d need to subscribe to a Google Calendar feed from Apple Calendar instead.