Creating entries
Grid Views & Task Views
Use the Allow New Entries option in your Grid/Task view settings to control when users can create new entries.
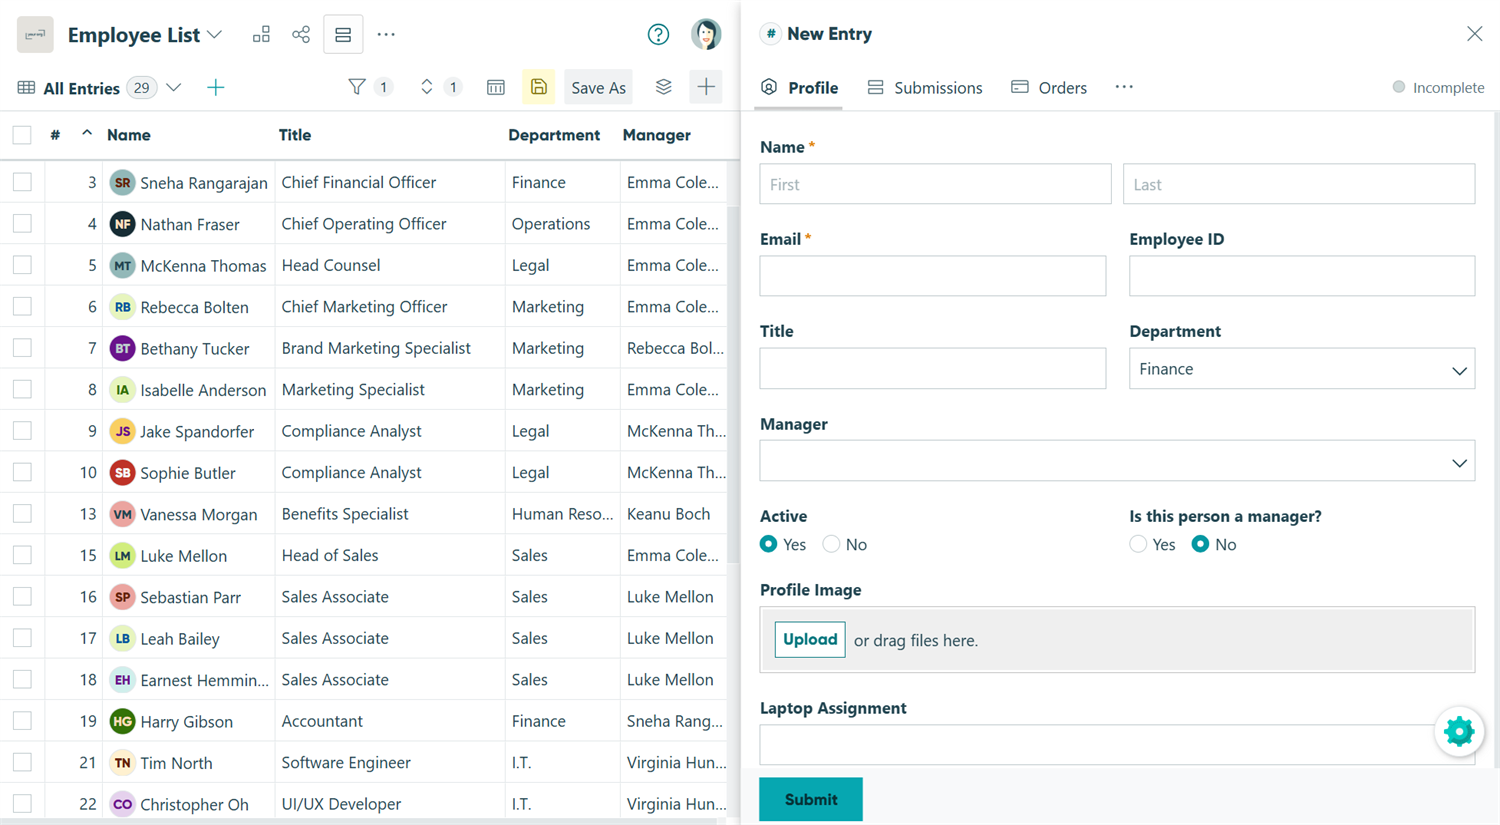
To create a new entry within a Grid view or Task view:
- Click the form name in the sidebar to open the Entries page.
- Click + New button in the top right.
- A blank entry will appear.
- After completing the entry, click the Submit button at the bottom of your form (or select another action from the available options).
Form View
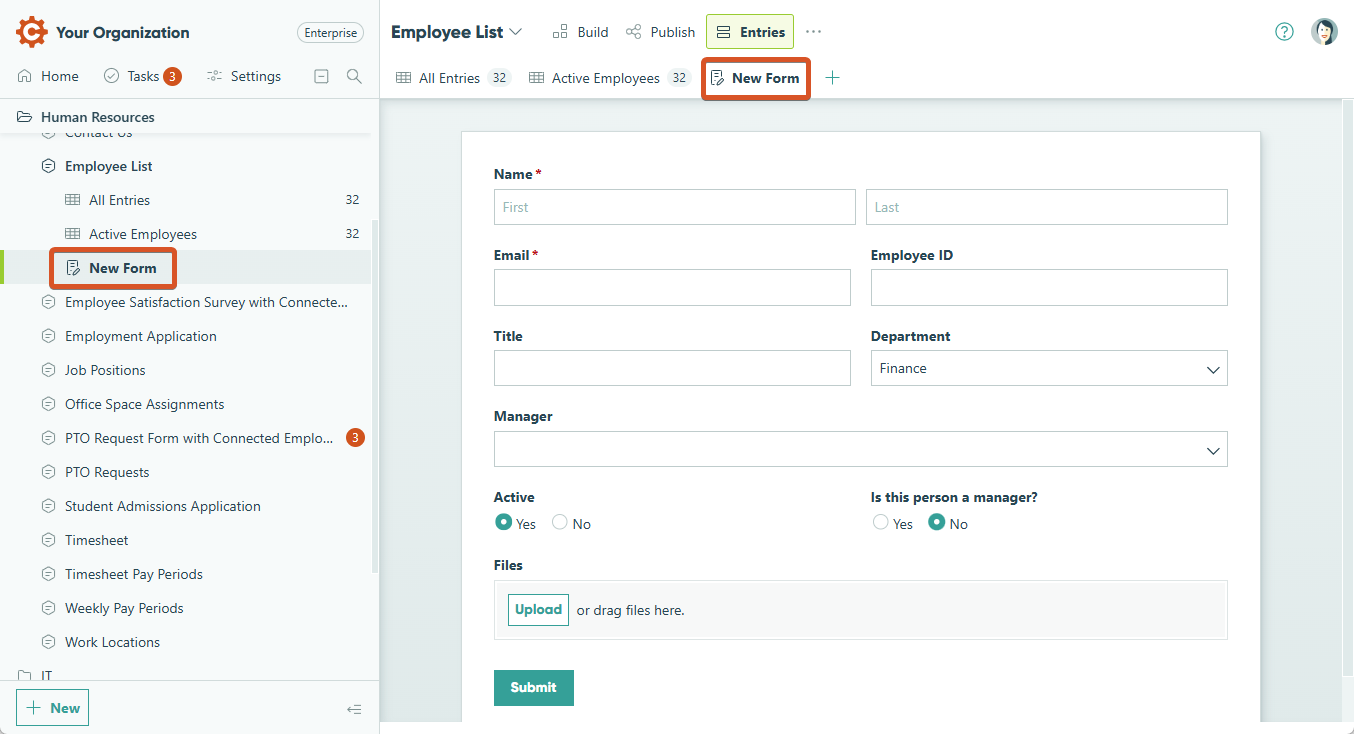
To create a new entry within a form view:
-
Click the form name in the sidebar to open the entry view list and select the form view. Or, select the form view from the top toolbar.
-
A blank entry will appear.
-
After completing the entry, click the Submit button at the bottom of your form (or select another action from the available action options).
Editing entries
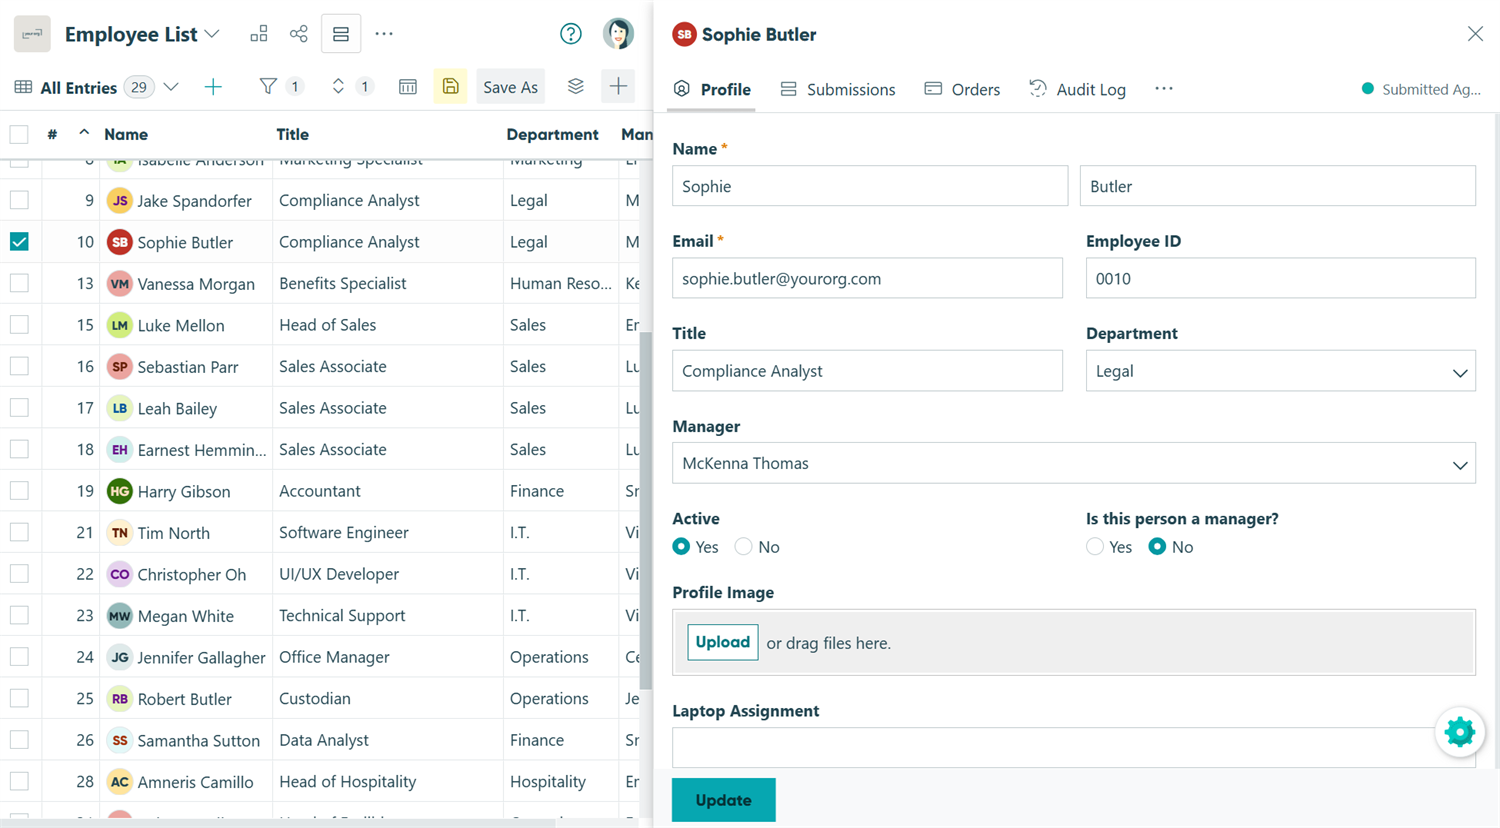
To edit an existing entry:
- Click the form name in the sidebar to open the Entries page.
- Select an individual entry to expand the entry details.
- Make any necessary changes to the form entry by clicking into a field and editing as needed, then click the appropriate action button to save your changes. To discard your changes, click Discard Changes.
Changing entry status
To change the status of a single entry:
- Open an individual entry, or simply select the checkbox next to the entry you want to change the status for.
- Open the Actions menu in the top toolbar, then click Change Status to select a new status.
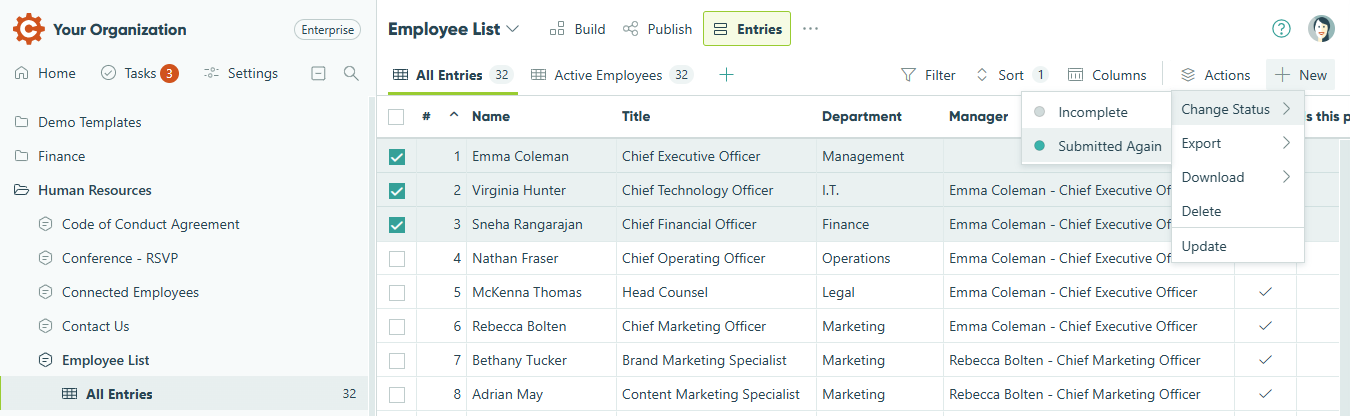
To change the status of multiple entries:
- Select the checkboxes next to the entries you want to change the status of.
- Open the Actions menu in the top toolbar, then click Change Status to select a new status.
Quick Tip: Bulk status changes will not trigger additional activities in a workflow, such as email notifications and integrations.
Deleting entries
When you delete an entry, the data is permanently deleted and cannot be retrieved.
You can delete individual entries one at a time or multiple entries simultaneously.
To delete individual entries:
- Click the form name in the sidebar to open the Entries page.
- Select an individual entry to expand the entry details.
- Click the ellipsis (…) at the top of the entry and select Delete.
- Confirm the deletion of your entry.
To delete multiple entries at once:
- Click the form name in the sidebar to open the Entries page.
- Select the entries you want to delete using the checkbox to the left of each entry.
- Open the Actions menu in the top toolbar and click Delete.
- Confirm the deletion of your entries.
Printing entries
We recommend using the Create Document option at the top of the entry view to generate printable PDFs and Word documents. Learn more about document generation.
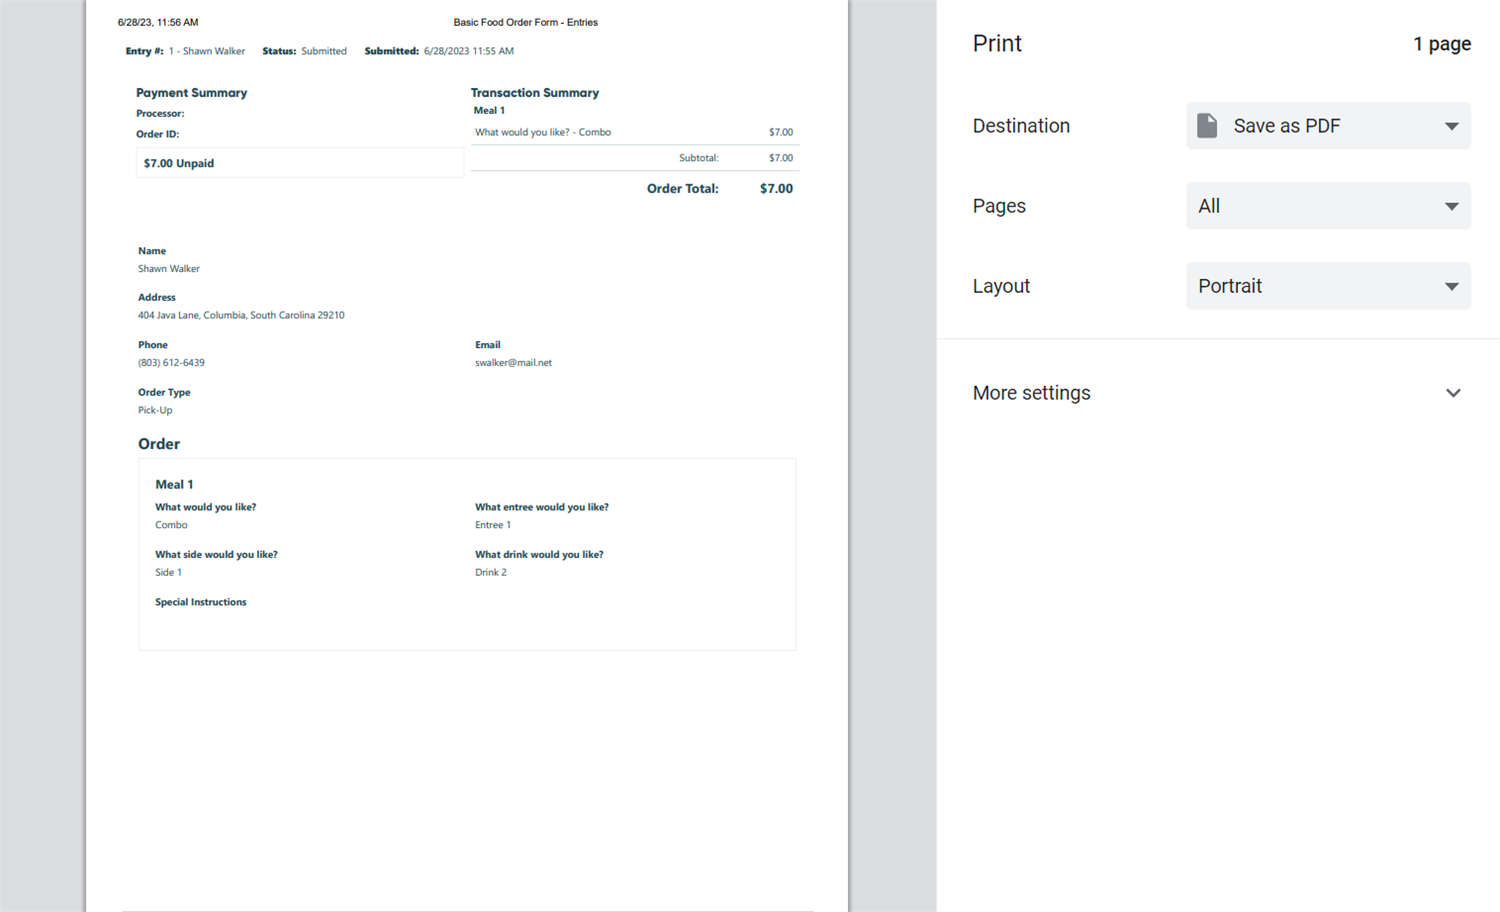
To print an entry:
- Click the form name in the sidebar to open the Entries page.
- Select an individual entry to expand the entry details.
- Click the ellipsis (…) at the top of the entry and select Print.
- Specify your printer settings and print the entry.
Marking entries as Read or Unread
When entries are submitted, they will be initially marked as Unread. Unread entries appear in bold in the entry view. Once you view an entry, that entry automatically changes to Read. You can, however, manually mark entries as Read or Unread as needed. Read and Unread statuses act independently of other entry status options (Incomplete, Submitted, or other custom statuses).
Entries with a status of Incomplete cannot be set to Read or Unread.
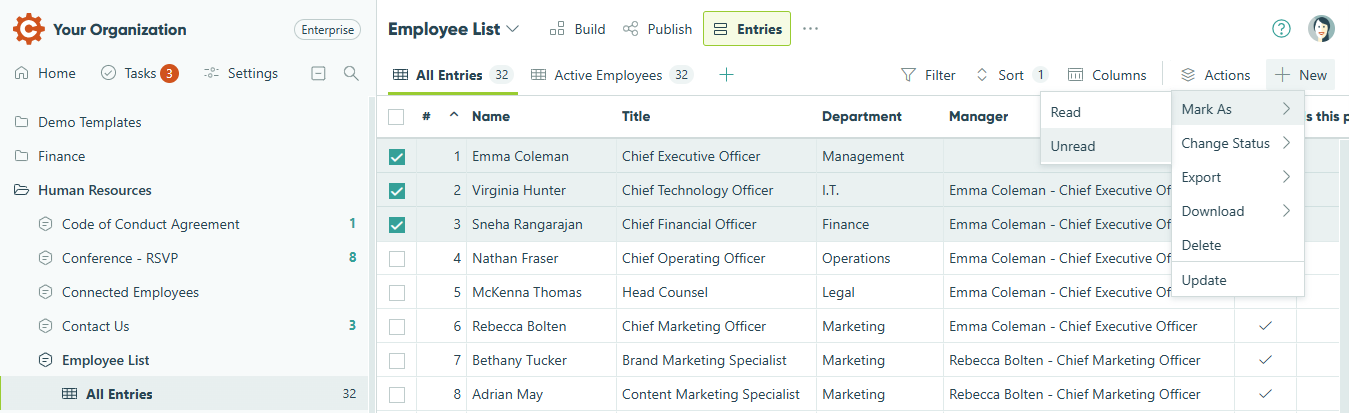
To mark an entry (or entries) as Read or Unread:
- Click the form name in the sidebar to open the Entries page.
- Check the box next to the entry (or entries) that you want to update.
- Open the Actions menu in the top toolbar and click Mark As, then select Read or Unread.
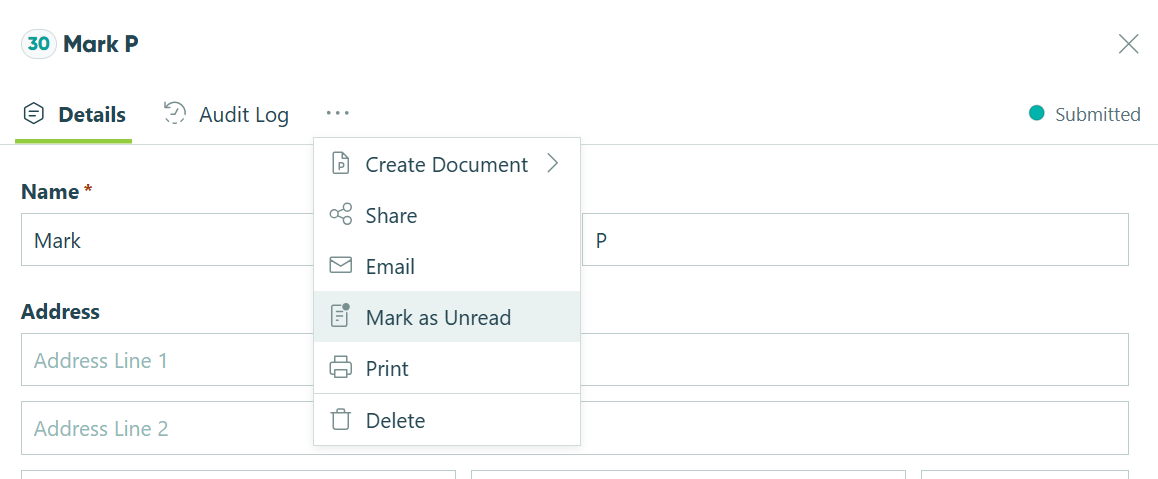
You can also mark an entry as Unread after opening it. Simply click the ellipsis (…) at the top of the entry and select Mark as Unread.
Performing Bulk Actions on entries
You can perform workflow activities on a batch of entries without viewing and processing them individually. These activities include updating entry statuses, sending emails, and/or triggering integrations. Since form rules set by conditional logic still apply when Bulk Actions are run, entries that fall under such rules will not be updated.
Consider using saved entry views to perform Bulk Actions on specific entry data sets.
You can select as many entries as you’d like, however Bulk Actions will run in batches of 100 entries at a time. This means the progress bar that shows while your bulk actions are being performed will notify you when one batch of 100 is completed and ask if you’d like to continue. You’ll also be notified of any entries that have been skipped and need to be manually updated.
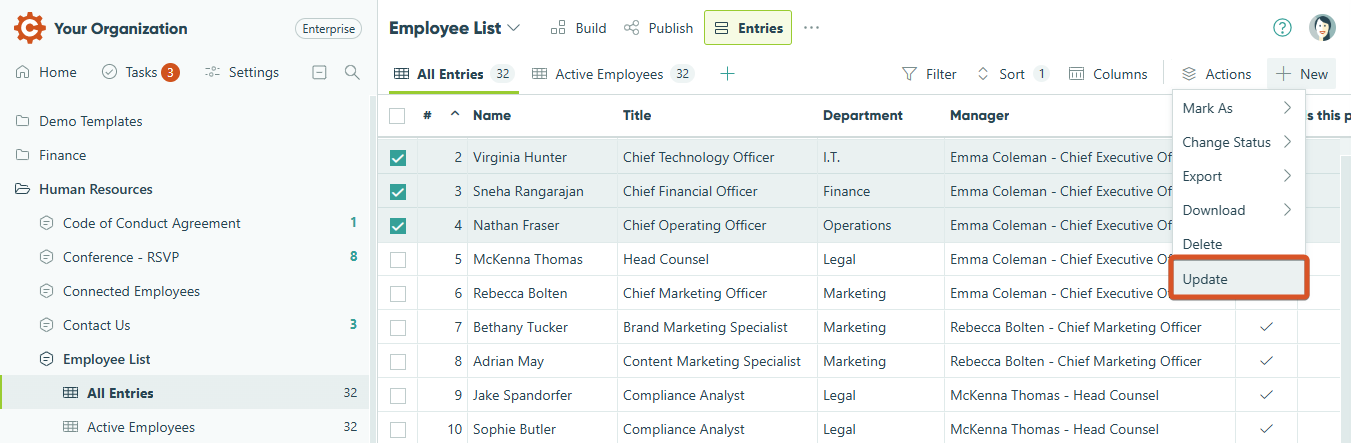
To perform bulk actions in the entry view:
-
Use the checkboxes to the left to select the entries you’d like to perform a bulk action on.
-
Open the Actions menu in the top right toolbar and select an action to perform. You can also right-click any entry to access the Actions menu.
-
A progress bar will show while the bulk action is being performed. You will be notified once the bulk action is completed, and/or if there are any entries that were skipped.
Entry numbers
All Cognito Forms entries automatically have their own unique ID number based on the order that they were submitted in. You can reference this number in calculations and in other places on your form (such as the form confirmation page) using the expression: =Entry.Number
And, not only can you display this number to your users in the form confirmation message/email notifications, you can also use the entry number in calculations to create your own custom ID codes.
Displaying the entry number
In the entry view, you’ll notice a number to the very left of each entry. This unique entry number is generated automatically, starting with 1 and increasing by 1 for each new entry. The entry number is assigned when an entry is first saved or submitted. It never changes, and it will never be reused; even after the entry is deleted.
Additionally, form entries with payment will also generate a separate unique transaction number that corresponds with your payment account. (You’ll need this if you ever make changes to your transactions within your payment account instead of Cognito Forms).
You can reference the form entry number in calculations using the expression Entry.Number. If your calculation is inside a section/repeating section/table, make sure to use =Form.Entry.Number instead.
You can also insert the entry number into the form confirmation page, as well as email notifications.
Confirmation message
To add the entry number to your form confirmation message, open the Action Settings under Workflow menu in your form builder and select the message area. Then, open the Insert Field dropdown and select Entry.Number.
Email notifications
From your Action Settings, open the email notification settings. Then, insert the entry number into the Subject line or the Message of your email using the Insert Field dropdown.
Creating custom IDs
In some cases, your organization may want to create a more customized ID for each entry. For example, let’s say you want to generate a unique voucher code for each submitted form, and each voucher code needs to be at least four characters long (ex: 1001 and 1002 rather than just 1 and 2).
To do this, start by adding a Calculation field to your form labelled “Voucher Code” (or something similar). Make sure to set the field to Internal view only, as the field will initially be blank before the form is submitted. Next, use the following expression as your calculation:
=Entry.Number + 1000
Save your changes. Now, when an entry is submitted, this calculation will simply add 1000 to the existing entry number.
As mentioned in the section above, you can share this code with your users by inserting the Voucher Code calculation field into your form’s confirmation message or in the notification email.
For further customization, you can even add different characters (like letters) to your entry number:
="C" + (Entry.Number + 100000).ToString("D")
Here, we’re using ToString("D") to convert the string to a number. This particular string will generate: “C100001”, “C100002”, “C100003”, etc.
Or, use the DateSubmitted property to display the date the entry was submitted followed by the entry number:
=Entry.DateSubmitted.ToString("yyMMdd") + (Entry.Number.ToString("D"))