Every file your clients upload through a form can go straight to the right Google Drive folder — automatically, with no manual downloading required.
Build Time & Skill
10-15 min
Beginner
What you'll learn
How to connect your form's File Upload field to Google Drive so every submitted file lands in an organized folder, named and sorted automatically based on form data.


Every form collecting files carries a hidden cost. A client submits a copy of their company information or their their photo ID. It lands in Cognito Forms. Then someone on your team downloads it, opens Google Drive, finds the right folder, and re-uploads it. Every time, for every submission.
Cognito Forms’ File Sync feature eliminates that step entirely. Connect your form’s File Upload field to Google Drive one time, and submitted files instantly go where they belong.
This setup works well for teams that:
- Run client intake or onboarding workflows where clients upload documents as part of a multi-step process.
- Share a Google Drive folder across their organization and need submitted files to land there without manual effort.
- Handle high submission volume where moving files one by one creates real bottlenecks.
- Need consistent file organization with folder structures and file names that build themselves from form data.
Understanding File Sync
File Sync is a one-way connection between a File Upload field on your form and a folder in your Google Drive account. When someone submits a form entry, any files they uploaded are automatically copied to your specified Drive folder. No third-party tools, Zapier or Make setups to maintain, or manual steps required.
A few key behaviors to know before you set it up:
- Files are copied, not moved. The original file stays in Cognito Forms. Your Google Drive receives an independent copy.
- Only new files sync on updates. If a client edits their entry and uploads a corrected document, only the new file is sent. The previously synced file stays in Google Drive untouched.
- Deletions don’t carry over. Deleting a file or entry in Cognito Forms has no effect on what’s in Google Drive.
- You control how files are organized. Send files to a fixed folder or build a dynamic subfolder structure that creates itself based on form data (i.e. a folder per client, per date, or per submission type).
Step-by-Step Setup: How to Send Files to Google Drive
Connect your File Upload field to Google Drive by enabling Sync Files to Cloud Storage in the field settings, authorizing your Google account, and configuring how files are named and organized. Once created, the integration is available across your entire organization and other forms can connect to it without re-authenticating.
Step 1: Enable syncing on your File Upload field
Turn on the setting that allows you to connect your File Upload field to your Google Drive account.

To do this:
- Open your form’s Build page and select the File Upload field you want to sync.
- In the field settings, enable Sync Files to Cloud Storage.
- Select Google Drive as your storage provider.
- Authorize access to your Google account when prompted.
Step 2: Choose your destination folder
After authorizing Google Drive, configure where your files will go by selecting the right folder.

To do this:
- Under Connected Folder, select the Google Drive folder where synced files will land. This can be a folder you own or a shared folder, as long as your Google account has editor permissions.
- Optionally, select Change Account to switch to a different connected Google account.
Select a broad, top-level folder here. You’ll define the subfolder structure in the next step using dynamic folder paths built from your form data.
Step 3: Choose which fields to sync
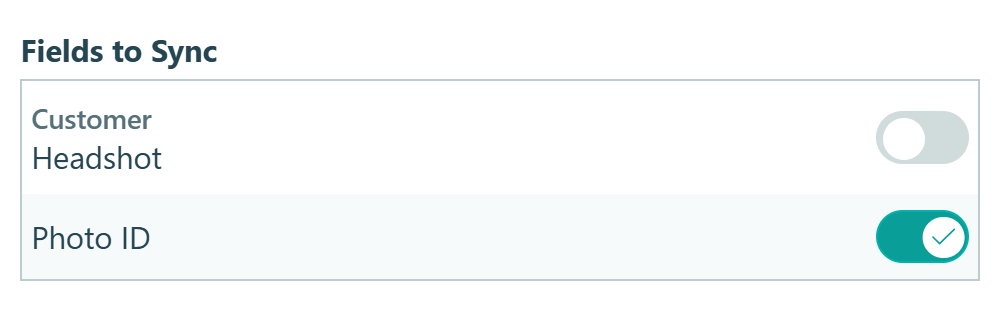
Under Fields to Sync, select which File Upload fields on your form should send files to Google Drive.
- If your form has multiple File Upload fields, you can sync all of them or only specific ones.
- All File Upload fields you choose to sync on a single form must go to the same folder within the same Google Drive account.
- To exclude a specific field, turn off the toggle for that individual field. Files uploaded through that field will continue to be stored in Cognito Forms only.
Once an integration exists, any form in your organization can connect to it, without creating a new integration or re-authenticating your Google account. Just remember, form Administrators can connect forms to an existing integration, but only Organization Administrators can create or delete integrations.
Step 4: Set up dynamic folder paths and file names
This is where File Sync becomes more than a basic upload tool. Instead of sending every file into one flat folder with confusing or unfamiliar file names, you can build a folder structure and file name that write themselves based on the actual data submitted in each entry.
Folder Path defines the subfolder structure inside your connected folder. File Name controls what each synced file is called. Both support tokens, which are placeholders that pull real values from the form at the moment of submission.

A real example
Say you run a client intake process. Clients enter basic information about themselves and upload a photo of their government-issued photo ID. You could configure File Sync like this:
- Folder Path:
Clients/[Client Name]/[Form Name] - File Name:
[Client Name]_[Field Name]_[Entry.DateSubmitted]
When Alia Morrison submits her intake form, her file lands at:
📁 Clients > Alia Morrison > Client Intake Form > Alia Morrison_Photo ID_ 05-14-2026.jpg
No one created that folder. No one renamed the file. The form data did it automatically.
How can I organize my files and folders?
How you configure your path depends on how you want to find files later. Here are a few approaches worth considering:
- Folder Path:
[Form Name]/[Client Name] - Entry [Entry Number] - File Name:
[Field Name] - [File Name]
Every form gets its own top-level folder in Google Drive. Within it, each submission gets a subfolder labeled with the client’s name and entry number. The name makes it easy to identify at a glance. The entry number ensures two clients with the same name never share a folder.
Adding the Field Name to the file name means a single submission including multiple uploads (such as an ID, a signed agreement, and a supporting document), each file lands in the same folder with a name that tells you exactly what it is.
- Folder Path:
Clients/[Email Address] - File Name:
[Form Name] - [Field Name] - [Date Submitted]
If your clients fill out more than one form (like an intake form, a follow-up questionnaire, and a contract), this structure pulls all their uploaded files into a single folder identified by their email address. Every file is named with the form and field it came from, so nothing loses context even though it’s all in one place.
- Folder Path:
[Form Name]/Entry [Entry Number] - File Name:
Entry [Entry Number] - [Field Name]
If your workflow involves sensitive client information and you’d prefer not to surface names or email addresses in folder paths or file names, entry number alone gives you a unique, traceable identifier without including any personal details. You can cross-reference the entry number back to the submission in Cognito Forms at any time.
Managing and Monitoring Your Google Drive Integration
Organization (Global) Administrators can view and manage all active integrations from Organization Settings > Integrations. From there, you can see which forms are connected to each integration, adjust the default folder path and file name, and delete integrations.
How do I confirm a file was delivered?

To confirm a specific file was delivered to your Google Drive:
- Open any entry and expand the Activity Log.
- Look for the Google Drive logo and expand the section.
- Click the section that says File Sync to view detailed information, such as whether the file was delivered successfully, when it was sent, and if any errors occurred.
Additional Features to Explore
File Sync works well on its own, but it becomes even more useful when combined with other Cognito Forms features:
- Show or hide specific File Upload fields based on earlier answers, using Conditional Logic. Clients only see and upload what’s relevant to their situation.
- Send an automatic confirmation email when files are received, so everyone knows the submission went through without following up manually.
- Create a secure document portal. Use Guest Access to give clients a private login where they can submit documents, check their status, and return to upload additional files — without digging through email threads for the right link.
Start Sending Your Files to Google Drive Today
Your form already collects the files, sending them to Google Drive with File Sync makes sure they end up where your team actually works. Set up your Google Drive integration once, configure your folder structure, and let every future submission file itself.
Wherever your workflow collects files today, this is how you stop moving them manually.
FAQ
Files deleted from Cognito Forms are not deleted from your Google Drive account. All files sent from Cognito Forms to Google Drive will stay there indefinitely. If you want to remove a file from Google Drive that has been automatically sent from Cognito Forms, you will need to delete it manually.
All restrictions to the size and type of files and the number of files allowed follow the limits on our File Upload field, which you can read more about on our File Upload Field reference page.
Organization Administrators can create new integrations and delete them. After the integration has been set up, anyone in your Cognito Forms organization who is an administrator on a form, folder, or organization level can connect forms to it.