Under your Payment settings (accessible by clicking Payment in the top toolbar or by clicking on the Payment area at the bottom of the form), there are multiple options to customize your payment setup.

Account
Connect your payment forms to one of our secure payment processors (PayPal, Stripe, and Square). When selecting a payment processor, you’ll be taken to a new window where you can register for a new account or connect your existing account.
You can add any combination of payment processors to the Payment Accounts dialog and use those accounts with any of your organization’s forms. However, you cannot connect more than one account to a single form at a time. Learn more about connecting your payment account.
Our integration with Stripe includes support for Apple Pay and Google Pay. Once you connect your Stripe account to your form, Apple Pay or Google Pay will appear as an option in the payment section. Learn more about accepting payments with Apple Pay and Google Pay.
Process Payment
Using conditional logic, you can opt to set conditions on when payment is required.
- Always – Always collect payment from every customer who submits your form. This option is selected by default.
- When – Only process payment when specific conditions are met. After selecting this option, the Conditional Logic Builder dialog will display allowing you to select when to process payment. You can set multiple conditions within the builder, or you can select the “Advanced Editor” tab to create more complex calculations. Learn more about conditionally requiring payment.
- Never – The form does not collect payment and only issues invoices.
If you’re collecting payment later, you can review the entry after it’s been submitted to collect payment and resolve your transactions. Learn more about collecting payment and managing payment entries.
Keep Card on File
Take advantage of the ability to securely store customer credit and debit cards in Stripe or Square for future use – while staying PCI compliant. Learn more about card on file payments.
- Always – Collect credit card information from every customer who submits your form.
- When – Only collect credit card information when specific conditions are met. After selecting this option, the Conditional Logic Builder dialog will display and allow you to determine when to keep credit cards on file.
- Never – Credit cards are never kept on file. This option is selected by default.
Map Billing Fields (Stripe/Square only)
Mapping your form’s billing fields helps verify a customer’s information and creates a new customer in Stripe or Square when you collect payment. This information will be included on the form confirmation page and email receipt (if email notifications are enabled). Learn more about mapping billing fields.
Include Processing Fees
If the currency of your payment form does not match the currency of your Stripe account, you may be subject to additional conversion fees from Stripe and you will not be able to include processing fees.
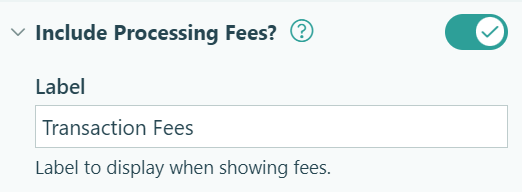
Stripe only: Stripe users on our Individual and Pro plans are charged an additional convenience fee on each successful transaction, in addition to Stripe’s processing fees – 2% on the Individual plan and 1% on the Pro plan. Check this box if you’d like to pass these fees onto your customers, instead of having them subtracted from the original total. You can set a custom label for these fees, or leave the default label of Processing Fees.
Show Subtotal
Check this box if you’d like to show the subtotal and any applicable fees at the bottom of your form. This option is selected by default.
Show Line Items
Line items represent the individual fields on your form you are charging for. Line item labels are pulled from information on your form. For Choice fields, the line item name will match the field label, and the line item description will match the option chosen. For Yes/No and Currency fields, the line item name will match the field label, and there will not be a line item description. For Price fields, you can specify the line item’s name and description in the Field Settings.
Check this box if you’d like to show the individual line items and amounts at the bottom of your form and on your customer’s receipt. This option is selected by default.
Additional Fees
You can also include additional fees for each transaction. These fees will appear after the subtotal, at the bottom of the form, and on your customer’s payment receipt. You can either set a fixed amount in the box marked with a dollar sign ($) or a percentage of the subtotal in the box marked with a percent symbol (%). Click the plus sign (+) to add multiple fees, or the trash can to remove them. Any fields left blank will not appear on your form.