Creating a new payment form
To create a new payment form:
- Log in to your Cognito Forms account.
- Select the + New button in the bottom left corner or go to the New Form section on the Home page. From here, you can create a new form from scratch, or choose a pre-built template.
- Some templates already have payment fields: Basic Food Order Form, Basic Sales Form, Catering Deposit, Donation, Membership Dues, and Parking Ticket Payment.
Adding payment to an existing form
After logging into Cognito Forms, click the name of the existing form you want to collect payment from. You can choose from one of four field types to collect payment:
- Choice
- Yes/No
- Currency
- Price
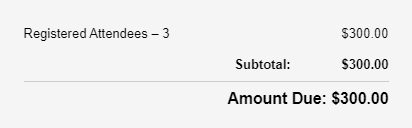
The currency of your form’s Payment fields will be determined by the location settings of your form and/or organization. If you have more than one field on your form that is collecting payment, the amounts from each field will be added together and used for the subtotal.
Payment fields
Hidden payment fields (set to Internal or Never view) still contribute to the order total on a payment form.
If you have a rather large inventory, save time by copying your list from Word, Excel, etc. and then pasting it into the first choice option line. The list will instantly populate down with all of your items.
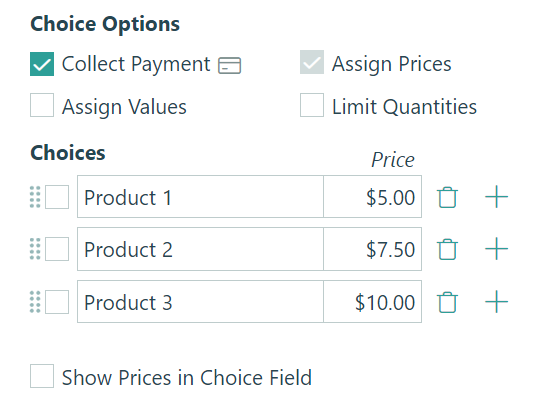
Assign prices and values, calculate charges, and limit quantities from the Choice Options section in your Choice field settings.
Collect Payment: This option allows you to connect your form to one of our fully integrated payment processors. Once your form is connected to your payment account, a list of charges and additional fields for collecting credit card information will automatically appear at the bottom of your form.
Assign Prices: This option allows you to specify a price for each item. These prices will appear in whichever currency is selected in your form settings.
Limit Quantities: This option allows you to limit the number of times a specific choice option may be selected based on available quantity. Learn more about creating a product inventory with limited quantities.
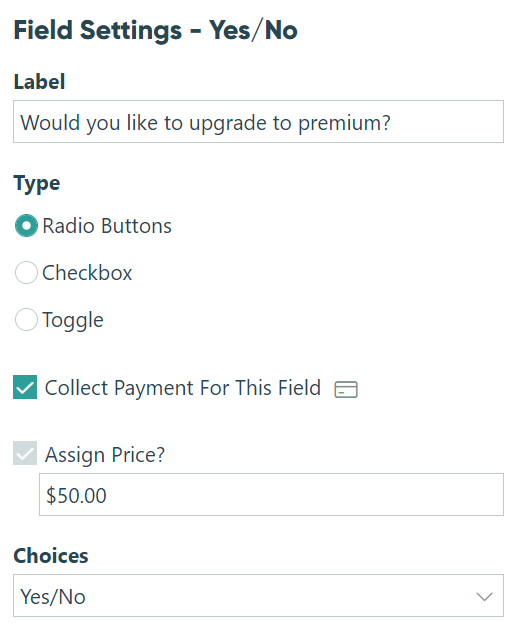
Assign prices and calculate charges using yes/no options from radio buttons, a checkbox or toggle.
A charge will only occur when a user selects the value that makes the statement true. For example, if you use the field to ask if a user would like to upgrade to a higher quality item, they will only be charged if they select “yes”.
In this example, “yes” is our true value and “no” is our false value. Now, if it is true that the user would like to upgrade to premium, they are charged the $50 you set as the upgrade price.
You can set the field to default to the true or the false value, but charges will still only occur when the true value is selected.
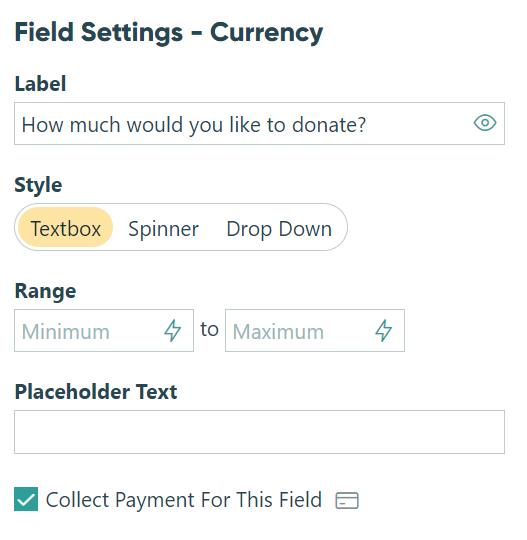
Allow users to specify the amount they would like to be charged, such as for donations.
If you’d like to collect custom payments from each user, add a Currency field and check “Collect Payment for This Field.” The amount entered by the user when they fill out the form is the amount they will be charged. You can set a default or suggested value for this field, but users will still be able to modify the amount.
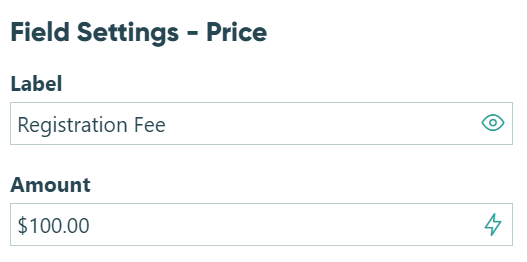
Use the Price field to set a fixed price item, or create calculations that result in a charge, like additional quantities.
The Price field always collects payment, so it will automatically prompt you to connect with your payment account, if you haven’t already done so. Then you’ll need to set the amount to be charged, whether it’s a fixed price or determined by calculating the results of other fields.
| Fixed Amount | Calculated Amount |
|---|---|
 |
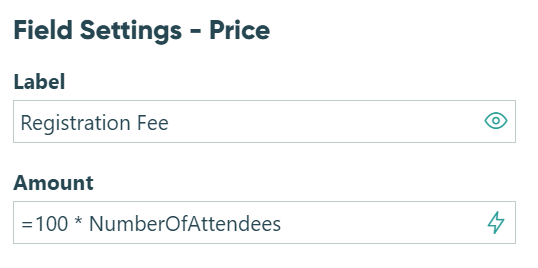 |
For help setting up calculations, you can always click the orange lightning bolt.
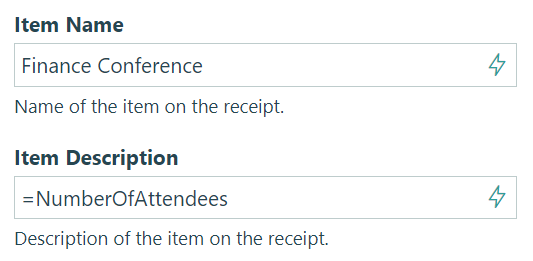
In addition to setting the amount, you also have the option of setting the item name and description as it will appear on the user’s receipt. These can be fixed labels, or you can use calculations to pull data from other fields.
| Fixed Label | Result |
|---|---|
 |
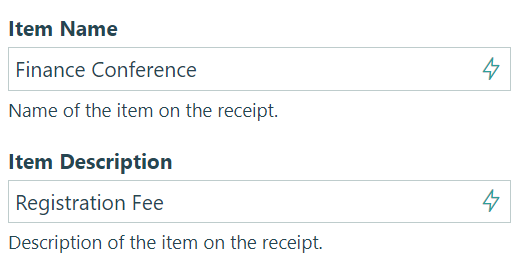 |
| Calculated Label | Result |
|---|---|
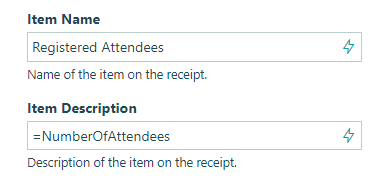 |
 |
Calculating quantities
Let’s say you want to sell boxes of cookies online. You could set up a Choice field with all your cookie varieties, then a Number field where users can enter the number of boxes they’d like to purchase (let’s call that field ‘How many boxes?’).
First, you’ll need to assign prices to each cookie variety:
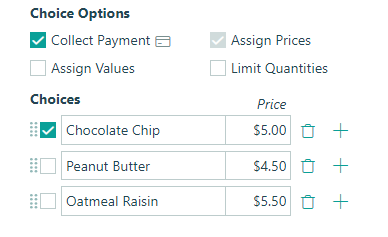
Next, find the Specify Quantity option in your Choice field settings, and select the ‘How many boxes?’ field. Now, the product price will automatically be multiplied by the specified quantity. You can also put these fields into a repeating section to allow users to order multiple boxes of different varieties of cookies — like 3 chocolate chip, 4 peanut butter and 2 oatmeal raisin.
Setting a minimum purchase amount
To require a minimum purchase amount on your order form:
-
Add a Calculation field toward the bottom of your form labelled ‘Final Total’. Set the field type to Currency.
-
Create a calculation to generate the subtotal. You will need to add up all the payments fields on your form (ex:
=PaymentField1 + PaymentField2 + PaymentField3). If your payments fields are inside a repeating section, you can use the Sum function to generate the total (ex:=MyOrder.Sum(Quantity*Product_Price)). -
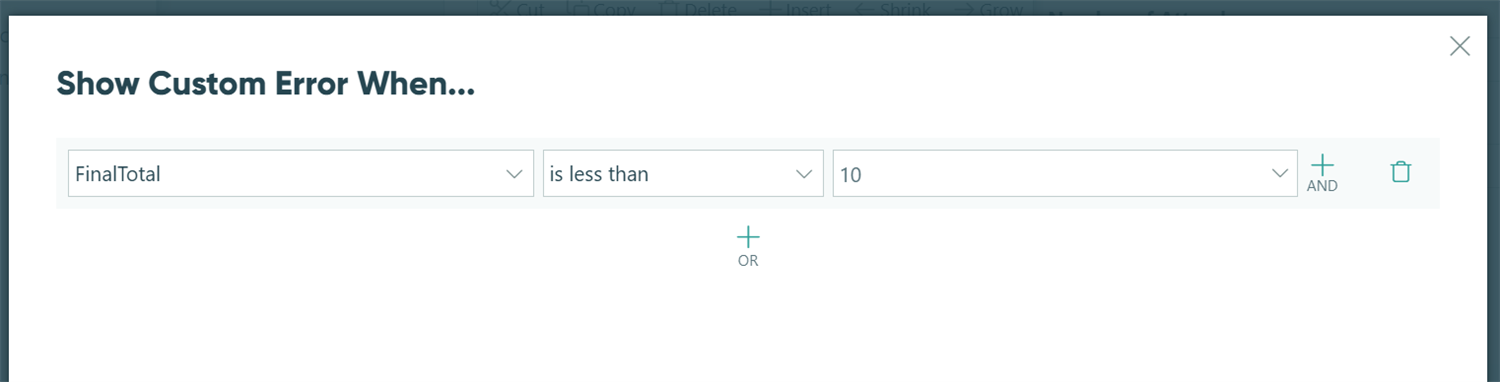
Select the Custom Error option, and set an error to appear when the total price is less than the minimum purchase amount (ex: $10):
-
Make sure to include a custom error message (ex: “Order total must be at least $10.”).
-
Save your form.
Check out our pre-built template to see this calculation in action!