Once Guest Access is enabled, you can add guests to your organization in two ways: by creating guest lists or by sharing authenticated Workflow or Save & Resume links.

Creating Guest Lists
Guests marked as active on a guest list can securely log in to your organization by visiting: https://www.cognitoforms.com/yourorganizationname
Replace ‘yourorganizationname’ with your organization’s Cognito Forms URL – you can find this in your browser’s address bar when logged in to your organization.
You can create guest lists to add guests to your organization. These guests can log in even if no specific entries have been shared with them.
Follow these steps to create guest lists for your organization:
-
Enable Guest Access for your organization.
-
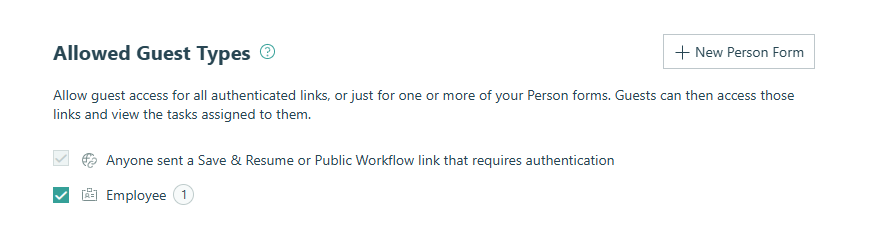
In the Allowed Guest Types section, click + New Person Form. Alternatively, you can click the + New button in the bottom left corner of the sidebar and select Person Form.
-
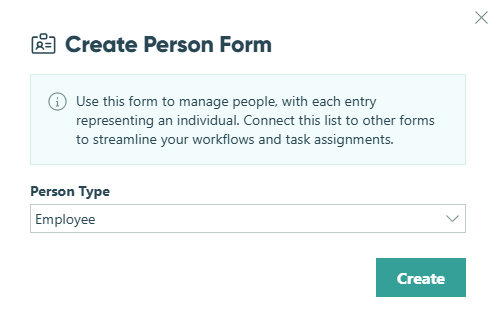
In the dropdown, enter or select a person type (like Client, Employee, or Patient) and click Create.
-
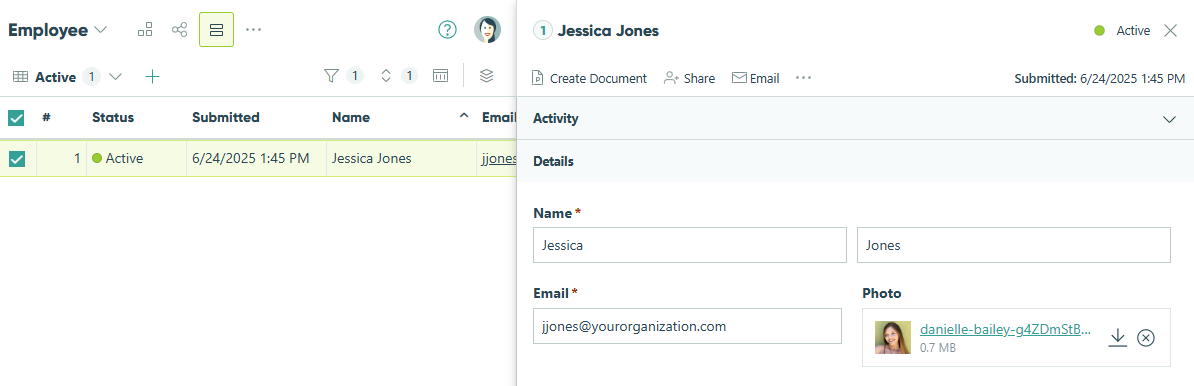
By default, the form should include fields for Name, Email, and IsActive. IsActive can be a Yes/No field or a Calculation field set to the Yes/No type, and it determines which guests are active and able to log in.
-
In the form’s Settings, turn on Use with Person Field. When prompted, map the Name, Email, and Is Active? fields to the corresponding fields on your form. If you don’t map an Is Active? field, all entries in this form will be treated as active guests by default.

-
Optionally, check one of the following options:
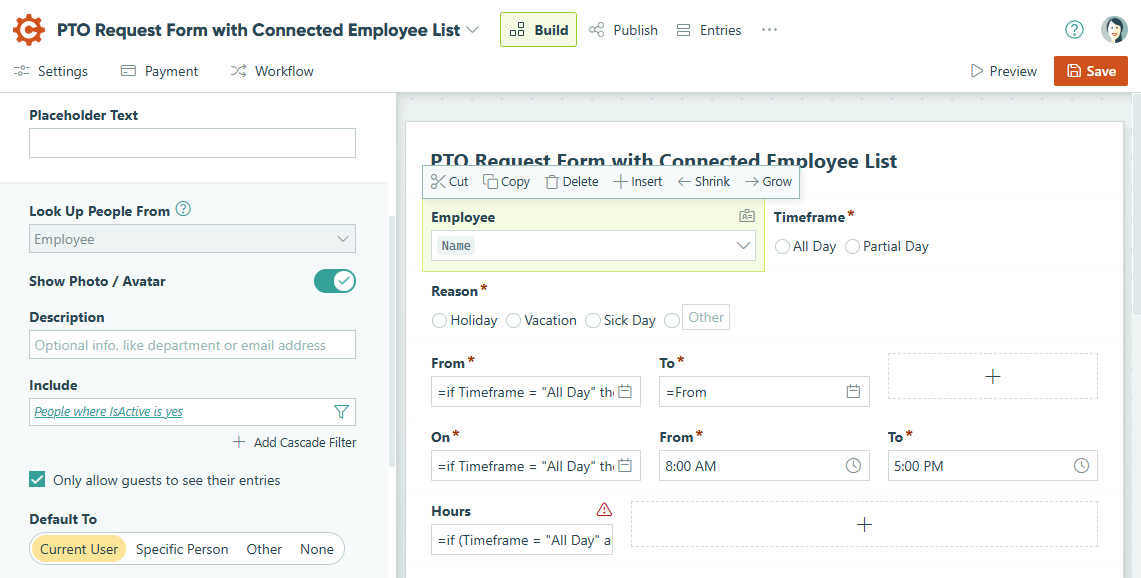
- Only allow guests to view entries shared with them? When this option is selected, any Person fields connected to this form will only display dropdown choices for entries that have been shared with the guest. Entries that the guest doesn’t have access to won’t appear in the dropdown.
- Allow guests to edit their profile? Let guests update their own profile information. When enabled, guests can click their profile image in the top right corner of the portal and select Edit Profile to update any fields on their profile entry that are visible to the Public role.
-
Check Allow people to log in as guest users? to activate this guest list. This is essentially the same as selecting this Person Form under Allowed Guest Types in the Guest Access settings.
Please note: Checking this box means all guests marked as active in this form will count toward your monthly guest usage and be billed automatically. See pricing details for more information.
-
Add each guest as a new entry in this form. If your form includes an Is Active? field, be sure to set it to Active for any guests you want to allow to log in. You can also share the form’s public link to let guests submit an entry themselves – this is a convenient way to let new guests add themselves to your guest list.
What happens next:
After setting up your guest list, the Person Form will appear under Allowed Guest Types in your Guest Access settings. To discontinue Guest Access for the guests on your Person Form, simply deselect the form name.
You can now use Person fields on other forms and connect them to your guest list, automatically populating guest details like names, emails, photos, and more.
Sharing Authenticated Links
In addition to guest lists, you can share authenticated Workflow or Save & Resume links directly with guests. This allows people outside your organization to securely access specific entries without being added to a guest list.
Similar to people on a guest list, you can manage these guests (Type: Link) from the table at the bottom of the Guest Access settings.
![]()
Guest Authentication for Save & Resume links
Save & Resume links are generated automatically when someone saves an incomplete form.
You can require guests to verify their email before accessing Save & Resume links:
- Enable Guest Access for your organization.
- Go to your form’s Build page and open the Workflow settings.
- Under Save & Resume, set Require Authentication to Always.

What happens next:
Guests will be prompted to enter a one-time verification code sent to their email address before they can access the link.
For Cognito Forms users in your organization, anyone accessing a Save & Resume link will need to log in with their organization account to open the link.
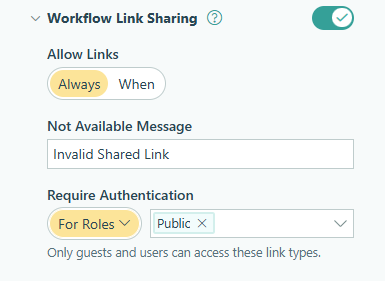
Guest Authentication for Workflow links
Guests can only open Workflow links shared with them in the Public role.
Workflow links are sent through email notifications or can be manually sent from the Entries page.
You can require guests to verify their email before accessing public Workflow links:
- Enable Guest Access for your organization.
- Go to your form’s Build page and open the Workflow settings.
- Under Workflow Links, set Require Authentication to either Always or For Roles – Public.
What happens next:
Guests will be prompted to enter a one-time verification code sent to their email address before they can access the link.
For Cognito Forms users in your organization, anyone accessing a Workflow link in the Public role will need to log in with their organization account to open the link.