With Guest Access, you control which forms and entries guests can view, submit, or update within your organization.
Let Guests Log In to Submit Forms
Use this setup when you want guests to log in to your organization and regularly submit forms.
-
Enable Guest Access and set up at least one guest list. (See Creating Guest Lists.)
-
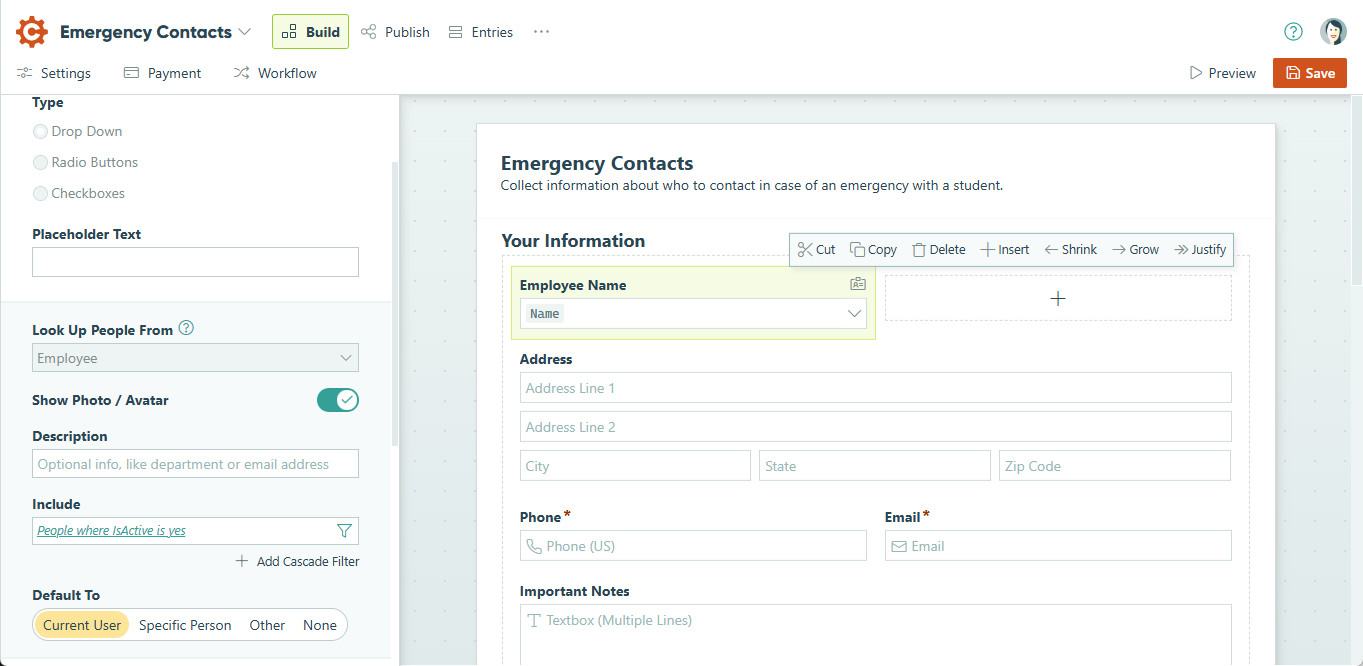
Choose the form you want guests to submit and open the Build page. Add a Person field linked to a Person Form that’s activated as a guest list.
-
In the Person field settings, select Default To – Current User.
-
Open the form’s Workflow settings.
-
Under Public Links, set Require Authentication to Guests & Users.

-
Save your changes, then go to the form’s Entries page.
-
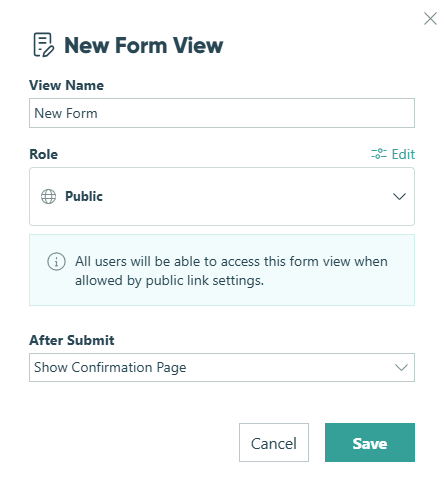
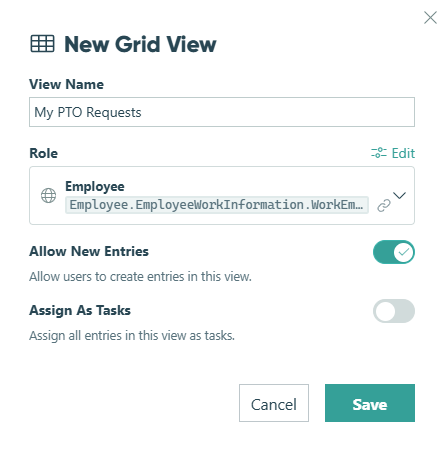
Click the plus sign (+) at the top of the Entries page to create a New Form View.
-
Assign the Public role to the view so guests can access and submit new entries.
What happens next:
Guests marked as Active on the connected guest list can log in and create new entries from this view. Each entry they submit will automatically link to them through the Person field.
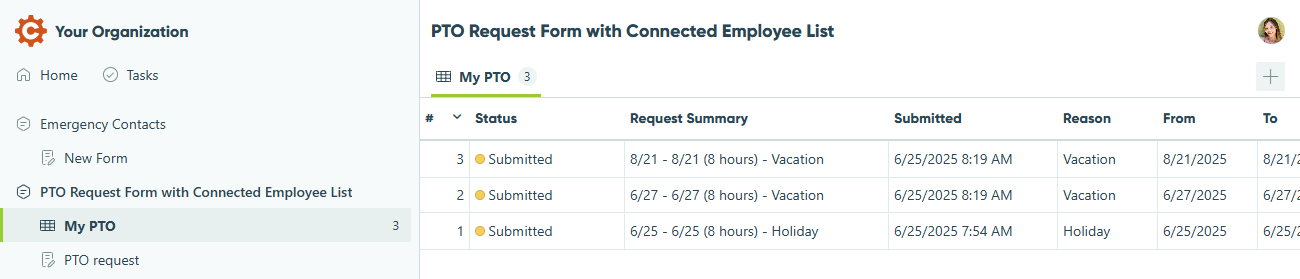
You can optionally redirect guests to a Grid View (like “My PTO Requests”) after submission so they can review or update their entries as needed.

Let Guests Log In to Manage Entries
Guests can only see and update entries that have been shared with them in the Public role.
Use this setup when you need guests to log in and manage specific entries assigned to them.
-
Enable Guest Access.
-
Choose the form you want guests to access and open the Build page.
-
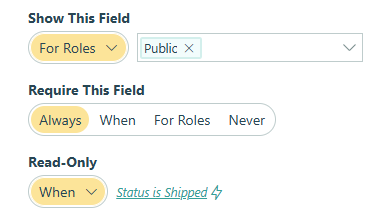
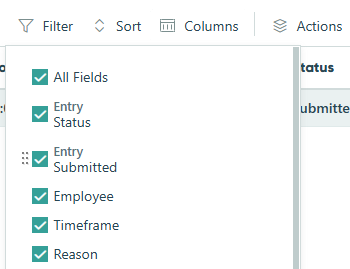
If needed, update the Show This Field and Read-Only settings on each field to control which fields guests can see and update when viewing their entries. You can adjust these settings specifically for the Public role.
-
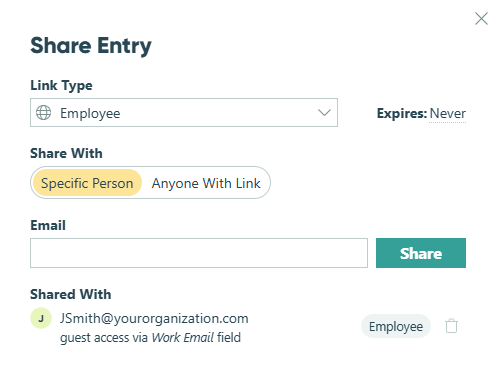
Share entries with guests in the Public role by either:
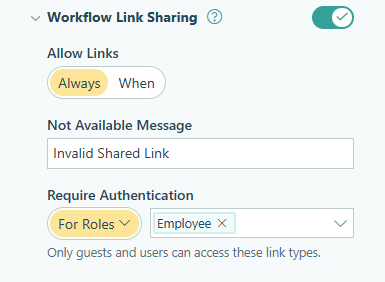
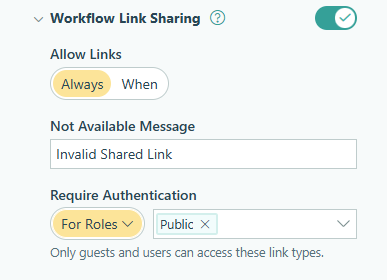
- Sending authenticated Save & Resume links or Workflow links. To enable these, open the form’s Workflow settings. Under Save & Resume, set Require Authentication to Always. Or, under Workflow Links, set Require Authentication to either Always or For Roles – Public.
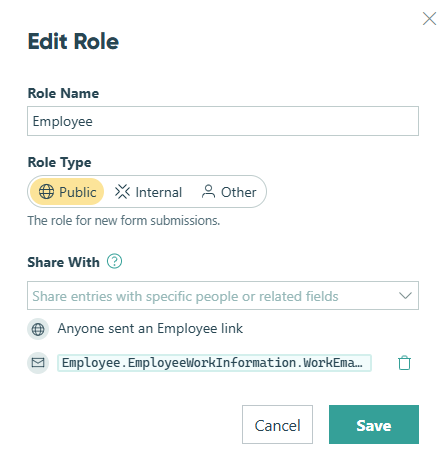
- In the settings for the Public role (in this example, the Employee role), under Share With, select an Email field or a Person field on your form to identify your guest.
- Sending authenticated Save & Resume links or Workflow links. To enable these, open the form’s Workflow settings. Under Save & Resume, set Require Authentication to Always. Or, under Workflow Links, set Require Authentication to either Always or For Roles – Public.
-
Save your changes, then go to the Entries page.
-
Click the plus sign (+) at the top of the Entries page to create a Grid View or Task View in the Public role.
-
If needed, hide or filter out any data you don’t want guests to see — guests will see all visible columns by default.
What happens next:
Guests will only see and update entries specifically shared with them in the Public role. Even if the entry view displays all form entries, each guest will only see their own assigned entries.
To check which guests have access to an entry, open the entry and use the Share option to view who it’s been shared with in the Public role (in this case, the Employee role).
Let Guests Log In Without a Guest List
Guests who aren’t on a guest list can still log in and access shared entries as long as they have at least one authenticated Save & Resume or Workflow link sent to them and there’s a Public role view available for that form.
Use this option when you want to grant access without maintaining a guest list.
-
Enable Guest Access.
-
Choose the form you want guests to access and open the Build page.
-
If needed, update the Show This Field and Read-Only settings on each field to control which fields guests can see and update when viewing their entries. You can adjust these settings specifically for the Public role.
-
Share entries with guests in the Public role by either:
- Sending authenticated Save & Resume links or Workflow links. Save & Resume links are generated when someone saves your form. You can share Workflow links through email notifications or manually from the Entries page.
To enable these, open the form’s Workflow settings. Under Save & Resume, set Require Authentication to Always. Or, under Workflow Links, set Require Authentication to either Always or For Roles – Public.
- Sending authenticated Save & Resume links or Workflow links. Save & Resume links are generated when someone saves your form. You can share Workflow links through email notifications or manually from the Entries page.
- In the settings for the Public role (in this example, the Employee role), under Share With, select an Email field or a Person field on your form to identify your guest.

- Save your changes, then go to the Entries page.
- Click the plus sign (+) to create an entry view (Grid, Task, or Form View) in the Public role.
- If needed, hide or filter out any data you don’t want guests to see — guests will see all visible columns by default.
What happens next:
When guests open an authenticated Save & Resume or Workflow link sent to them, the entry will open automatically after they verify their email address and log in.
Guests can also log in directly at your organization’s Cognito Forms URL (example: https://www.cognitoforms.com/yourorganizationname) as long as they have an entry shared with them and the form has an entry view available for the Public role.