Automate your approval process so every expense gets reviewed, tracked, and resolved – without manual follow-up or missed steps.
Build Time & Skill
15 min
Beginner
What you'll learn
How to build a multi-role expense report approval workflow with automated email notifications and status tracking at every stage.

Every business has approval processes – expense reports, purchase requests, time-off requests. Without automation, these workflows rely on email chains, manual follow-ups, and spreadsheets that are hard to track. With Cognito Forms, you can build a structured approval workflow that moves entries through each stage automatically, notifies the right people at the right time, and gives everyone clear visibility into where things stand.
This guide uses an expense report as the example, but the same approach applies to any approval process your team runs. By the end, you’ll have a workflow that:
- Keeps employees informed. Automatic email notifications confirm submissions and communicate approvals or denials instantly.
- Gives managers clear action items. A secure workflow link takes managers directly to the entry they need to review – no login required.
- Tracks every stage automatically. Status changes keep your team aligned without manual updates or check-in emails.
- Closes the loop for Accounting. A dedicated role and action ensure reimbursements are logged and marked complete.
Step-by-Step: Building Your Expense Report Approval Workflow
The steps below walk you through setting up Roles, Statuses, and Actions for a three-role expense report workflow. You’ll also configure automated email notifications so every participant is kept in the loop without any manual effort.
Step 1: Set Up Your Roles
Start by assigning a role to each person involved in your workflow – roles are the foundation of your workflow that everything else is built on. Once they’re set up, you’ll reference them in nearly every other setting.
- Open your form and navigate to Workflow on the Build page.
- Click Roles.
- Add the following three roles:
| Role | Role Type | Who It Represents |
|---|---|---|
| Employee | Public | The person submitting the expense. |
| Manager | Other | The person reviewing and approving or denying. |
| Accounting | Internal | The admin team processing reimbursements. |

Step 2: Customize Your Statuses
Statuses track where each entry is in the approval process. Customize them to reflect the stages of your expense report workflow.
- In Workflow, click Statuses.
- Add or rename statuses to match the following:
| Status | What It Means |
|---|---|
| Incomplete | Default status – expense has not been submitted yet. |
| Submitted | Employee has submitted the expense for review. |
| Approved | Manager has approved the expense. |
| Denied | Manager has denied the expense. |
| Completed | Accounting has processed the reimbursement. |

Step 3: Configure Your Actions
Actions are where your approval logic comes together. Each Action controls who can trigger it, what status it moves the entry to, and who gets notified. Your expense report workflow needs five Actions.
Submit Action
The Submit Action starts the workflow. Employees use it to send their expenses for manager review. It also allows denied expenses to be corrected and resubmitted.
-
Open the Submit Action in Workflow > Actions.
-
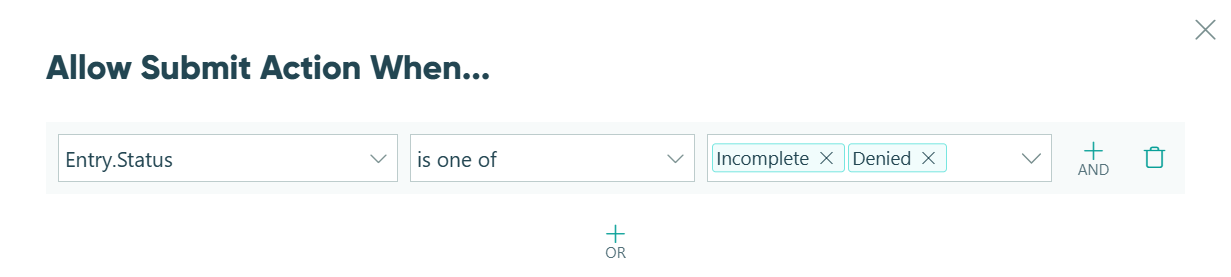
Under Allow Action, select When and set the condition:
=(Entry.Status = "Incomplete") or (Entry.Status = "Denied"). This ensures employees can only submit at the start of the workflow or after a denial.
-
Under Change Status To, select Submitted.
-
Under Send Emails, create two email notifications:
- Email 1 – Employee Confirmation: Set To using Insert Field to pull the employee’s email from the form. This confirms their submission was received.
- Email 2 – Manager Notification: Set To to the manager’s email address. Click Share Workflow Link and select the Manager Role. This gives the manager a direct link to review the entry and take action.

The Manager Workflow Link is role-specific — when the manager clicks it, they see the form with Manager permissions, including the Approve and Deny Actions. Employees will never see those buttons.
Approve Action
The Approve Action is available only to managers and admins on submitted entries.
-
Create a new Action and name it Approve.
-
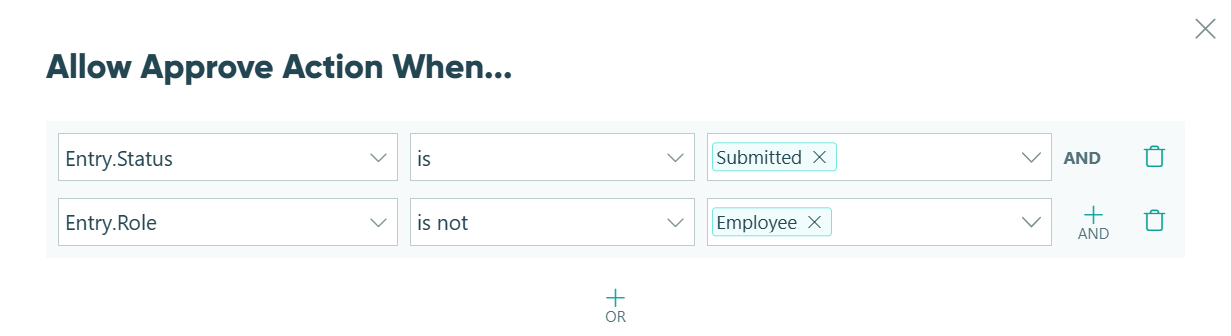
Under Allow Action, select When and set the condition:
=(Entry.Status = "Submitted" and Entry.Role != "Internal"). This prevents employees from approving their own expenses.
-
Under Change Status To, select Approved.
-
Under Send Emails, create one email notification:
- Email – Employee Approval Notice: Use Insert Field to pull the employee’s email. Let the employee know their expense has been approved.
Deny Action
The Deny Action follows the same logic as Approve, but routes the entry back to the employee for corrections.
- Create a new Action and name it Deny.
- Under Allow Action, select When and set the condition:
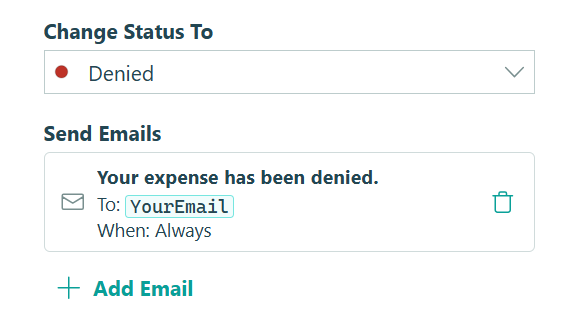
=(Entry.Status = "Submitted" and Entry.Role != "Employee"). - Under Change Status To, select Denied.
- Under Send Emails, create one email notification:
- Email – Employee Denial Notice: Use Insert Field to pull the employee’s email. Click Share Workflow Link and select the Employee Role so the employee can return to their entry, make corrections, and resubmit.
- Email – Employee Denial Notice: Use Insert Field to pull the employee’s email. Click Share Workflow Link and select the Employee Role so the employee can return to their entry, make corrections, and resubmit.
Consider adding a “Denial Reason” text field to your form and making it visible only when =(Entry.Status = "Denied"). This gives managers a place to explain the denial, and gives employees the context they need to resubmit correctly.
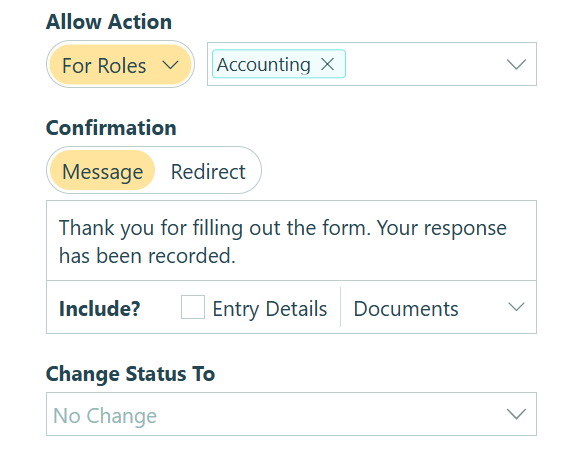
Pay Action
The Pay Action marks the end of the workflow. Only Accounting can trigger it, confirming that reimbursement has been processed.
- Create a new Action and name it Pay.
- Under Allow Action, select For Roles and check Accounting. Only Accounting admins will see this button.
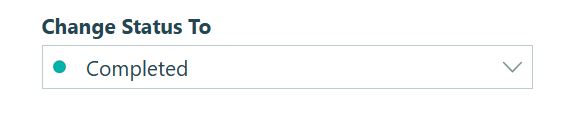
- Under Change Status To, select Completed.
Update Action
The Update Action gives Accounting admins the flexibility to edit an entry at any point in the workflow — useful for correcting errors or adding internal notes during processing.
- Create a new Action and name it Update.
- Under Allow Action, select For Roles and check Accounting.
Note: Unlike the other Actions, Update does not change the entry’s status. It simply allows Accounting to save edits without moving the workflow forward.
Step 4: Refine Your Form Fields
With your Roles, Statuses, and Actions in place, fine-tune your form fields to match the workflow logic.
Lock expense details after submission
Make fields like expense amount, date, and description Read-Only once an entry is submitted. This prevents employees from changing details while a manager is reviewing.
- Select the field and open Field Settings.
- Under Read-Only, select When and set the condition:
=(Entry.Status != "Incomplete" and Entry.Status != "Denied").
Show internal fields only to the right roles
Fields like internal notes or reimbursement references should only be visible to Accounting.
- Select the field and open Field Settings.
- Under Show This Field, select For Roles and check Accounting.

Show a Denial Reason field only when relevant
If you added a Denial Reason field, hide it until it’s needed.
- Under Show This Field, select When and set the condition:
=(Entry.Status = "Denied").
Additional Features
Once your approval workflow is running, these Cognito Forms features can take it even further:
- Task Views. Create a filtered Task View for Accounting that shows only entries in “Approved” status — so they always know exactly which expenses are ready to process.
- Document Generation. Automatically generate a PDF expense report when an entry is approved, ready to attach to your records or send to employees.
- Audit Log. Every status change, Action taken, and field edit is automatically logged. Use the Audit Log to review the full history of any expense entry.
- Automated Reminders. Set up reminder emails in your workflow to nudge managers if a submitted expense hasn’t been reviewed within a set timeframe.
Start Building Your Approval Workflow Today
A well-built approval workflow removes the friction from routine processes — no more chasing managers for responses or wondering if an expense was ever reviewed. With Roles, Statuses, and Actions working together, Cognito Forms automatically handles routing, notifications, and tracking. Build your expense report workflow today and see how much time your team gets back.
For more help with Workflow features, visit our Workflow help section.
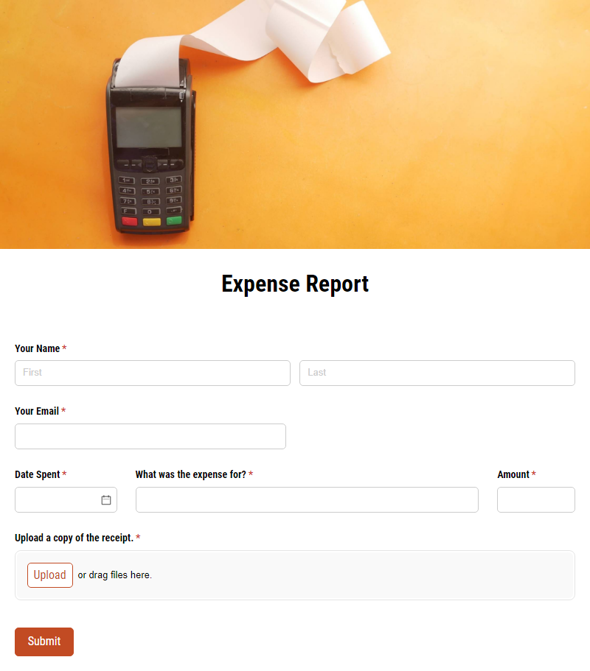
Expense Report Form
- Auto-sends email notifications at every stage
- Routes submissions from employee → manager → accounting
- Fully customizable, with built-in receipt image upload
FAQ
Yes. When you configure the Submit Action with the condition =(Entry.Status = "Incomplete" and Entry.Status = "Denied"), employees can return to their entry and resubmit after a denial. Include an Employee Workflow Link in your denial email so they can access their entry directly. Any fields you’ve made Read-Only after submission will need to be editable again for denied entries – use =(Entry.Status != "Incomplete" and Entry.Status != "Denied") as your Read-Only condition.
Yes. Add a new Role (like “Finance Director”), a new Status (like “Pending Final Approval”), and a new Action that moves entries from “Approved” to “Pending Final Approval.” Configure the second approval Action to allow only the Finance Director Role, and set up a Workflow Link email to notify them when the first approval is complete.
To learn more, check out our comprehensive guide: How to Set Up Approval Workflows with Multiple Approvers.
Yes. Set up a scheduled reminder email in your workflow triggered when =(Entry.Status = "Submitted") after a set number of days. This automatically nudges managers without any manual follow-up on your part.