Build a professional registration form in minutes. Collect sign-ups, accept payments, and send automatic confirmations, all without writing a single line of code.
Build Time & Skill
15-20 min
Beginner
What you'll learn
How to build a registration form that collects sign-ups, optionally accepts payment, and automatically sends confirmation messages to registrants
Whether you’re organizing a workshop, enrolling clients in a program, or signing up participants for an event, a registration form is often the first step in your relationship with customers. A good registration form makes sign-ups easy and puts all the information you need in one organized place, without a single back-and-forth email.
With Cognito Forms, you can build a complete registration form from scratch in minutes. When registrations come in, your form can automatically:
- Confirm every sign-up instantly. Send registrants a personalized confirmation the moment they submit, so they know their spot is secured.
- Keep your team in the loop. Trigger internal notifications whenever a new registration comes in, so no one misses a beat.
- Collect payment upfront. Charge registration fees or program costs or collect deposits directly on the form, with no separate invoicing tool needed.
- Organize everything in one place. Every registration is stored in your Entries page, ready for you to filter, export, or act on.
Step-by-Step: Building Your Registration Form
Build your form in four steps. Add your fields, optionally collect payment, set up confirmation messages and email notifications, then test and share. Each step is self-contained, so you can move at your own pace and revisit any section as your needs change.
Step 1: Build your form
Your form’s fields are the foundation of the entire registration experience. The goal is to collect only the information you actually need (like contact details, session preferences, and any program-specific questions). Keeping it short and focused makes it easier to complete and leads to higher submission rates.

Create a new form
- Log in to your Cognito Forms account (or sign up for a free trial if you’re new).
- Click + New Form to create a form from scratch, browse templates to start with a pre-built structure, or try out our AI form-generator for a personalized starting point.
- Give your form a clear, descriptive name (for example, “Summer Camp Registration” or “Workshop Sign-Up”).
Add your fields
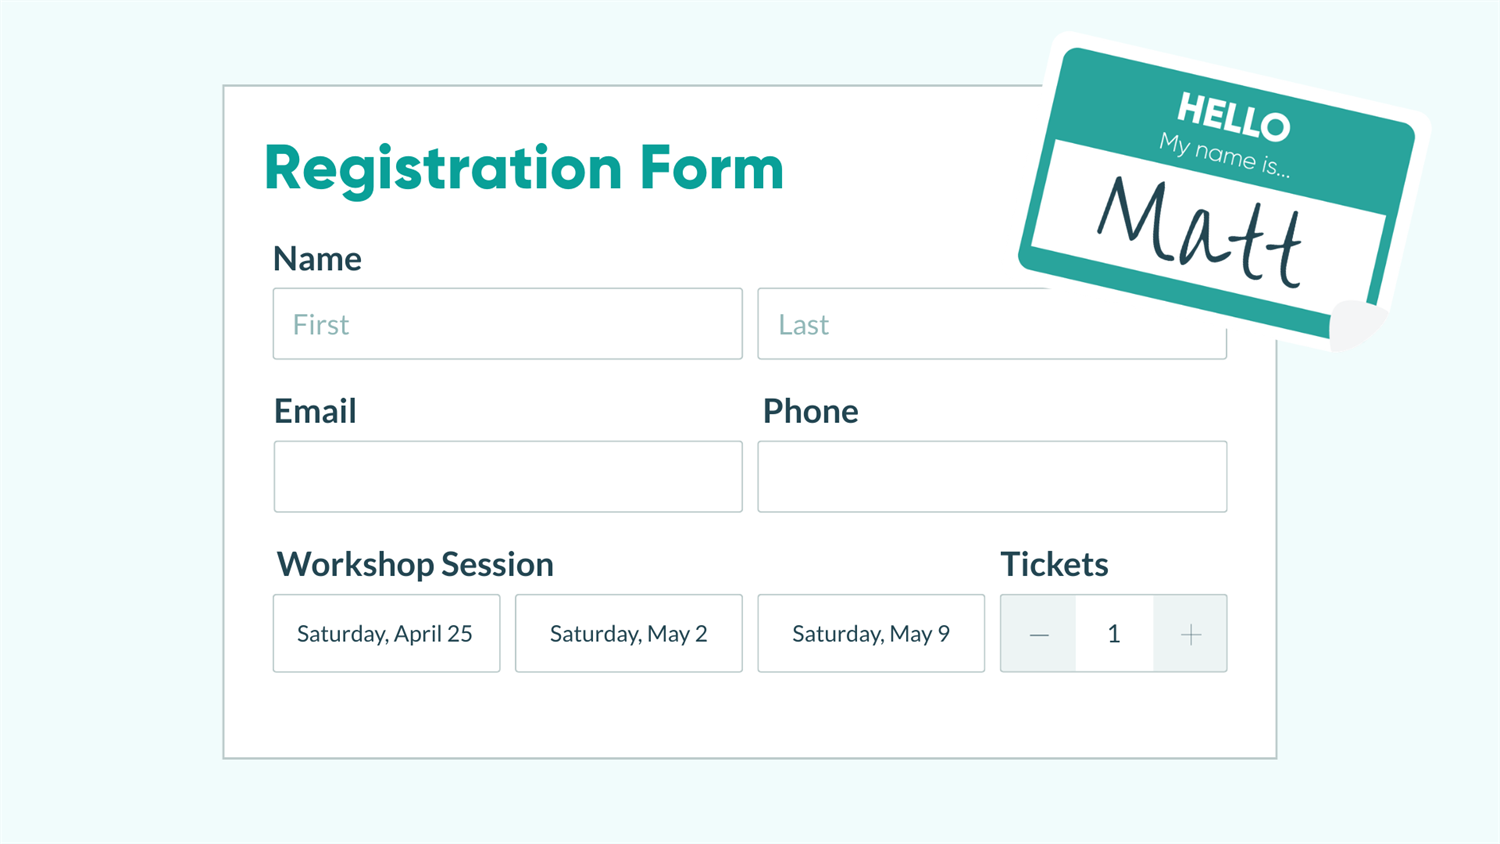
On the Build page, drag and drop fields to build out your form. A standard registration form typically includes:
- Name: Use a Name field to collect first and last names separately and ensure that they’re easy to sort.
- Email: Required for confirmations. Use an Email field so Cognito Forms can validate the format.
- Phone: Optional depending on your use case, but useful for time-sensitive programs.
- Date or Session Selection: Use a Date field or a Choice field to let people select the event date, time slot, or program session they’re registering for.
- Number of Attendees: If registrants can bring guests or sign up multiple participants, add a Number field.
- Pro Tip: Use a Repeating Section or Table if you need information for multiple attendees on one form.
- Additional Questions: Any custom intake questions specific to your program (dietary restrictions, skill level, emergency contact, etc.).
Make it look professional with Choice field styles
If your registration involves selecting from multiple options (like session types, ticket tiers, or add-ons), Choice fields can display those options as cards with images or icons. This makes the selection experience feel polished and helps registrants make confident choices at a glance.
A few settings to try out:
- Under Style, select Cards. You can use the card style with or without images.
- Adjust how choices are formatted on the form with the Layout setting.
- Under Choice Options, select Show Images. Upload your images to each choice item and adjust the Image Size to your liking.
- Decide whether to show or hide prices next to choice options with the Assign Prices setting.
- Hide Labels to show images or icons only.
Use conditional logic to show only relevant fields
Not every question applies to every registrant. Conditional logic lets you show or hide fields based on previous answers, so your form stays clean and focused.
For example, if you ask, “Will you need accommodation?” you can set a follow-up address or room preference field to only appear when the answer is “Yes.” To do this, open the field’s settings and use the Show This Field option to set a condition.
Step 2: Accept payment (optional)
If your registration includes a fee, whether it’s a class cost, event ticket, deposit, or membership, you can collect it directly on the same form. Registrants pay at the point of sign-up, which means no follow-up invoices or unpaid balances to chase.
Cognito Forms connects to Stripe, PayPal, and Square. All three are PCI-DSS Level 1 compliant (the highest card-data security standard), so card data is handled securely without touching your form or servers.
Add a payment field

Fields that can collect payment are denoted in the form builder with a small credit card icon. From the Build page, add one of the following five field types to your form, depending on your needs:
- Choice field: Ideal for selecting a session, ticket type, or package with a price assigned to each option.
- Yes/No field: Great for optional add-ons, like “Add a t-shirt for $15.”
- Currency field: Lets registrants enter a custom amount, useful for variable fees or donations.
- Price field: Sets a fixed or calculated charge, like a flat registration fee.
- Lookup field: Populates a list of choices and prices based on the entries from another form
Once you add a payment field, a payment section automatically appears at the bottom of your form where registrants enter their card information.
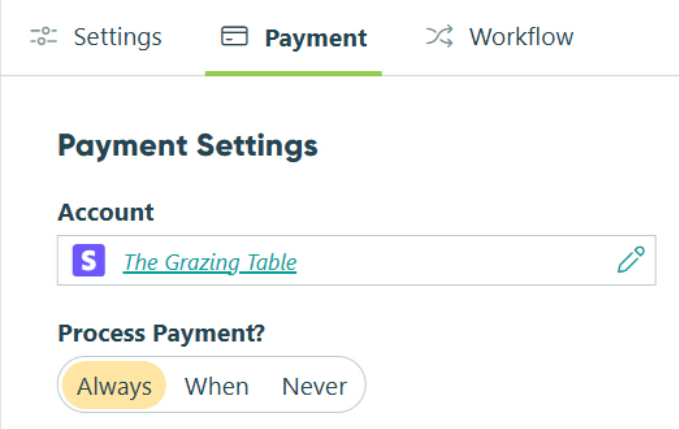
Connect your payment account
- Click Payment in the top toolbar on the Build page.
- Select Add Payment Account from the Payment Settings menu.
- Choose your payment processor (Stripe, PayPal, or Square) and follow the prompts to connect your existing account or create a new one.
Once connected, your payment account can be used across any form in your organization.
Step 3: Set up confirmations and notifications
Once your form collects information, it should immediately do two things: confirm the registration with the person who submitted it and alert your team that a new entry is waiting. Both happen automatically once you configure them.
Customize your confirmation message
The confirmation message is what registrants see on-screen the moment they hit submit. By default, Cognito Forms shows a simple success message, but you can customize it to be much more useful.

To edit the confirmation message:
- On the Build page, open the Workflow menu.
- Click on the Submit Action to open its settings.
- Under Confirmation, customize the Message field.
- Use the Insert Field option to personalize the message with details from the form (like the registrant’s name, their selected session, or their entry number).
A confirmation message like "Thanks, [First Name]! You're registered for [Session Name] on [Date]" is far more reassuring than a generic success screen. It tells registrants exactly what they signed up for and reduces the “did it go through?” follow-up emails.
You can also check Entry Details under the Include section to show a full summary of what the registrant submitted, acting as an on-screen receipt.
Set up a confirmation email to registrants
An on-screen message is helpful, but a confirmation email they can refer back to is even better.

To send an email automatically:
- In the Submit Action settings, scroll to Send Emails and click + Add Email.
- In the To field, click Insert Field and select the Email field from your form. This sends the email directly to the entry’s registrant.
- Write a clear Subject line (for example, “You’re registered! Here’s what to know.”).
- In the Message field, use Insert Field to pull in the registrant’s name, session details, date, and any other relevant information from their submission.
- Check Entry Details or Receipt under the Include section if you’d like a summary of their registration details or receipt attached to the email.
Send yourself a notification too. Add a second email under Send Emails with your own email address in the To field. Set the subject to something like “New Registration Submitted.” This way, your team receives an alert the moment a new sign-up comes in without needing to check the Entries page manually.
Step 4: Test and share your form
Before sending your form out to your audience, take a few minutes to test it and confirm everything works as expected.

Preview your form
While you’re still on the form’s Build page, use the Preview mode to view what changes will look like. This makes it easy to adjust field layouts, conditional logic, and Workflow settings before saving any changes.
Test your form
- Open the Public Link of your form.
- Fill it out completely and submit a test entry.
- Check that:
- All fields appear and behave as expected.
- Conditional fields show and hide correctly.
- The confirmation message appears on screen after submitting.
- The confirmation email arrives in your inbox with the correct personalized details.
- Payment (if enabled) processes using a test card in preview mode.
Testing payment? Cognito Forms supports test card numbers for forms connected to Stripe. While in Preview mode, use the card number 4242 4242 4242 4242 with any future expiration date and any CVV to simulate a successful payment (no real charge occurs).
Share your form
When you’re ready for your form to go live, open the Publish page by clicking Publish in the top toolbar. From here, you can:
- Embed it on your website: Choose from Seamless, Iframe, or AMP embed codes and paste the code into your site. The form lives on your page, so registrants never have to navigate away.
- Share a direct link: Copy the public link and add it to an email, newsletter, or social media post.
- Use the QR code: Download the auto-generated QR code and add it to a flyer, poster, or printed materials for in-person promotion.
Registration Forms in Action
Registration forms work across nearly every service industry, from fitness studios to professional training companies to youth programs. The setup is the same, while the fields and use case details change. Here are three examples of how businesses use Cognito Forms to streamline their sign-up process.
Workshop and training sign-ups
A professional training company runs monthly workshops. They use a single registration form with a Lookup field that lists upcoming sessions and dates. Attendees select their session, pay the workshop fee, and receive an instant confirmation with the date, location, and what to bring. The team gets an internal notification for each sign-up, and all registrations are tracked in one place for easy headcount management.
Class and program enrollment
A fitness studio offers weekly yoga, Pilates, and spin classes. Their registration form lets clients choose a class type and time slot. Conditional logic shows a health disclaimer field only when clients select high-intensity classes. Once enrolled, clients receive a welcome email with their class schedule and studio policies.
Youth camp and activity programs
A summer camp uses a registration form to collect everything in one submission: camper details, parent contact information, emergency contacts, health notes, and a signed liability waiver. A Signature field captures the parent’s digital signature before the form can be submitted. Staff receive a notification for each new camper, and all registrations are ready to export when the season begins.
More Ways to Extend Your Registration Form
A basic registration form handles sign-ups well on its own. Cognito Forms includes several features you can add to automate more of your process, improve the registrant experience, and connect your form to the rest of your business workflow.
- Route new registrations into an internal review or approval process with Workflow. Assign a status to each entry, trigger follow-up emails based on registration type, or notify specific team members based on the session or program selected.
- Automatically generate documents, like confirmation letters, event tickets, enrollment agreements, or program summaries, when someone registers. With Document Generation, instantly attach generated PDFs or Word docs to the confirmation email or confirmation page.
- Let people save their progress and return later to finish with Save & Resume. If your registration form is long, this feature reduces drop-off for complex forms without losing any partially completed data.
- Give registrants a customer portal to view their registration, check their status, or complete additional steps (like uploading a document or signing a follow-up form). Guest Access allows you to provide customers with a self-service space that makes multi-step enrollment processes or programs with ongoing communication more seamless.
Start Collecting Registrations Today
A well-built registration form saves hours of manual work, reduces back-and-forth with clients, and creates a better first impression. With Cognito Forms, you can have your own registration form live and ready to share in under 20 minutes, with no developer, no code, and no hassle. Build yours today and see how smooth your next sign-up process can be.
Start with a template
Rather start from a pre-built foundation? Browse our registration form templates to find one that fits your needs. You can customize any template to match your brand, event, and process.
-
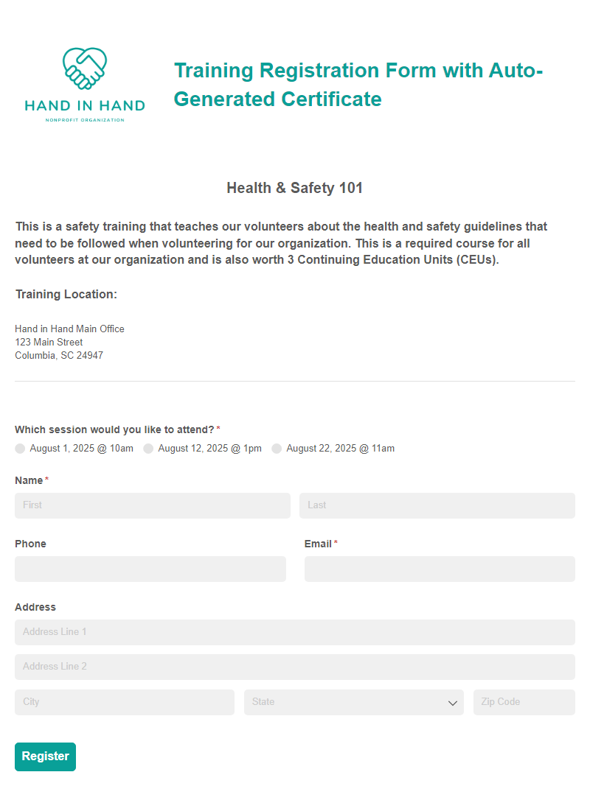
Training Registration Form with Auto-Generated Certificate
Make your training attendance and certificate creation process more efficient with our Training Registration Form with Auto-Generated Certificate.
Preview -

Summer Camp Registration
Use our free summer camp registration form template to make it easy for participants to sign up online. Even accept payments right in the same form.
Preview -
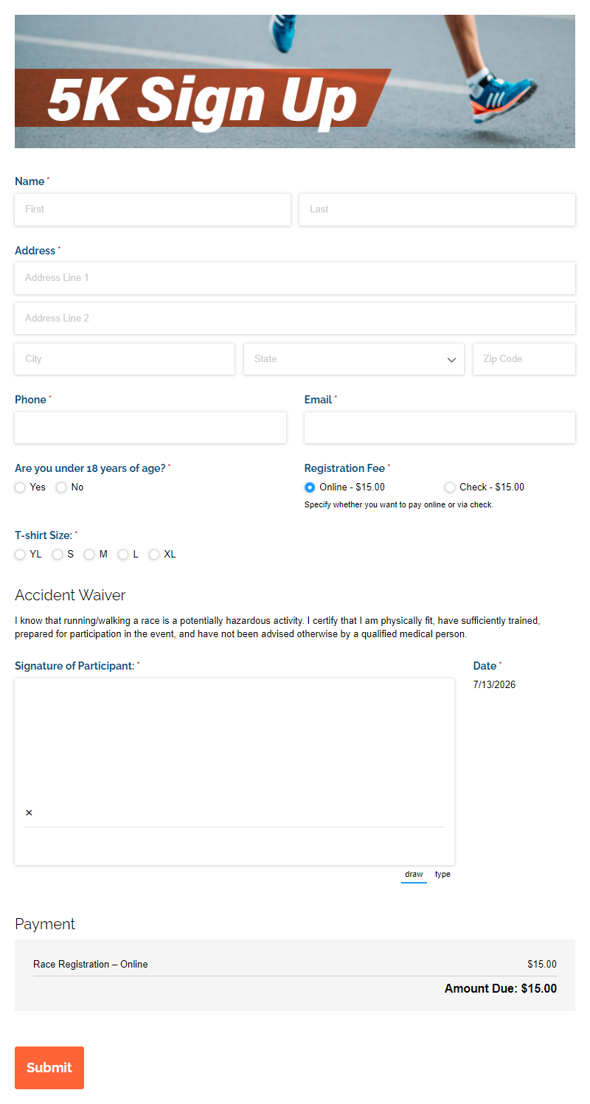
5K Sign Up
Our free 5K race registration template makes it easy to sign up runners online. Use online payment, register multiple runners, offer earlybird discounts and more.
Preview
FAQ
Yes. Use the Limit Quantities option on any Choice field to cap how many times a specific option can be selected. Once a session or ticket tier sells out, that option becomes unavailable to new registrants automatically. This works across all forms that reference the same Choice field, so you never accidentally oversell a spot. Check out our guide on how to enforce quantity limits on your form.
Set up a confirmation email under the Submit Action in Workflow, and check Entry Details in the Include section. This sends each registrant a full summary of their submission automatically. You can also include a downloadable Word or PDF copy of their entry by attaching a document template to the email.
Only if you want them to. Enable Workflow Link Sharing in your form’s Workflow settings, then include a Workflow Link in the confirmation email you send to registrants. When they click the link, they can open their submission and make changes—within whatever fields and time windows you allow. See our guide to letting customers edit their submissions for full setup instructions.