Confirmation pages control what a form user sees after performing an action on your form, such as Submit or Update. From a basic confirmation message to a more in-depth page that includes entry details or documents, you can customize confirmation page content for each action you’ve enabled on your form.
You’ll find confirmation options within the Action Settings for any action you’ve created.
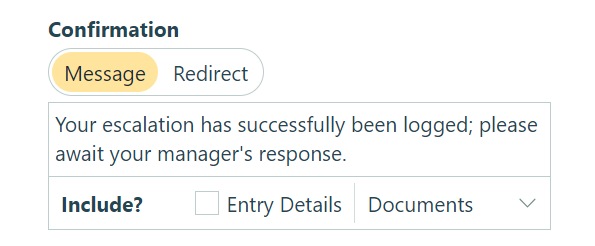
Confirmation message
You can customize the confirmation message shared with a form user for any action performed on your form. This Message option is toggled on by default for each new form.
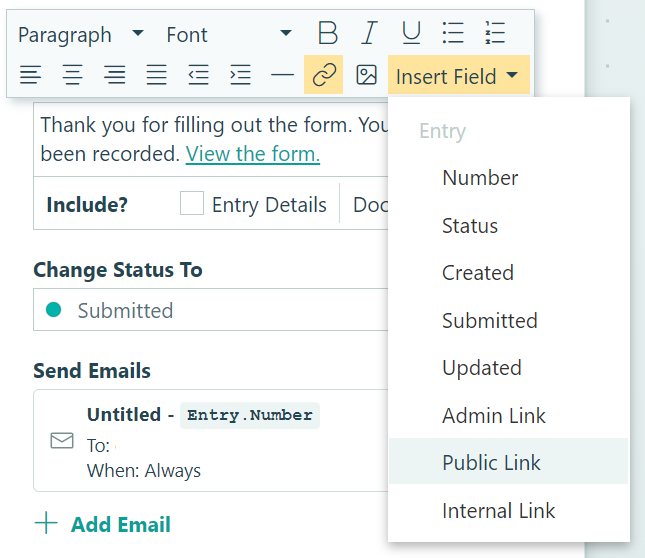
To format your message text or to add links and images, click into the Message field to open formatting options. Here, you’ll also find the Insert Field option, which enables you to insert field values from your form. Use this to customize your message by populating the form user’s name, entry number, date of the entry, and more.
You can also use the Insert Field option to include a role-based workflow link, allowing form users to view or edit their entry after submission.
Entry Details
We do not recommend including entry details in forms that capture sensitive data.
A confirmation page can include your form’s entry data, acting as a receipt for an entry. To include entry details, check Entry Details in the Include section. The entry details will be displayed in a layout similar to your form.
If you include entry details, the fields shown in the message will reflect the entry’s current workflow status when the message is viewed. For example, if an entry moves from Incomplete to Submitted, the confirmation message will display fields configured for the Submitted status.
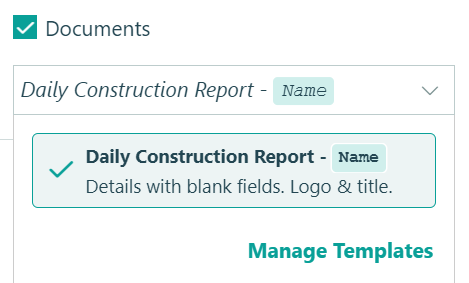
Documents
Include your form’s entry details as a Word or PDF document on your confirmation page for users to download. Open the Documents dropdown and select which document(s) to include by clicking on each document name. You can customize the format of these documents from the Manage Templates menu.
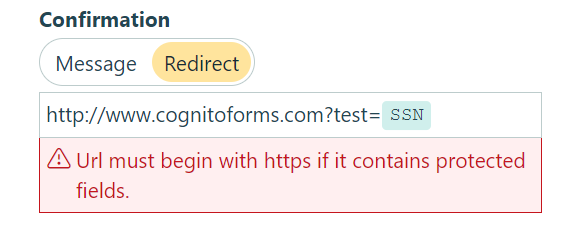
Redirect URL
Redirect form users to a specific web page upon performing an action on your form. To enable this, make sure Redirect is toggled on below Confirmation, then place the full website address in the provided textbox. If you want to include field values from your form in your Redirect URL, learn more in our form prefill guide.
Please note the following guidelines:
- Individual plan only: Redirects to external websites (i.e., URLs that do not start with
www.cognitoforms.com) are only allowed for embedded forms. Forms created after September 1, 2024 cannot be redirected to an external website via the public link. - If you’re including protected fields in your redirect, you must enable HTTPS on your site.
- Forms embedded via the AMP embed option do not redirect upon submission.