Back-and-forth estimates and approvals don’t have to mean endless emails. Build one form that automatically moves a service request from submission to estimate to payment.
Build Time & Skill
30 min
Intermediate
What you'll learn
How to build a single service request form that routes a job through submission, estimating, customer approval, and invoicing automatically.

Every service business knows the drill: a customer submits a request, you email an estimate, they approve it, you schedule the work, then you chase them down for payment. Each handoff is a chance for something to get lost, delayed, or miscommunicated.
A negotiation workflow in Cognito Forms puts the entire process in one place. Instead of managing jobs through scattered emails and phone calls, each party gets a secure link to a form that shows exactly what they need – and nothing they don’t. The workflow moves forward automatically at each stage, without anyone manually tracking Status or forwarding information.
This approach helps you:
- Reduce back-and-forth emails. Automated notifications move each party to action the moment it’s their turn – no follow-up required.
- Protect sensitive information. Customers never see your internal estimate details. Technicians never see what the customer was quoted. Each Role sees only their relevant fields.
- Track every job at a glance. Custom Statuses show you exactly where each service request stands, from the moment it’s submitted to the moment payment clears.
- Deliver a professional experience. Customers receive clean, branded communications with secure links to review estimates and make payments.
Step-by-Step Setup of a Negotiation Workflow
The steps below walk you through the process of building a service request workflow with four roles. You’ll set up Roles and Statuses, configure conditional field visibility, and create email notifications that automate the negotiation.
Step 1: Set up Roles
Start by assigning a Role to each person involved in your workflow. Roles are the foundation of your workflow – you’ll reference them in field visibility settings, email notifications, and action logic throughout the rest of the process.
- Open your form and navigate to Workflow on the Build page.
- Click Roles.
- Add the following Roles:
| Role | Role Type | Who It Represents |
|---|---|---|
| Customer | Public | The person who submits the service request and approves the estimate. |
| Estimator | Other | The person reviewing the request and providing a cost estimate. |
| Technician | Other | The person completing the work and submitting the invoice. |
| Internal | Internal | Admin access to view and manage all entries. |

Step 2: Build your form sections
Your service request form is organized into six sections. Each section belongs to a specific stage of the workflow, making it easy to control which Role sees what (and when) with section-level field settings.
Want a head start? Save our pre-built Service Request template and customize it to fit your needs.
On the Build page, create the following sections in order:
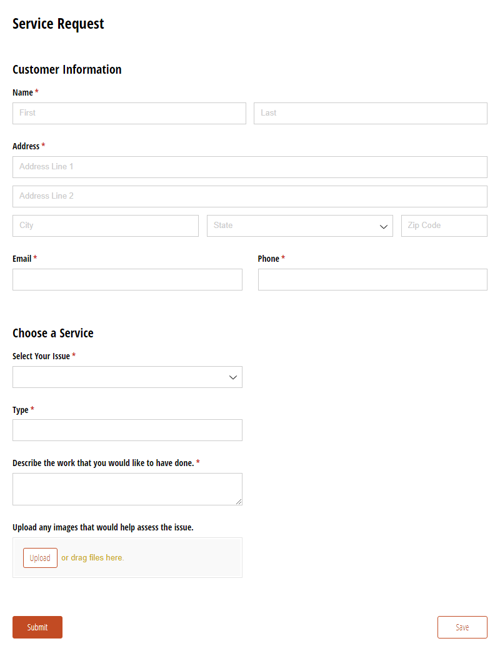
- Customer Information – Name field, Email field, Phone field, Address field
- Choose a Service – Choice field for service type, Textbox field for issue description
- Estimate – Repeating section for parts and labor line items, Number fields for individual costs, Calculation field for the total, Signature field for the Estimator
- Estimate Approval – Signature field for the Customer, Date field
- Invoice – Table fields for materials/parts and labor (Currency field for cost, Number field for quantity, Calculation field for amount), Currency fields for subtotal and tax, Price field for the total, Signature field for the Technician
- Work Completed Approval – Signature field for the Technician, Date field

Step 3: Set up Statuses
Statuses track where each service request is in the workflow. You’ll use them to control field visibility, trigger automatic transitions, and filter your entry views.
- In Workflow, click Statuses.
- Add the following Statuses in order:
| Status | What It Means |
|---|---|
| Incomplete | Default Status — request has not been fully submitted yet. |
| New | Customer has submitted the service request. |
| Estimate Pending | Estimator has provided an estimate to the customer. |
| Estimate Approved | Customer has approved the estimate. |
| Awaiting Payment | Technician has completed the work and invoiced the customer. |
| Closed | Payment has been made and the workflow is complete. |
Next, configure three of these Statuses to trigger conditionally. For each one, open the Status and set Automatically Assign Status to When, then apply the following conditions:
| Status | Condition |
|---|---|
| Estimate Pending | Estimator’s signature is filled out AND entry Status is New: =(Estimate.EstimatorsSignature.Svg != null and Entry.Status = "New") |
| Estimate Approved | Customer’s signature (Estimate Approval section) is filled out AND entry Status is Estimate Pending: =(EstimateApproval.CustomersSignature.Svg != null and Entry.Status = "Estimate pending") |
| Awaiting Payment | Technician’s signature is filled out: =(Invoice.TechniciansSignature.Svg != null) |
These automatic Status transitions are what make the workflow feel seamless. As soon as the estimator signs off, the entry moves to Estimate Pending and triggers the customer notification – without anyone manually changing the Status.

Step 4: Configure field visibility by Role and Status
This is where the conditional logic for your negotiation process comes to life. Each section needs two settings configured: Read-Only (who can’t edit it) and Show This Section (when it appears). This ensures each person sees only what’s relevant to their Role – and only at the right stage.
Select each section and apply the settings below:
| Read-Only: For Roles | Show This Section: When |
|---|---|
| Estimator, Technician | Always |
The Estimator and Technician need to see the customer’s contact details, but they should never be able to change them. This section is always visible to all Roles.
| Read-Only: For Roles | Show This Section: When |
|---|---|
| Estimator, Technician | Always |
Like Customer Information, the service request details are visible to everyone but only editable by the customer. This section is always visible to all roles.
| Read-Only: For Roles | Show This Section: When |
|---|---|
| Customer, Technician | Status is not Incomplete: =(Entry.Status != "Incomplete") |
The Estimate section is hidden until the customer has fully submitted their request. This prevents the Estimator from accessing a partially filled-out entry. Once the request is submitted and the Status moves to New, this section becomes visible to the Estimator.
| Read-Only: For Roles | Show This Section: When |
|---|---|
| Estimator, Technician | Status is not Incomplete and not New: =(Entry.Status != "Incomplete" and Entry.Status != "New") |
This section stays hidden until the Estimator has completed and submitted the estimate. It only appears once the Status moves past New, ensuring the customer isn’t asked to approve an estimate that hasn’t been sent yet.
| Read-Only: For Roles | Show This Section: When |
|---|---|
| Customer | Status is Estimate Approved, Awaiting Payment, or Closed: =(Entry.Status = "Estimate approved" or Entry.Status = "Awaiting payment" or Entry.Status = "Closed") |
The Invoice section is hidden from the customer until the Technician has completed the work and triggered the Awaiting Payment Status. It remains visible after payment so the customer can reference it once the workflow is closed.
| Read-Only: For Roles | Show This Section: When |
|---|---|
| Estimator, Technician | Status is Estimate Approved, Awaiting Payment, or Closed: =(Entry.Status = "Estimate approved" or Entry.Status = "Closed" or Entry.Status = "Awaiting payment") |
This section only appears once the estimate has been approved and work is underway. It gives the Technician a place to document the completed work and add their signature, which triggers the Status to move to Awaiting Payment.

Step 5: Configure Actions and email notifications
Three Actions handle every interaction in this workflow. Each one needs specific conditions and email notifications so the right person is notified at the right time.
Submit action
The Submit Action handles two moments: the customer’s initial request submission and the estimator’s submission of the completed estimate back to the customer.
- Open the Submit Action in Workflow > Actions.
- Under Allow Action, select When and set the condition:
=(Entry.Status = "Incomplete"). - Under Change Status To, select New.
- Under Send Emails, create two email notifications:
- Email 1 – Customer Confirmation: Use Insert Field to pull the customer’s email from the form. This confirms their request was received.
- Email 2 – Estimator Notification: Set To to the estimator’s email address. Click Share Workflow Link and select the Estimator Role. This gives the estimator a direct link to review the request and provide an estimate.

Update action
The Update Action is used by multiple Roles at different stages – the estimator submits the estimate, the customer approves it, and the technician submits the completed invoice. Conditional logic handles who sees it and when.
- Open the Update Action in Workflow > Actions.
- Under Allow Action, select When and set the condition:
=(Entry.Status != "Incomplete"). This ensures only fully submitted requests can be updated. - Under Send Emails, create three conditional email notifications:
- Email 1 – Customer (Estimate Ready): Use Insert Field to pull the customer’s email. Click Share Workflow Link and select the Customer Role. Under Send, select When and set the condition:
=(Estimate.EstimatorsSignature.Svg != null and Entry.Status = "Estimate pending"). - Email 2 – Estimator/Service Department (Estimate Approved): Set To to the service department’s email. Click Share Workflow Link and select the Technician Role. Under Send, select When and set the condition:
=(EstimateApproval.CustomersSignature.Svg != null and Entry.Status = "Estimate approved"). - Email 3 – Customer (Invoice Ready): Use Insert Field to pull the customer’s email. Click Share Workflow Link and select the Customer Role. Under Send, select When and set the condition:
=(Invoice.TechniciansSignature.Svg != null and Entry.Status = "Awaiting payment").
- Email 1 – Customer (Estimate Ready): Use Insert Field to pull the customer’s email. Click Share Workflow Link and select the Customer Role. Under Send, select When and set the condition:

Pay action
The Pay Action appears only after the technician has completed the work and submitted the invoice.
- Create a new Action and name it Pay.
- Under Allow Action, select When and set the condition:
=(Entry.Status = "Awaiting payment"). - Under Change Status To, select Closed.
- Under Send Emails, create one email notification:
- Email 1 – Customer Receipt: Use Insert Field to pull the customer’s email. Set to send Always. Check the Receipt box under Include.

Step 6: Configure payment
The last setting is key: payment should only process after the technician has completed the work and signed off.
- Open Payment Settings on the Build page.
- If you haven’t already, connect your payment processor. See our help guide for more details.
- Under Process Payment?, select When and set the condition:
=(Entry.Status = "Awaiting payment").

Real-World Examples
A negotiation workflow fits any service business where work can’t begin until a price is agreed upon. Here are three common scenarios where this setup works well:
HVAC and Home Services. A homeowner submits a repair request describing the issue. The estimator reviews the request, assesses the parts and labor involved, and sends back a quote for the customer to approve. Once the customer signs off, the technician is notified and schedules the visit. After completing the repair, the technician submits the invoice and the customer pays directly through the form.
IT and Managed Services. A business submits a support request outlining the scope of work needed. The estimator reviews the request and sends a project quote for the client to approve. Once approved, the assigned technician completes the work and submits the invoice. The client pays through the form and the request is closed – all without a single email thread.
Landscaping and Lawn Care. A homeowner submits a service request for a seasonal cleanup or landscaping project. The estimator scopes the job and sends a quote with a breakdown of materials and labor. Once the customer approves, the crew completes the work, submits the invoice through the form, and the customer pays. The entire job (from first contact to final payment) is tracked in one place.
Advanced Workflow Techniques
Once your core negotiation workflow is running, these techniques let you handle more complex scenarios and edge cases.
Add an estimate revision loop. If a customer rejects an estimate, you can route the entry back to the estimator for revision. Create a “Reject Estimate” action available to the Customer Role when the Status is Estimate Pending. Configure it to change the Status back to New and notify the estimator with their Workflow Link so they can revise and resubmit.
Use Task Views for internal tracking. Set up a Task View filtered by Status for your internal team so they always see which jobs are waiting on an estimate, which have been approved, and which are awaiting payment — without digging through entries manually.
Auto-generate estimate and invoice documents. Use Document Templates to automatically produce a professional PDF of the estimate or invoice when the relevant Status is reached. Attach it directly to the email notification so customers receive a formatted document alongside their Workflow Link.
Additional Features to Enhance Your Workflow
These Cognito Forms features pair naturally with a negotiation workflow to add polish and control:
- Guest Access – Give customers access to your organization’s portal so they can log in and view their service request directly, without needing a Workflow Link email.
- Audit Log – Track every change made to an entry, including who signed what and when – useful for disputes or compliance needs.
- Task Reminders – Set up automated reminders to nudge customers who haven’t approved their estimate or completed payment within a set timeframe.
- Document Templates – Auto-generate branded estimate and invoice PDFs directly from form data, eliminating manual document creation.
Start Building Your Negotiation Workflow Today
A negotiation workflow turns a messy, multi-email process into a clean, automated system where every party knows exactly what to do next. With Roles, Statuses, and conditional notifications all working together, you spend less time chasing approvals and more time completing the work. Start with the Service Request template and customize it to fit how your business operates.
Service Request
- Collects estimate approvals, signatures, and payments all in one place
- Automatically notifies customers, estimators, and technicians at each step
- Fully customizable to fit your existing workflow