Build a list of choices only one time and use it across multiple forms. Changes update everywhere automatically, eliminating duplicate work and keeping data consistent.
Build Time & Skill
15-20 min
Beginner
What you'll learn
How to create a “master list” to reference on other forms using a Lookup field, automatically updating choices and preventing inconsistencies
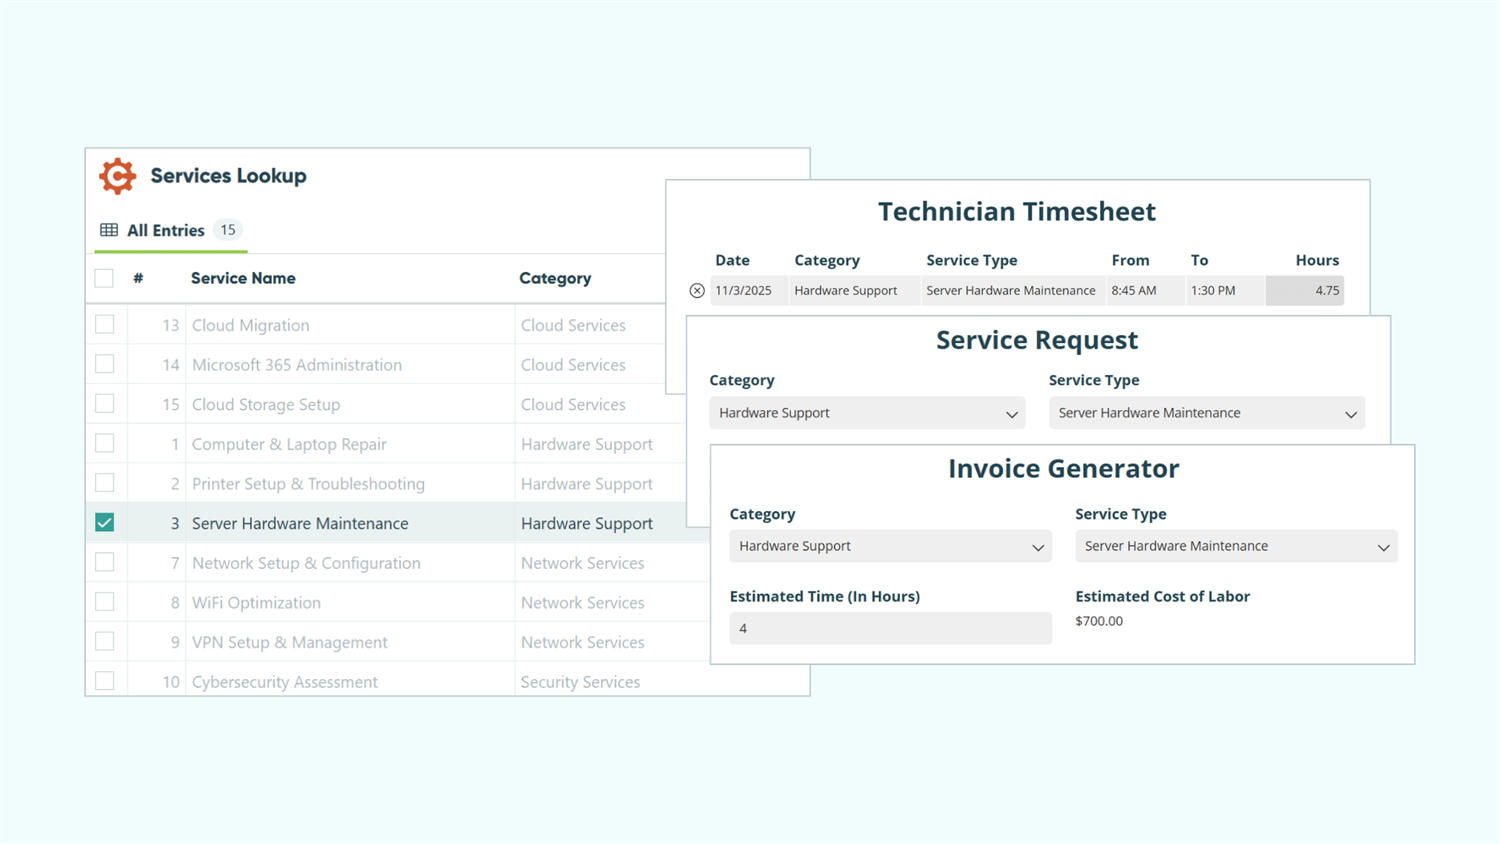
When you need the same list of products, locations, or customers on multiple forms, manually updating each form becomes tedious and error-prone. With Cognito Forms’ Lookup field, you create one reusable list that feeds into unlimited forms. Add a new product? It appears everywhere instantly. Remove an outdated location? It disappears from all forms automatically.
This approach benefits you by:
- Eliminating duplicate data entry. Build your list once, reference it everywhere. No more copying and pasting the same choices across multiple forms.
- Maintaining consistency across forms. Everyone works from the same up-to-date information, preventing version mismatches and confusion.
- Simplifying updates. Change your list of choices only once and every form using it updates automatically, saving hours of manual updates.
- Reducing errors. One source of truth means fewer typos, outdated options, and data inconsistencies across your forms.
Before You Begin: Understand Lookup Fields

Lookup fields connect two forms together by pulling choice options from entries stored on another form. The other form is what becomes your “source form” and serves as your central database of information. Any forms that pull in data from the source form’s entries will stay up-to-date without manual updates.
Lookup fields automatically populate based on form entries, rather than manually typing in choices. When you add, remove, or edit an entry on your source form, those changes immediately appear everywhere that list is used. If you need to reference the same information across multiple forms, you should consider using a Lookup Field.
Step-by-Step: Creating and Using Reusable Lists Across Your Forms
In the steps below, you’ll learn how to establish one central database that feeds multiple forms with automatically synchronized information. You’ll learn how to set up a “source form” that contains the choices you want to be shown on your reusable list, and how to reference or prefill any data connected to those choices through Lookup Fields.
Step 1: Set up your source form
Your source form acts as the central database where other forms will pull information from and reference. This is the one place where you’ll manage all your options or choices in the list.
Build your source form
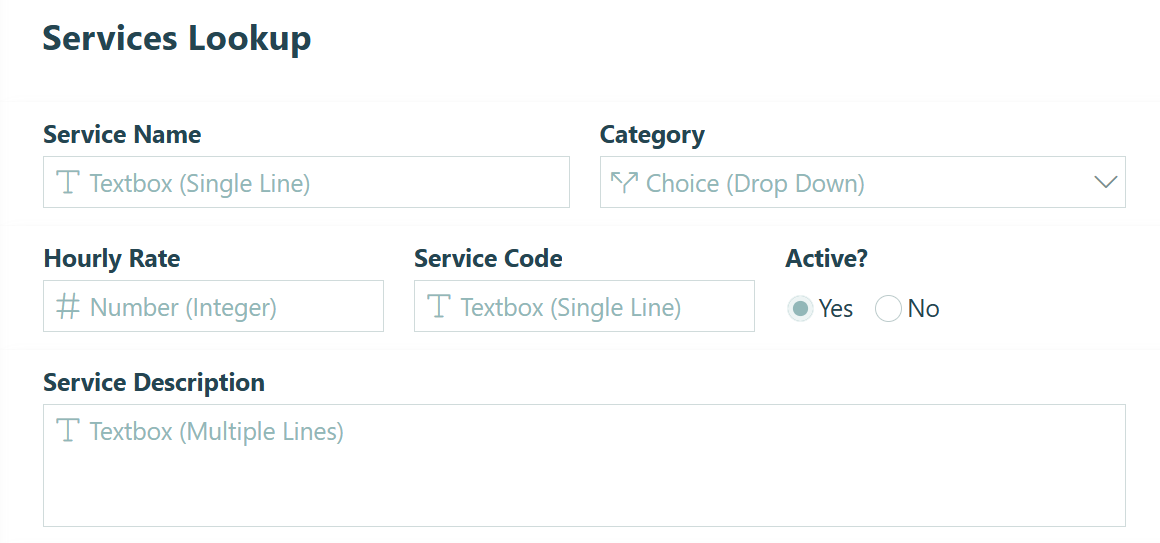
- Create a new form and give it a clear name that indicates it’s a source form. Examples: “Product Catalog,” “Services Lookup,” "Office Locations.”
- Add fields for the information you want to capture about each item. For a catalog of services, you might include:
- Service Name (Text field)
- Category (Choice field)
- Hourly Rate (Number field)
- Description (Text field)
- Service Code (Text field)
- Add any other relevant fields specific to your business needs.
Include a Yes/No field called “Active” or “Available” on your source form. You can use this later to filter out discontinued items without deleting historical data.
Add items to the source form
Add an entry for each item you want to include in the reusable list of choices. Each entry becomes one choice option in the Lookup Field on your connected forms.
To add entries manually:
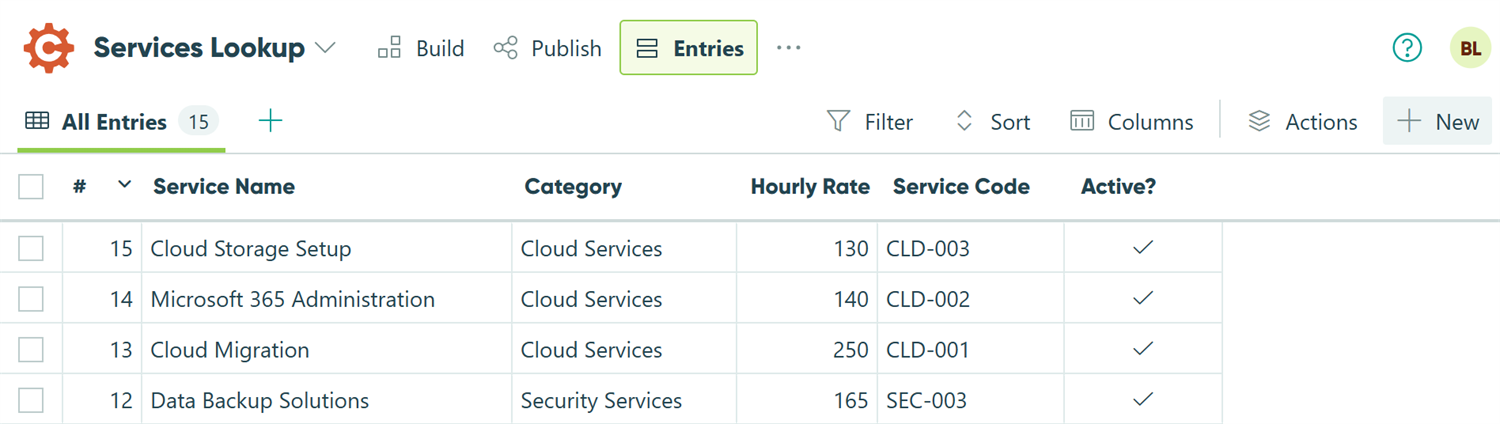
- Go to your source form’s Entries page.
- Click the + New button in the top right.
- Fill in all relevant details for each entry.
- Click “Submit” to add the item to your list.
Your source form is now ready to be used and referenced by other forms.
Alternatively, you can import entries from a spreadsheet to bulk-add multiple items at once.
Step 2: Add a Lookup Field to other forms
Now, this is where the magic happens. You’ll connect another form to your source form using the Lookup field, instantly populating it with all your options.
Add and configure the Lookup field

- Open the other form where you want to add your reusable list (like an order form or service request).
- Add a Lookup field and label it appropriately. For example, if your source form is “Services Lookup,” name the Lookup field “Service Type” or "Select Service.”
- Choose your field type from the Type dropdown:
- Dropdown for longer lists (most common)
- Radio buttons for short lists where users should see all options
- Checkboxes if users should be able to select multiple items
- In the Lookup Choices From setting, select your source form.
- Double-check the field’s Choice Label setting. This determines what users see in the dropdown. By default, it populates the first text field from your source form. You can change this or add multiple fields for more descriptive labels.
- Optional: If you have several choices, use Sort By to sort options in a logical order.
Your Lookup field should now display all entries from your source form.
Step 3: Reference any data from the source form
Here’s where Lookup fields become truly powerful. Once someone selects a choice from the Lookup field, you can automatically pull in any other information from that entry without displaying additional dropdown fields.
Pull in hidden data
Let’s say your Services Lookup form includes descriptions and service codes. When a customer selects a service, you want the description of the service to appear in a Content field automatically.

- Add a Content field to your form.
- Use the Insert Field option to reference your Lookup field name followed by the field you want to pull from the source form:
=Product.Price
This pulls in the unique description of whichever service the user selects, without you needing to create multiple conditional fields or show details for every service type on your form.
This technique works for any field on your source form:
- Hourly rates:
=ServiceType.HourlyRate - Category:
=ServiceType.Category - Service Codes:
=ServiceType.ServiceCode
You can even use this data in other calculations. For example, multiply the selected service’s “Hourly Rate” price by a quantity field to calculate line item totals: ServiceType.HourlyRate * Quantity. No manual price entry required.
Advanced Lookup Field Customizations
Once you’re comfortable with basic reusable lists, these advanced features let you build even more sophisticated forms.
Filtering available choices
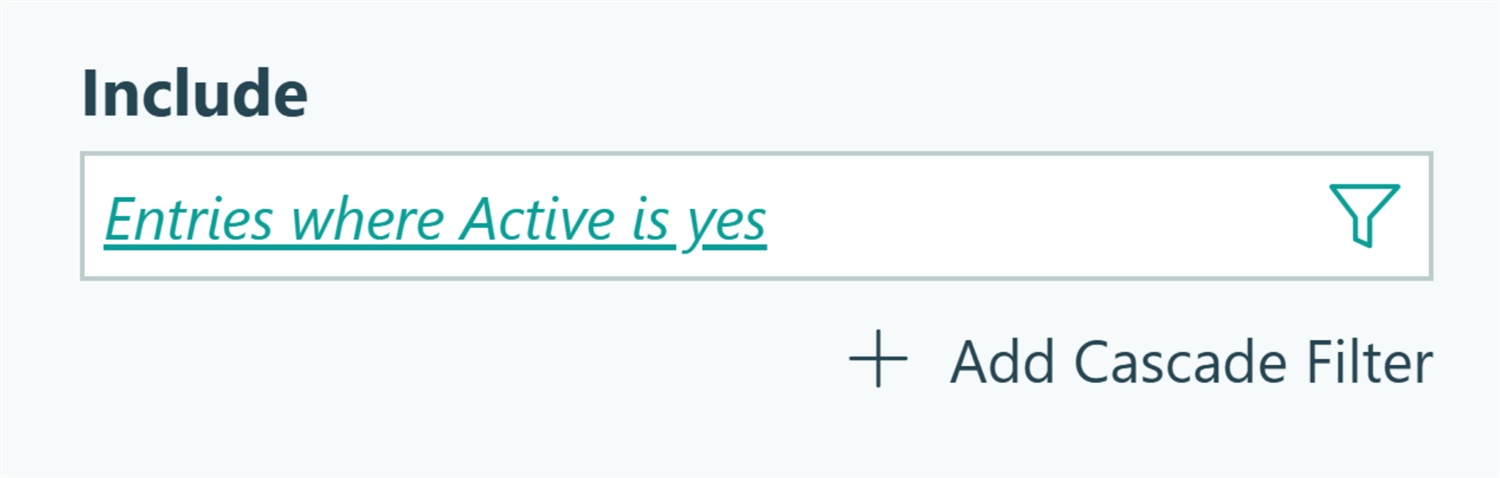
The Include option controls exactly which entries from your source form appear as choices, letting you show different subsets of your source form entries on different forms.
Common uses
- Hide inactive items by filtering where “Active” is yes, keeping discontinued products out of dropdowns while preserving historical data
- Show date-based options like upcoming events or current appointments
- Display conditional subsets like products matching the selected category or team members in the selected department
Cascade Filters: Creating dependent dropdowns
Cascade filters create hierarchical dropdowns where one selection narrows down the next. Select “Electronics” as a category, and the product dropdown shows only electronic items.

In your Lookup field settings, find the Include option and click Add Cascade Filter. This creates a separate filter field that appears before your main Lookup field. You can add up to three cascade filters for multi-level filtering like Region → State → City.
Common uses: Filter products by category, narrow locations by region, or show team members by department.
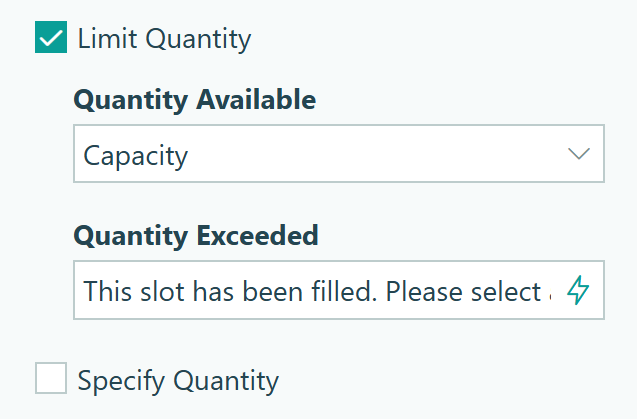
Tracking inventory with Quantity Limits
Set quantity limits on your Lookup field to prevent customers from ordering more than you have available. The system automatically tracks quantities across all forms using the same source form and displays error messages when limits are exceeded.
Add a Number field to your source form for starting quantity, then reference it in the Limit Quantity setting on your Lookup field. Quantities update in real-time as orders come in.
Common uses
- Prevent overbooking event registrations or appointment slots
- Track product inventory across multiple order forms
- Limit service requests based on team capacity
- Manage resource allocation for equipment or facility rentals
Real-World Examples: How Teams Use Lookup Fields
Here’s how different organizations implement this approach:
- Product catalogs for multiple order forms: Maintain one “Catalog” source form with all services, prices, and service codes. Reference this catalog on your customer quote form, internal work order form, and invoice forms. When you adjust pricing or add new services, the change appears instantly on all three form without manual updates.
- Office locations for appointment requests: Healthcare networks with multiple clinics can create a “Provider Directory” source form. Patient intake forms use cascade filters where patients first select their preferred location, then choose the type of care needed, and finally select from a filtered list of providers who match both that location and specialty.
- Customer categories within a customer database: Maintain a “Customer Database” with fields for company name, industry, service tier, and assigned account manager. When completing other forms, your team can select the customer and the form automatically populates with the correct service tier and account manager without displaying the entire database.
Additional Features to Enhance Reusable Lists
Combine Lookup fields with other Cognito Forms features to create even more powerful workflows:
- Use Conditional Logic to show or hide entire sections based on Lookup selections. Show warranty options only when certain products are selected, or display additional questions based on the chosen service type.
- Collect payment by assigning prices to Lookup choices. Each product in your catalog can have its own price that automatically calculates in the payment total.
- Route email notifications based on Lookup selections. Automatically send notifications to the appropriate department head based on the selected office location, or to specific team members based on the product category.
Start Building Reusable Lists Today
Stop updating the same information across multiple forms. Create your first reusable list and experience how one simple change updates everywhere instantly. Whether you’re managing products, locations, customers, or any other repeating data, Lookup Fields in Cognito Forms help eliminate duplicate work while ensuring consistency across your entire organization.
FAQ
No. Changes to your source form appear immediately in all connected forms without any action required. Add a new product, and it appears in every connected form instantly. This automatic synchronization eliminates the need to track down and update multiple forms whenever your reusable list of choices changes.
Open the Lookup field’s Include setting and add a filter like Active = Yes. This hides retired items without deleting historical data.
Yes, use the Include option in your Lookup field settings to filter choices. Each form can show a different subset of your source form’s entries based on the criteria you set. An order form for one category of products can show just those products, while a different order form can show a different set of products.