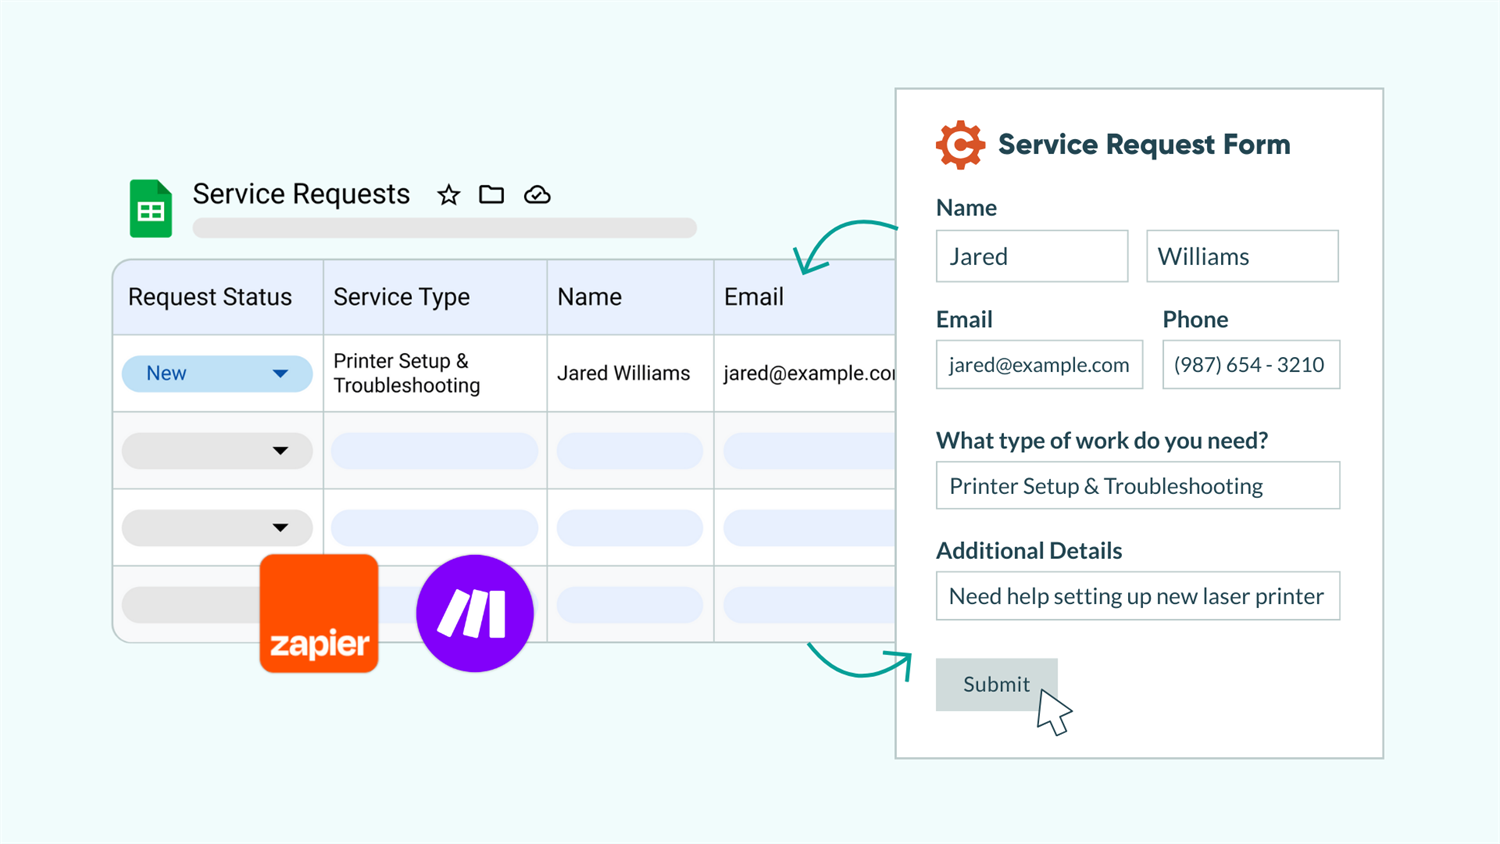
Automatically send Cognito Forms entries to Google Sheets and keep both systems updated — no manual exporting, copying, or pasting required.
Build Time & Skill
20-30 min
Intermediate
What you'll learn
How to connect Cognito Forms to Google Sheets through Zapier or Make so your data logs, updates, and syncs automatically across both platforms
You may use spreadsheets to track or report on your data or maybe it serves as the bridge between Cognito Forms and another platform. Either way, getting data from one place to the other can require a lot of manual work. Every time you export entries, copy values, or re-key data into a spreadsheet, you risk errors and waste time that could go toward serving your clients.
With Cognito Forms, you can connect your forms directly to Google Sheets through one of two no-code automation platforms — Zapier or Make. Once connected, your data flows automatically in either direction. These integrations help you:
- Eliminate manual data exports. Every submission lands in your spreadsheet instantly, with no downloading CSV files or copy-pasting between tabs.
- Keep records accurate and consistent. When someone updates a form entry, the spreadsheet updates too (and vice versa). Everyone works from the same information.
- Enable real-time reporting and collaboration. Your team can build charts, pivot tables, and dashboards in Google Sheets that always reflect your latest form data.
- Support two-way workflows. Teams that manage pricing, statuses, or approvals in Google Sheets can push those changes back into Cognito Forms automatically.
Understanding How Zapier and Make Work
Cognito Forms connects to Google Sheets through Zapier or Make, third-party automation platforms. Both platforms work on the same basic principle: a trigger detects a change (like a form submission or an updated spreadsheet row), and an action sends that data to the other app. You connect your Cognito Forms account and your Google account, map the fields you want to sync, and the automation handles the rest.
The main difference between the two automation platforms is terminology and interface. Both achieve similar results. The choice comes down to which platform you prefer. Zapier organizes automations into Zaps, or a trigger paired with one or more actions. Make organizes them into Scenarios, or a sequence of connected modules.
| The concept | Zapier’s Term | Make’s Term |
|---|---|---|
| The full automation | Zap | Scenario |
| The event that starts the automation | Trigger | Trigger Module |
| The event that happens after being triggered | Action | Action Module |
Learn more about each platform’s terminology and how to use their platform by visiting Zapier’s Help Center or Make’s Help Center.
Before you begin: Zap and Scenario tests overwrite real data. Make sure your test entry and row contain data you’re comfortable changing, so you don’t accidentally overwrite important information.
Three Ways to Sync Cognito Forms with Google Sheets: Step-by-Step Setup
When automating Cognito Forms data with Google Sheets, you have three general options to choose from, depending on what you want to do. Choose one method or set up all three to sync your data no matter where changes occur.
| If you want to… | Use this method |
|---|---|
| Create a new row in Google Sheets when your form is submitted | Method 1: Log each submission as a spreadsheet row → |
| Update Google Sheets rows when the connected Cognito Forms entry is edited | Method 2: Keep spreadsheet rows updated when entries change → |
| Update entries in Cognito Forms when its row in Google Sheets changes | Method 3: Update entries when Google Sheets changes → |
Log each submission as a spreadsheet row
Every time someone submits your form, automatically create a new row in your Google Sheets spreadsheet with that entry’s data. This reduces time spent manually transferring form data into your spreadsheet rows, eliminating data entry errors as well. To automate this, use Zapier or Make’s Triggers and Actions.
When to create a new row in Google Sheets after a form is submitted
- Feed data into existing spreadsheet-based reports. Connect submission data directly into Sheets where you already run calculations, charts, or dashboards.
- Create a backup record of entries. Maintain an automatic copy of all submissions in Google Sheets as a secondary data source alongside your Cognito Forms entries.
- Create a “database” that powers another app or tool. Send form data to another tool, while having the ability to transform the data or control column names that the additional tool requires.
How to set this up with Zapier
1. Create a new Zap in Zapier.
2. Choose Cognito Forms as the Trigger App and New Entry as the Trigger Event.
3. Connect your Cognito Forms account, if you haven't already.
4. Select the Form you want to sync.
5. Test the connection with a recent form entry.

1. Create a new Zap in Zapier.
2. Choose Cognito Forms as the Trigger App and New Entry as the Trigger Event.
3. Connect your Cognito Forms account, if you haven't already.
4. Select the Form you want to sync.
5. Test the connection with a recent form entry.
1. Add Google Sheets as the Action App.
2. Select Create Spreadsheet Row as the Action Event.
3. Connect your Google account, if you haven't already.
4. Select the Spreadsheet and the specific Worksheet you want to create a new row in.

1. Add Google Sheets as the Action App.
2. Select Create Spreadsheet Row as the Action Event.
3. Connect your Google account, if you haven't already.
4. Select the Spreadsheet and the specific Worksheet you want to create a new row in.
1. Fields for each column in your spreadsheet will appear.
2. In each field, use the backslash /
to view the list of Cognito Forms field tokens.
3. Select the tokens that match each column header, mapping each form field to the corresponding spreadsheet column.

1. Fields for each column in your spreadsheet will appear.
2. In each field, use the backslash /
to view the list of Cognito Forms field tokens.
3. Select the tokens that match each column header, mapping each form field to the corresponding spreadsheet column.
1. From your Create Spreadsheet Row step, click Test step .
2. Check the results and make changes, if needed.
3. Click Publish to turn on your zap!

1. From your Create Spreadsheet Row step, click Test step .
2. Check the results and make changes, if needed.
3. Click Publish to turn on your zap!
How to set this up with Make
1. Create a new Scenario.
2. Add Cognito Forms to the first module.
3. Select the Trigger Watch New Entries .
4. Create a Webhook and connect your Cognito Forms account.
5. Choose the Form you want this Scenario to watch.

1. Create a new Scenario.
2. Add Cognito Forms to the first module.
3. Select the Trigger Watch New Entries .
4. Create a Webhook and connect your Cognito Forms account.
5. Choose the Form you want this Scenario to watch.
1. Add Google Sheets to the next module.
2. Select the Action Add a Row .
3. Create a connection to your Google account.
4. Select the Spreadsheet ID and Sheet Name that you want to add rows to.

1. Add Google Sheets to the next module.
2. Select the Action Add a Row .
3. Create a connection to your Google account.
4. Select the Spreadsheet ID and Sheet Name that you want to add rows to.
Map each form field to the corresponding column by clicking into each column field and selecting the Cognito Forms data you want to send.

Map each form field to the corresponding column by clicking into each column field and selecting the Cognito Forms data you want to send.
1. Click Run Once to start a test.
2. Submit a test entry on your form.
3. Check the test's results in Make and change things if needed.
4. When you're finished, Save your changes and set the form to Active .

1. Click Run Once to start a test.
2. Submit a test entry on your form.
3. Check the test's results in Make and change things if needed.
4. When you're finished, Save your changes and set the form to Active .
Keep spreadsheet rows updated when entries change
When someone updates an existing Cognito Forms entry (through a Workflow Action, an edit, or a Status change) the corresponding row in your spreadsheet updates automatically. This keeps your spreadsheet in sync with the latest entry data without manual re-exports. To locate the correct row before updating it, use Zapier’s search step or Make’s search module.
When to update rows after an entry is edited
- Track status changes in real time. When an approval workflow moves an entry from “Pending” to “Approved,” your spreadsheet can reflect the change immediately.
- Maintain accurate client records. If a customer updates their contact information or project details through a Workflow Link, the spreadsheet stays current.
- Accurately reflect the latest data. If you use Google Sheets as your reporting or analytics hub, automatically keep numbers up to date so dashboards, pivot tables, and charts stay current.
Before You Begin: If you do not already have a unique field/column that can be used as an identifier, add a column called “Entry Number” or “Entry ID” in your Google Sheet and connect it to the corresponding Entry Number in Cognito Forms.
How to set this up with Zapier
1. Create a new Zap in Zapier.
2. Choose Cognito Forms as the Trigger App and Update Entry as the Trigger Event.
3. Connect your Cognito Forms account, if you haven't already.
4. Select the Form you want to sync.
5. Test the connection with a recent form entry.

1. Create a new Zap in Zapier.
2. Choose Cognito Forms as the Trigger App and Update Entry as the Trigger Event.
3. Connect your Cognito Forms account, if you haven't already.
4. Select the Form you want to sync.
5. Test the connection with a recent form entry.
1. Choose Google Sheets as the Action App.
2. Select Update Spreadsheet Row as the Action Event.
3. Connect your Google account, if you haven't already.
4. Select the Spreadsheet and the specific Worksheet you want to update rows in.

1. Choose Google Sheets as the Action App.
2. Select Update Spreadsheet Row as the Action Event.
3. Connect your Google account, if you haven't already.
4. Select the Spreadsheet and the specific Worksheet you want to update rows in.
1. When you get to the Row field, select + Add Search Step .
- Zapier will add a Lookup Spreadsheet Row step to the Zap for you, and connect it to the Row field.
- This step is used to identify the field in Cognito Forms and the column in the Google Sheet that correspond and will be used as identifiers.
2. Select the same Spreadsheet and Worksheet that you selected in the Update Action step.
3. Select the Lookup Column and Lookup Value fields for your Entry Number , since this will always be unique.
Set up another column and value to search using the Supporting Lookup Column and Supporting Lookup Value options. This ensures your Zap only finds rows that match both conditions.
1. Go back to the Update Spreadsheet Row step.
2. In each remaining field, use the backslash /
to view the list of Cognito Forms field tokens.
3. Select the tokens that match each column header, mapping each form field to the corresponding spreadsheet column.

1. Go back to the Update Spreadsheet Row step.
2. In each remaining field, use the backslash /
to view the list of Cognito Forms field tokens.
3. Select the tokens that match each column header, mapping each form field to the corresponding spreadsheet column.
1. Update any field on your test entry.
2. From your Update Spreadsheet Row step, click Test step .
3. Check the results and make changes, if needed.
4. Click Publish to turn on your zap!

1. Update any field on your test entry.
2. From your Update Spreadsheet Row step, click Test step .
3. Check the results and make changes, if needed.
4. Click Publish to turn on your zap!
How to set this up with Make
1. Create a new Scenario.
2. Add Cognito Forms to the first module.
3. Select the Trigger Watch Updates .
4. Create a Webhook and connect your Cognito Forms account, if you haven't already.
5. Choose the Form you want this Scenario to watch.

1. Create a new Scenario.
2. Add Cognito Forms to the first module.
3. Select the Trigger Watch Updates .
4. Create a Webhook and connect your Cognito Forms account, if you haven't already.
5. Choose the Form you want this Scenario to watch.
1. Add Google Sheets to the next module.
2. Select Search Rows , which will locate the row matching the entry.
3. Create a connection to your Google account, if you haven't already.
4. Select the Spreadsheet ID and Sheet Name that you want to update rows in.
5. Add a Filter to match your Entry Number column and the Entry Number in Cognito Forms.
1. Add a third module and select Google Sheets again.
2. Select Update a Row .
3. Select the same Spreadsheet and Sheet Name that you used in the Search module.
4. For Row Number
, select the
Row Number
the Search module found. This will make sure to update only the row that matches the row that the Search module identified.
Map the updated fields from Cognito Forms to the appropriate columns.

Map the updated fields from Cognito Forms to the appropriate columns.
1. Click Run Once to start a test.
2. Make an update on an entry that already has a corresponding row in Google Sheets.
3. Check the test's results in Make and change things if needed.
4. When you're finished, Save your changes and set the form to Active .

1. Click Run Once to start a test.
2. Make an update on an entry that already has a corresponding row in Google Sheets.
3. Check the test's results in Make and change things if needed.
4. When you're finished, Save your changes and set the form to Active .
Update Cognito Forms entries when Google Sheets changes
This automation works in the opposite direction. When someone updates a row in Google Sheets, the corresponding Cognito Forms entry updates to match. This gives your team the flexibility to manage certain data in a spreadsheet while keeping customer-facing submissions accurate.
When to update entries after a row changes
- Feed decisions from other tools into your customer-facing entries. Teams separate from your work might track data in Google Sheets (like a finance team managing budget approvals in a shared spreadsheet). Their decisions can sync back to the relevant Cognito Forms entry that customers interact with, triggering a Workflow status change, email notification, or next step.
- Enrich entries with external data. If a separate system or process generates data that doesn’t flow through your form (like verification results, credit assessments, or third-party reference codes) your team or another Zap or Scenario can add that information to the spreadsheet and sync it back to the corresponding Cognito Forms entry, keeping everything in one place.
- Bridge data from legacy processes. During a transition to Cognito Forms, your team may still receive some information through older spreadsheet-based workflows. Syncing those updates back into your form entries helps maintain a single source of truth while you migrate fully to forms.
Before You Begin: If you do not already have a unique field/column that can be used as an identifier, add a column called “Entry Number” or “Entry ID” in your Google Sheet and connect it to the corresponding Entry Number in Cognito Forms.
Additionally, create a separate integration-only Action named “Integration Update.” This helps differentiate integration updates in the Audit Log. Because this Action is separate from the “Update” Action a user has access to, you can also trigger automated emails that only happen when the integration updates the entry.
How to set this up with Zapier
1. Create a new Zap in Zapier.
2. Select Google Sheets as the Trigger App and New or Updated Spreadsheet Row as the Trigger Event.
3. Connect your Google account, if you haven't already.
4. Select the Spreadsheet and Worksheet you want the Trigger to watch.
- If you want the Trigger to only happen when a specific column is updated (and not happen when other columns are changed), select the column you want it to watch in the Trigger Column

1. Create a new Zap in Zapier.
2. Select Google Sheets as the Trigger App and New or Updated Spreadsheet Row as the Trigger Event.
3. Connect your Google account, if you haven't already.
4. Select the Spreadsheet and Worksheet you want the Trigger to watch.
- If you want the Trigger to only happen when a specific column is updated (and not happen when other columns are changed), select the column you want it to watch in the Trigger Column .
1. Select Cognito Forms for the Action App and choose Update Entry as the Action Event .
2. In the Id field, select the spreadsheet column that contains the Cognito Forms entry number. This tells the Zap which entry to update.

1. Select Cognito Forms for the Action App and choose Update Entry as the Action Event .
2. In the Id field, select the spreadsheet column that contains the Cognito Forms entry number. This tells the Zap which entry to update.
1. In each remaining field, use the backslash /
to view the list of Google Sheets column tokens.
2. Select the tokens that match each field name, mapping each column to the corresponding field.
- The options in the Action and Role fields correspond with your form's Workflow Actions and Roles. Visit our Workflow support page to learn more
- In your Zap's settings, Choice fields will default to a Static value. To map the text in your spreadsheet to this field, use the Custom value option.
1. Update any cell on your test entry.
2. From your Update Spreadsheet Row step, click Test step .
3. Check the results and make changes, if needed.
4. Click Publish to turn on your zap!

1. Update any cell on your test entry.
2. From your Update Spreadsheet Row step, click Test step .
3. Check the results and make changes, if needed.
4. Click Publish to turn on your zap!
How to set this up with Make
1. Create a new Scenario.
2. Add Google Sheets to the first module.
3. Select the Trigger Watch Changes .
4. Create a Webhook and connect your Google account, if you haven't already.

1. Create a new Scenario.
2. Add Cognito Forms to the first module.
3. Select the Trigger Watch Changes .
4. Create a Webhook and connect your Google account, if you haven't already.
1. Copy the Webhook's URL in Make, then open your spreadsheet in another tab.
2. Select Extensions > Add-Ons > Get Add-Ons , and then install Make's extension.
3. Go back to the Extensions tab, select Make , and then select Settings .
4. Paste your copied URL in the Webhook URL and Save your changes.
5. Go back to Make and Save the module.
You will need to add Make’s Google Sheets Add-On for this Scenario to work properly. To learn how to add this add-on to your spreadsheet, visit Make’s support article with step-by-step directions.
1. Add Cognito Forms to the next module.
2. Select the Update Entry Action.
3. For Entry Id , select the spreadsheet column that contains the Cognito Forms Entry Number. This will make sure to update only the entry that matches the Entry Number of the spreadsheet row that was updated.
4. Select the Form you want to update.
Map the updated fields from Google Sheets to the appropriate fields in Cognito Forms.

Map the updated fields from Google Sheets to the appropriate fields in Cognito Forms.
1. Click Run Once to start a test.
2. Make an update to a row that already has a corresponding entry in Cognito Forms.
3. Check the test's results in Make and change things if needed.
4. When you're finished, Save your changes and set the form to Active .

1. Click Run Once to start a test.
2. Make an update to a row that already has a corresponding entry in Cognito Forms.
3. Check the test's results in Make and change things if needed.
4. When you're finished, Save your changes and set the form to Active .
Extend Your Google Sheets Integration
A Google Sheets sync is just the starting point to building more powerful, end-to-end workflows. Here are a few ideas to take your setup further:
- Send data to multiple apps at once. Use Multi-Step Zaps or multi-module Make Scenarios to send form data to Google Sheets and another app simultaneously, like a CRM, project management tool, or email marketing platform.
- Clean and transform data before it arrives. Add Formatter steps in Zapier or use Make’s built-in functions to split full names into first and last, reformat dates, or adjust text before it reaches your spreadsheet.
- Combine with Cognito Forms email notifications. Set up confirmation emails that trigger when data syncs or when an external update writes back to an entry, keeping your team informed at every step.
- Monitor integration health in the audit log. Use the Cognito Forms entry audit log to track when integrations trigger and confirm successful syncs.
Start Syncing Your Form Data Today
Connecting Cognito Forms to Google Sheets removes the manual work between collecting data and acting on it. Whether you need a simple submission log or a full two-way sync, Zapier and Make give you the flexibility to build the exact automation your team needs, without writing code. Pick a platform, connect your accounts, and set up your first integration in minutes.
FAQ
Yes. Create a separate Zap or Make Scenario for each form, and point them all to the same Google Sheets spreadsheet. You can send each form’s data to different tabs within the same file, or to the same tab if the column structure matches. This is a common setup for teams that want one central spreadsheet for reporting across multiple forms.
If you rename a field in Cognito Forms after creating your Zap, the updated field name won’t appear automatically in Zapier. The old mapping may stop working or display the outdated field name. You’ll likely need to re-select the form in the trigger settings and re-map the renamed field. The same principle applies in Make. Always check your field mappings after changing field names on your form.