Send customers secure, role-based links that let them update exactly what they need—saving your team time and improving customer satisfaction.
Build Time & Skill
10-15 min
Beginner
What you'll learn
How to send customers a secure link to edit their submission, with settings that control exactly what they can and cannot change
Every business faces the same problem: customers make mistakes. Typos in email addresses, forgotten attachments, changed circumstances. This creates endless email exchanges, duplicate submissions, and hours of manual updates.
With Cognito Forms, you can give customers a secure link to edit their own submissions. They fix errors immediately while you stay in control of exactly which fields they can change.
This self-service approach is ideal for:
- Event registrations where details change
- Applications that need frequent corrections
- Client onboarding with evolving information
- Any form where accuracy matters, but circumstances change
How To Let Customers Edit Their Form Submissions: Step-By-Step
To let customers edit their submissions, enable Workflow Link Sharing in your form’s Workflow settings and determine which fields are visible and editable by configuring conditional logic. These five steps ensure customers can access and update exactly what they need with every form submission.
Step 1: Enable Workflow Link Sharing
Turn on the feature that makes editing possible: Workflow Link Sharing. This allows secure links to be created and shared with customers.

- Go to Workflow settings.
- Toggle Workflow Link Sharing to On.
- Decide when links are allowed:
- Always: link works indefinitely.
- When: set custom conditions (e.g., only while
Status is not Complete).
Set link expiration for time-sensitive forms. For applications, registrations, or submissions with deadlines, configure Workflow Links to expire using conditional logic in the Allow Links option. This prevents late edits while allowing reasonable time to make changes.
Step 2: Control which fields customers can edit
Control exactly what customers can see and change using Show This Field and Read-Only logic. This is where you protect sensitive data while allowing helpful updates.

Fields that should always be editable
- Click the field and set Show This Field to Always or For Roles > Public.
- Under Read-Only, keep it set to Never.
Fields that should be visible, but not editable
- Click the field and set Show This Field to Always or For Roles > Public.
- Under Read-Only, select Always.
Use conditional Read-Only strategically. Rather than permanently locking fields, use When to make fields read-only based on status. For example, lock payment information once processed, but allow contact details to remain editable.
For fields that should be completely hidden from customers
This option is ideal for internal notes, approval fields, or administrative data that your team edits on the back-end as part of your process.
- Click on the field and set Show This Field to For Roles > Internal (or any other Role)
- Optional: Under Read-Only use When to make the field read-only for your internal team after a certain point in the Workflow (e.g.,
When Entry.Status is “Approved”prevents editing after approval).
Add in Require This Field conditions to prevent customers from submitting incomplete information.
Step 3: Configure the Update Action
Ensure customers can save their edits by configuring the “Update” Action that’s included in every form by default.

- Go to Workflow and find Actions.
- Open the “Update” Action.
- Under Allow Action, choose one of the options:
- For Roles to let a certain Role update anytime. (Ensure “Public” is checked, as this Role is the person who submits the form.)
- When to allow updates only in certain statuses, or any other criteria you set.
- Always to let anyone to update anytime.
Optional customizations
- Change the Button Text to something more clear like “Save Changes” or “Update My Info.”
- Add a Confirmation Message. A simple message like, “Your changes have been saved” gives immediate feedback.
- Set the Change Status To option to a specific Workflow Status after the button is clicked. For example, change the status to “Under Review” or “Revised,” so your team knows to look at the entry again.
- Add an email notification under Send Emails to confirm updates were received or send a copy of their updated entry details.
Step 4: Send customers their editing link
Add a Workflow Link to your confirmation email so customers automatically receive their editing link after submitting.

- Navigate to the “Submit” Action (or whatever Action is triggered when the form is first submitted).
- Under Send Emails, click + Add Email.
- Click Share Workflow Link (next to the To field) and select “Public” as the Role.
- Customize the Workflow Button text (e.g., “Edit my submission” or “Update my info”).
- Set the To field to the Email field on your form.
- Write your Subject line and Message content.
Step 5: Test the editing experience
Always preview your form before sending it to customers. This helps you catch any visibility issues and confirm customers see exactly what they should.
- Use Preview mode and check what the Public role sees in each status.
- Confirm:
- Correct fields show/hide as expected
- Read-Only fields can’t be edited
- “Update” Action appears only when allowed
- Submit a test entry and check the email link.
What the Customer Experience Looks Like
Once configured, customers control their information while you save time managing update requests. They receive a confirmation email with a Workflow Link to their editable submission, where they can make updates as needed. The experience is seamless and professional.

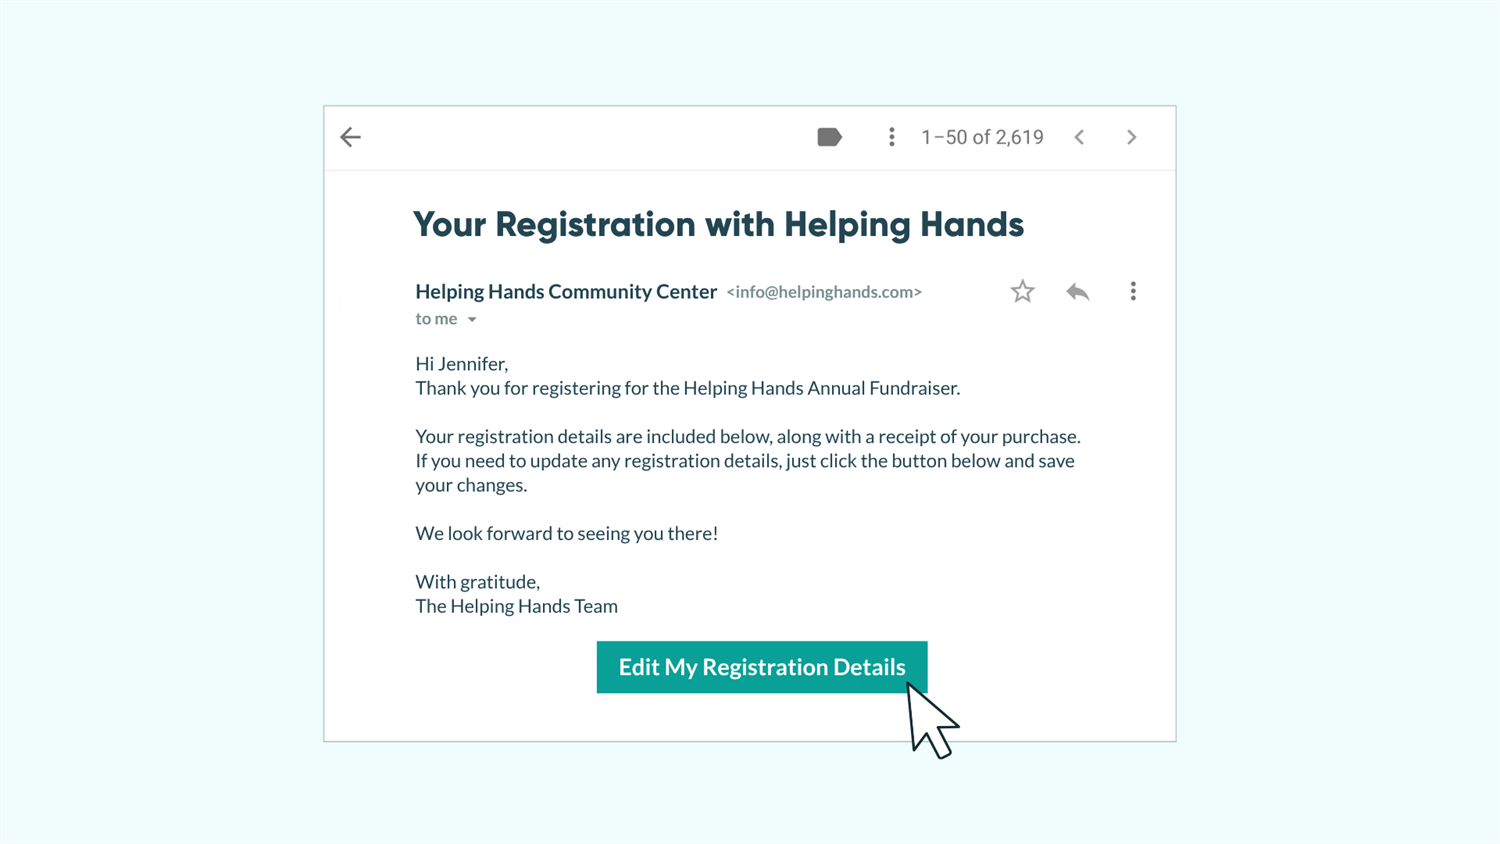
How customers receive the editing link
After submitting, customers receive a confirmation email with a button that stands out visually. No need to contact support or resubmit. They have immediate access to make changes on their own time.
How customers make updates
One click opens their pre-filled form where they can update what they need. Editable fields work normally, protected information appears locked, and internal data stays completely hidden. They make changes, click “Update”, and see instant confirmation.
Customers can return to edit again later
The Workflow Link in their original email continues to work (unless you’ve set it to expire). They can make updates as many times as needed, following the same simple process.
When to Consider a Client Portal
For customers who need to manage multiple submissions or track ongoing processes, consider upgrading to a full portal powered by Guest Access. Portals work best when customers need to:
- Submit a form multiple times (like multiple PTO requests or project updates)
- View and edit multiple submissions in one place
- Track long-term processes or ongoing collaboration
Advanced Techniques
Once your basic editing workflow runs smoothly, add these capabilities to create more powerful, automated processes:
- Send conditional email notifications. Trigger emails only when specific fields change. For example, if a customer updates their delivery address, notify your shipping team automatically.
- Set up approval workflows after edits. Use multiple Roles to create approval chains where edits must be reviewed before finalizing (useful for contract changes or sensitive data).
- Track changes in audit trails. Every change made through a Workflow Link is automatically logged. Review the Audit Log to see who made what change and when.
- Create status-based editing windows. Use Allow Action settings to permit editing only when entries are in specific statuses, giving you granular control over when changes are allowed.
Start Enabling Customer Self-Service Today
Transform a one-time form into a flexible, ongoing tool by enabling customer editing. With thoughtfully configured field visibility, Read-Only settings, and Workflow Links, you empower customers while reducing your workload. Whether you’re managing simple contact updates or complex application processes, editable submissions reduce friction, improve accuracy, and deliver a better experience for everyone involved.
FAQ
Yes, customers can use the same Workflow Link to edit as many times as needed, unless you’ve configured the link to expire. The link remains active for unlimited updates within your configured timeframe.
Use the Read-Only setting on any field you want to protect. Set to “Always” to permanently lock the field, or use “When” to lock fields only in certain situations (like locking payment information after processing).
Yes, if they are logged in as a user or a guest. Every change made through a Workflow Link is automatically logged in the entry’s Audit Log. You can see who made changes, what fields were modified, and when the changes occurred. How far back your audit log goes depends on your plan’s limits.
Workflow Links are unique, encrypted URLs that are extremely difficult to guess. Each link is specific to one submission and one Role. However, because Workflow Links can be forwarded to and opened by anyone, we recommend requiring authentication for added security.