Give people time to gather information, get approvals, or find documents—without losing their progress or starting over from scratch.
Build Time & Skill
10-15 min
Beginner
What you'll learn
How to enable Save & Resume so form users can save their progress, return later via email link, and complete submissions on their schedule
Long forms require time. Clients need to gather documents, employees need manager approvals, customers need to find payment information. Without a way to save progress, every interruption becomes an abandoned form, and you lose valuable submissions because people don’t want to start over.
With Cognito Forms’ Save & Resume feature, you can:
- Reduce form abandonment for complex intake, onboarding, and payment processes by letting people return exactly where they left off.
- Improve completion rates by giving people the flexibility to work at their own pace across days or weeks.
- Maintain control over link expiration times and form security while offering convenience.
How to Set Up Progress Saving: Step-by-Step
Allowing progress saving on your forms takes just a few minutes. You’ll turn on the Save & Resume feature, configure how long links stay valid, customize the email people receive, and test the experience before going live.
Step 1: Enable Save & Resume
Turn on the feature that lets form users save their progress and return later.

- Open the Workflow menu at the top of the form builder.
- Toggle Save & Resume to On.
- A Save button automatically appears at the bottom of your form.
Once enabled, anyone filling out your form can click the “Save” button and receive a unique link to their in-progress entry.
Step 2: Configure link expiration
Control how long Save & Resume links remain valid. This balance between convenience and security depends on your specific use case.
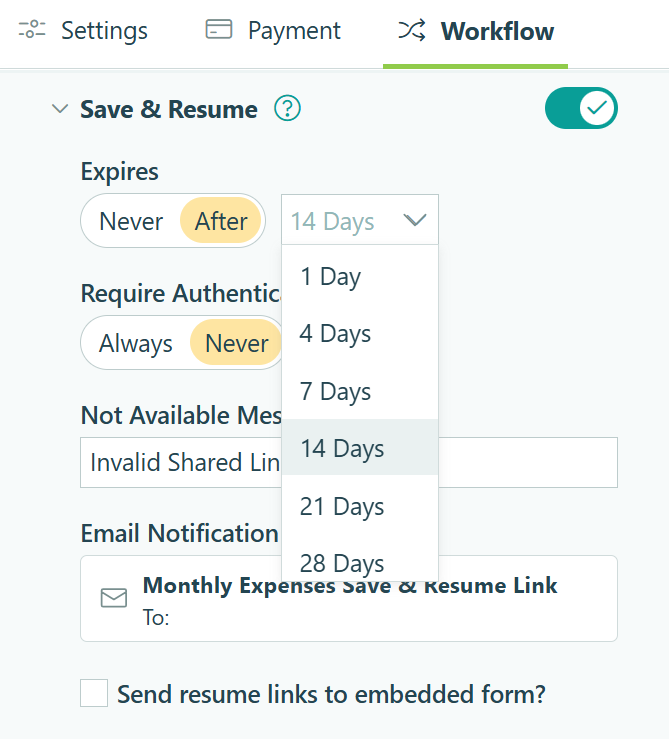
For the Expires setting, you have two options:
- Never expire: The link works indefinitely until someone submits the form (changing the status from Incomplete). Choose this for applications or registrations where people need unlimited time to gather information.
- After X days: Set a specific timeframe from 1 to 28 days after the initial save. The link expires after your chosen period or when the entry status changes from Incomplete (whichever comes first). This works well for time-sensitive processes like event registrations or quote approvals.
When a link expires, users see a customizable Not Available Message. You can edit this message to explain why the link no longer works and provide next steps (like contacting your team or submitting a new form).
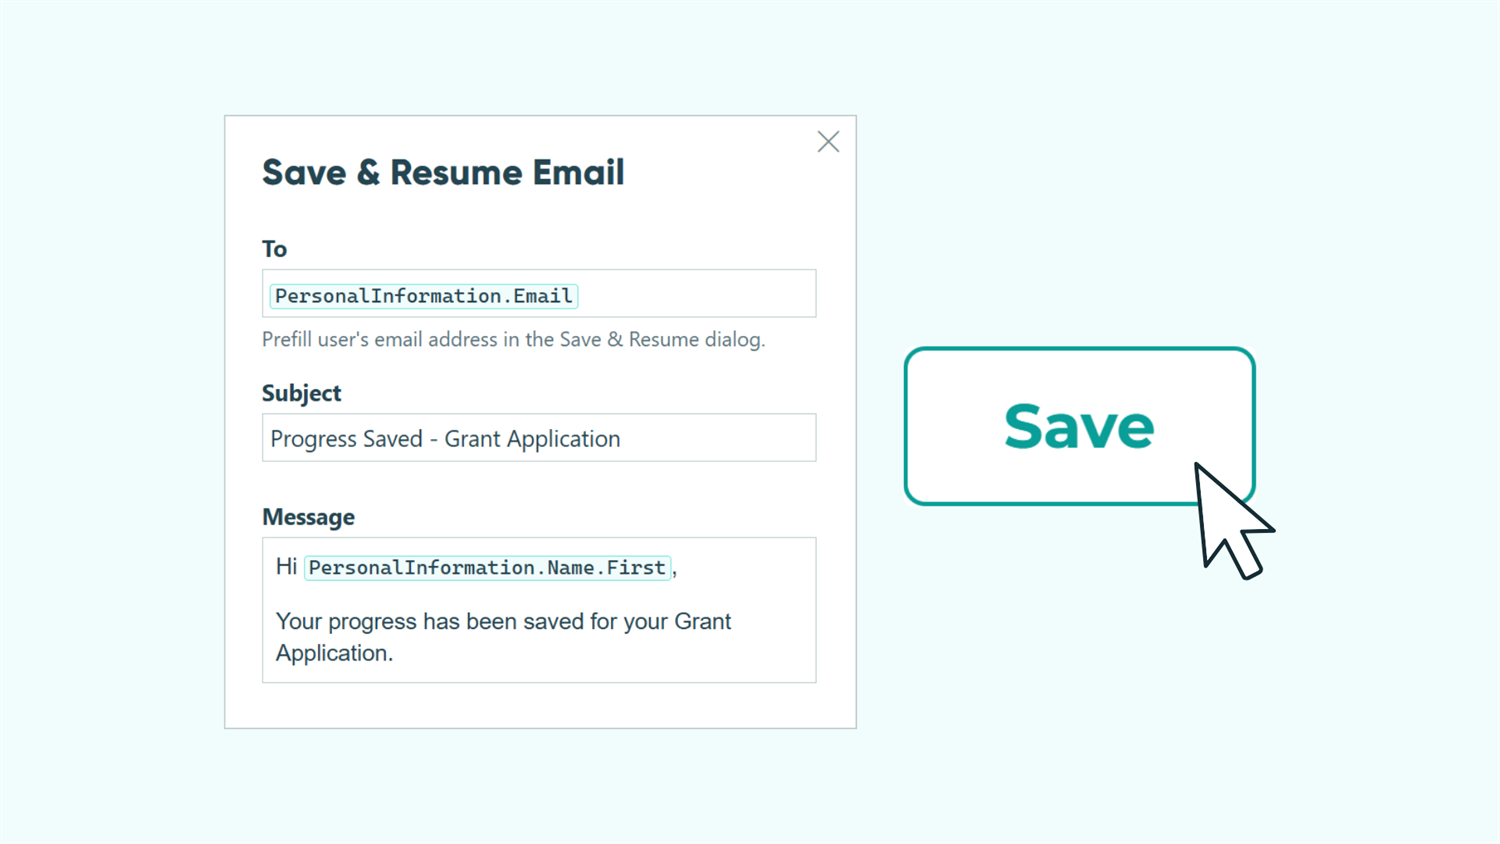
Step 3: Customize the Save & Resume email
When someone saves their progress, they can either copy the link directly or email it to themselves. Customize this email to match your brand voice and provide clear instructions.

Configure these email settings:
- From: Set both the display name and email address that the message comes from.
- To: You have two options here:
- Leave blank so the form user can input any email address when saving.
- Use Insert Field to auto-populate an email address from an Email field or Person field already on your form.
- Message: Write instructions explaining what the link does and how long it remains valid. Keep it brief and action-oriented.
If you’ve embedded your form on your website, check Send resume links to embedded forms to redirect people back to your site instead of the Cognito Forms domain.
Step 4: Test the experience
Before sharing your form, verify that Save & Resume works as expected and provides the right user experience.

- Fill out part of the form using the Public Link.
- Click the Save button at the bottom.
- Choose to email the link to yourself.
- Check your email and click the link to reopen your entry.
- Confirm you return to exactly where you left off, with all data preserved.
This testing process helps you catch any issues with link expiration settings, email formatting, or the overall flow before your real form users encounter them.
When someone opens a Save & Resume link for a multi-page form, their progress is automatically saved as they navigate from page to page.
When Save & Resume Becomes Essential
While Save & Resume benefits many forms, certain scenarios make this feature absolutely critical. These are the situations where abandonment rates drop dramatically once you enable progress saving.
- Lengthy intake forms and applications: Client onboarding, job applications, and intake forms often span multiple pages and require information people don’t have at their fingertips. Save & Resume respects that reality and turns these frustrating obstacles into manageable tasks people can complete in stages.
- Payment collection forms: People rarely have payment information readily available. Whether they need to get budget approval, locate a company credit card, or verify account details with accounting, payment forms see high abandonment without progress saving.
- Multi-department approval workflows: Employees submitting requests often can’t complete forms in one sitting when they need manager signatures, budget codes, or departmental approvals before submission. Save & Resume prevents them from losing work while they gather required sign-offs.
Start Reducing Form Abandonment Today
Long forms don’t have to mean lost submissions. Enable Save & Resume to give people the flexibility they need while maintaining the professional, efficient workflows you depend on. Whether you’re onboarding clients, collecting payments, or processing applications, this single feature can dramatically improve completion rates and user satisfaction.
FAQ
Yes, they can save their progress as many times as needed within the expiration timeframe. Each time they click Save, they can use the same link they previously received and will receive the link again. The Entry Audit Log tracks saves that are at least one hour apart, giving you visibility into how many times someone returned to complete the form.
When a link expires, users see your customized “Not Available Message” instead of the form. This message can explain why the link expired and provide next steps, like contacting your team or submitting a new form. Links expire either after your set timeframe (up to 28 days) or when the entry status changes from Incomplete (whichever comes first).
Yes, saved entries count toward your plan’s entry limit even while they remain in Incomplete status. These entries contain data and consume storage, so they’re viewed as “In Progress” and counted just like submitted entries.
Yes, Save & Resume works with embedded forms. Enable the Send resume links to embedded forms option in your Save & Resume settings to ensure the link redirects people back to your website where the form is embedded, rather than to the Cognito Forms domain. This maintains a seamless, branded experience even when people return to complete their form later.