Build Time & Skill
10-15 min
Intermediate
What you'll learn
How to use the Include filter to show only active choices in Lookup fields while preserving historical entries
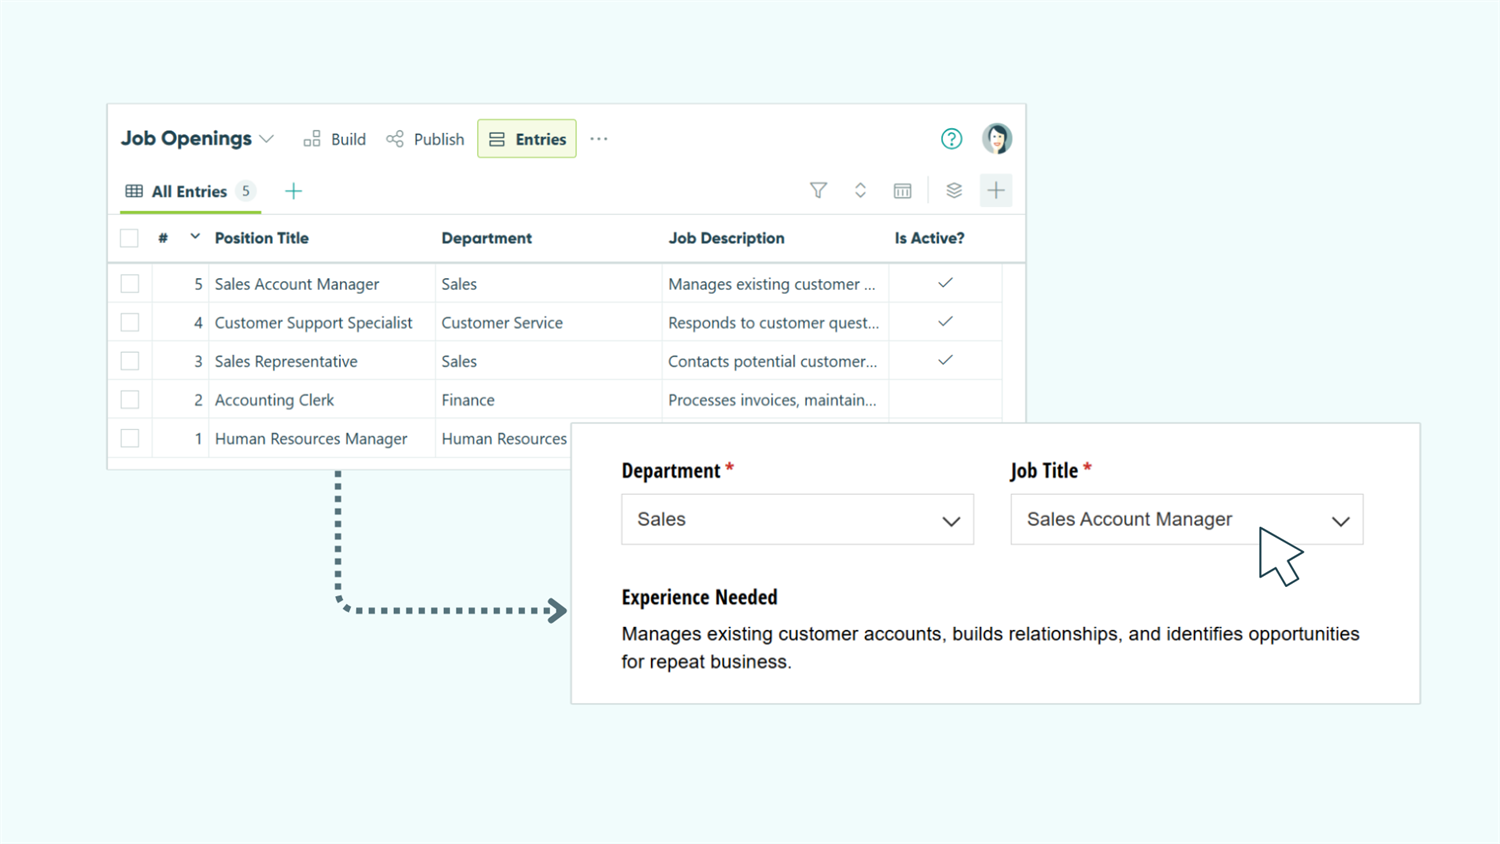
With Cognito Forms’ Include filter on Lookup fields, you can hide inactive options while preserving all historical data. When someone views an old entry, they still see which option was originally selected – even if that option is now inactive. New submissions only show current, active options.
This approach helps you:
- Keep dropdowns clean and relevant. Users see only available options, reducing confusion and preventing selections of discontinued items.
- Preserve historical accuracy. Old entries retain their original selections, maintaining complete records even after options are retired.
- Update instantly across all forms. Change one Yes/No field on your master list, and the option disappears from every form that references it—no need to edit multiple forms.
- Avoid accidental deletions. Retiring options rather than deleting them protects data integrity and maintains audit trails.
Step-by-Step: Filtering Inactive Options
This four-step process ensures users see only current options while you maintain complete historical records.
Step 1: Set up your source form with an active status field
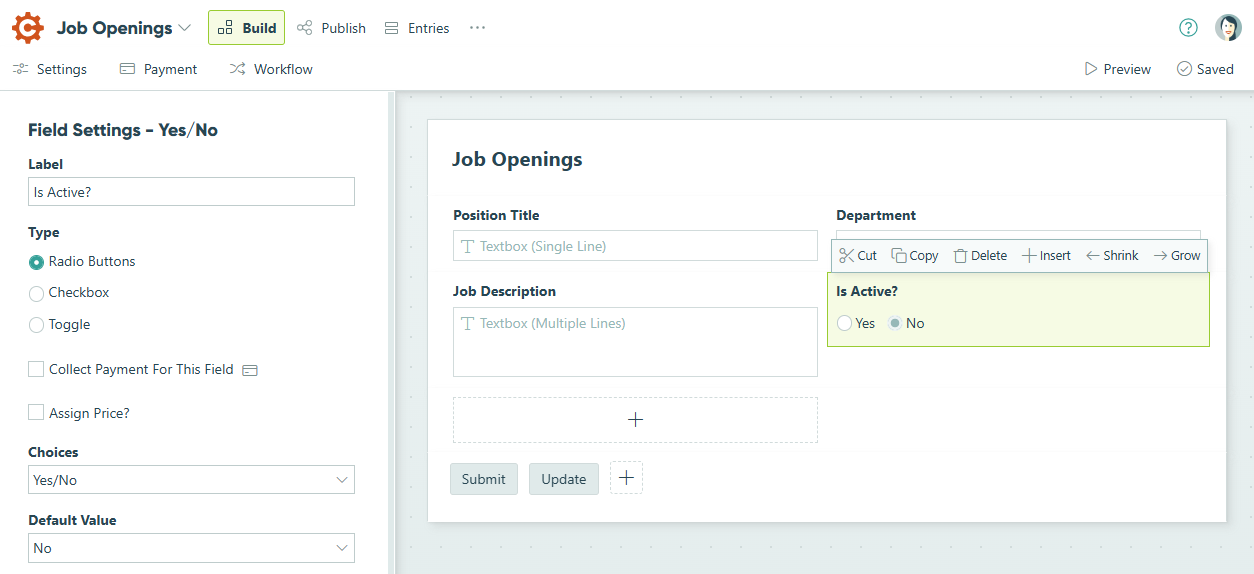
Your source form needs a way to mark options as active or inactive. The Yes/No field provides the simplest, most reliable method for filtering.
-
Create or open your source form (like “Job Openings” or “Product Catalog”).
-
Add a Yes/No field and label it “Is Active?”.
-
Add any other fields relevant to your use case. For job openings, you might include fields like Position Title, Department, and Job Description.
-
In Form Settings, turn on Use with Lookup Field?
-
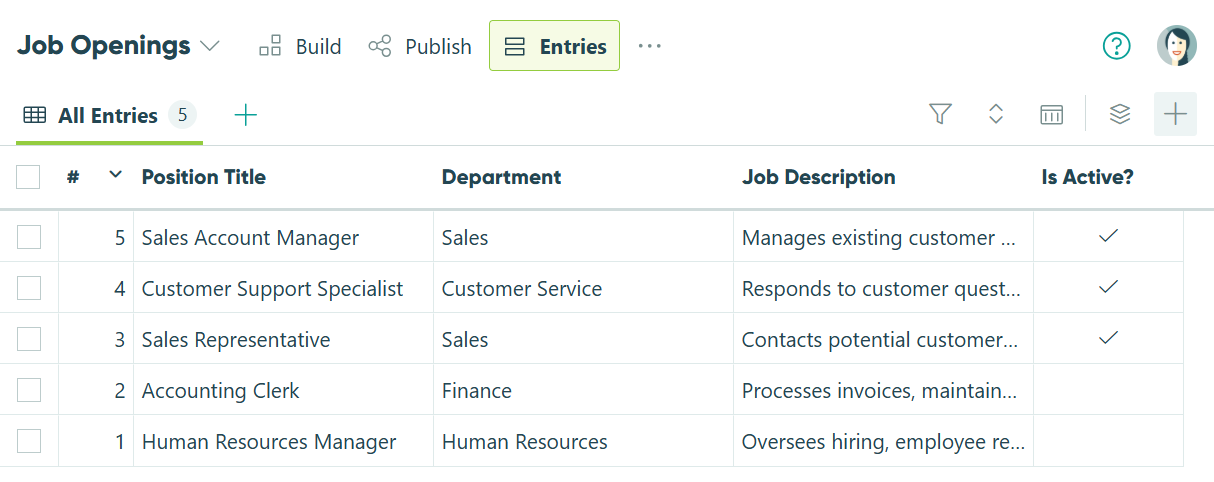
Go to the Entries page and populate your list:
- Set Is Active? to “Yes” for current job openings
- Set Is Active? to “No” for inactive job openings
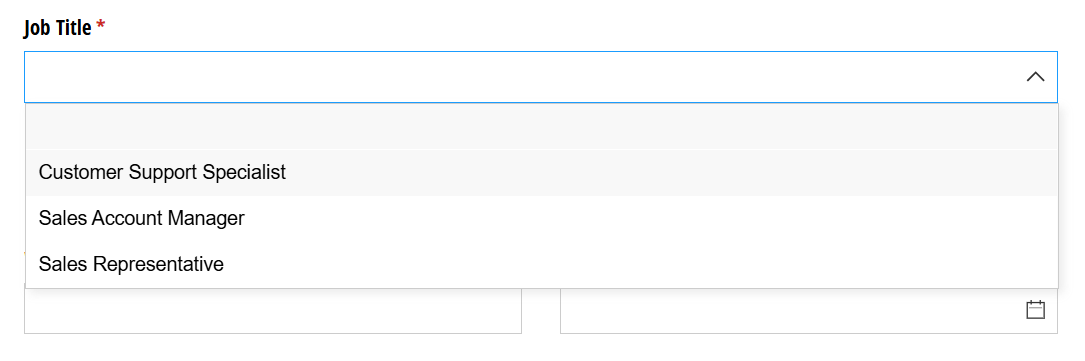
Step 2: Add a Lookup field to your target form
Connect your target form to the source form using a Lookup field. This establishes the relationship that makes filtering possible.
-
Open the form where users will make selections (like “Job Application” or “Order Form”).
-
Add a Lookup field and label it “Job Title”.
-
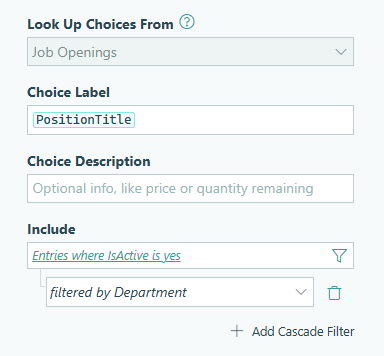
In the Lookup field settings:
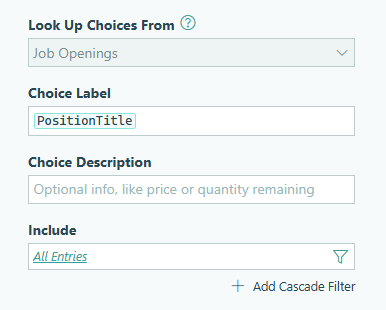
- Lookup Choices From: Select your source form (in this case, the Job Openings form)
- Choice Label: Select the field applicants should see (like “Position Title”)
-
Optionally, include a Textbox field to display the job description details:
- Set Type to Multiple Lines
- Set Default Value to
=JobTitle.JobDescription. Make sure to replace “Job Title” with the name of your Lookup field and “Job Description” with the name of the field you’re referencing from your source form. - Set Read-Only to Always
Your Lookup field now displays all entries from your source form – both active and inactive. The next step filters this list.

Step 3: Configure the Include filter
The Include filter controls which entries appear as choices. Configure it to show only active options while preserving historical selections.
-
In your Lookup field settings, find the Include option.
-
Set the filter to match your active status field:
- Select your Yes/No field (like “Is Active?”)
- Choose “is yes” from the dropdown
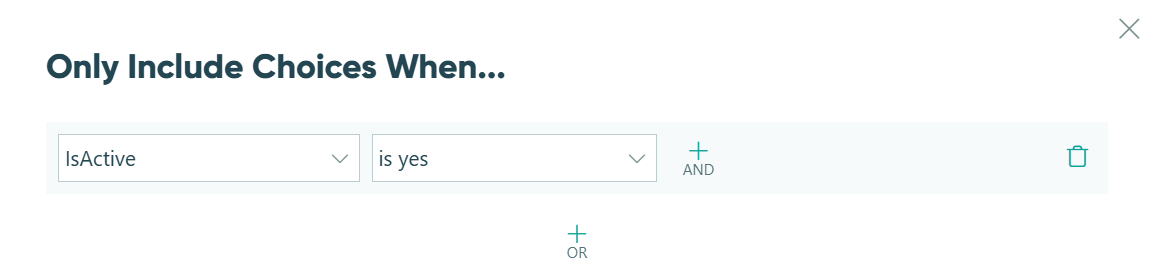
-
Save your changes.
Now your Lookup field displays only options marked as active on the source form. When you change an entry’s active status on the source form, it immediately appears or disappears from the dropdown across all forms using that filter.
Historical entries remain intact. When you view an old submission that selected a now-inactive option, the original selection still displays correctly. The filter only affects new submissions – it doesn’t retroactively change or hide existing data.
Step 4: Test your filter
Verify that the filter works correctly and that historical data remains accessible.
- Preview your form and check the Lookup field dropdown – it should show only active options.
- Submit a test entry selecting one of the active options.
- Go to your source form and change that option’s “Is Active?” field to “No.”
- Preview your form again – the option should no longer appear in the dropdown.
- View your test entry. The originally selected option should still be visible, even though it’s now inactive.

Advanced Techniques
Once you’re comfortable with basic active/inactive filtering, these advanced approaches create even more sophisticated dropdown controls:
Cascade filters for dependent dropdowns
Create dependent dropdowns where the first selection narrows the second. This is particularly useful when you have hierarchical data like Department → Position or Category → Product.
-
In your Job Title Lookup field settings, click Add Cascade Filter in the Include section.
-
Select a category to help narrow down selections, like “Department” for job openings. A separate filter field for Department will appear before the Lookup field.
-
Optionally, set Show This Field – When to only display the Job Title Lookup field when the department is filled out.

Now, when an applicant selects a department, they will only see the relevant, active positions in the Job Title Lookup field.

Filter by quantity limits
Automatically hide options when capacity is reached by filtering on quantity fields. This prevents overbooking and ensures accurate availability across all forms.
Add a Number field to your source form for available quantity, then reference it in the Limit Quantity setting on your Lookup field. Quantities are updated in real time as orders come in across all forms, using the same master list.
For step-by-step instructions on configuring quantity limits with Lookup fields, see How To Create a Product Inventory Using Lookup Fields.

Start Filtering Inactive Options Today
Stop deleting valuable historical data or forcing users to scroll through irrelevant options. With the Include filter on Lookup fields, you maintain clean, current dropdowns while preserving complete records. Mark an option as inactive once, and it disappears from all forms instantly – yet remains visible on any entries that selected it before retirement.
Whether you’re managing job openings, product catalogs, service offerings, or any other dynamic list, filtering inactive options creates a better experience for users while protecting your data integrity.
FAQ
No. Those past entries retain their original selection and display it normally when viewed. The Include filter only affects new submissions – it doesn’t retroactively hide or remove data from existing entries. This ensures historical accuracy and maintains complete audit trails.
Yes. Simply go to your source form, find the entry you want to reactivate, and change the Yes/No field back to “Yes.” The option immediately reappears in all Lookup field dropdowns across every form that references your source form. No need to republish or reconfigure anything.
Yes. The Include filter works with any field type on your source form. You can filter by Choice fields (like “Status = Open”), Number fields (like “Price < 1000”), Date fields (like “Event Date is after Today”), or any other field that helps you control which options appear. Yes/No fields are simply the most straightforward approach for active/inactive filtering.