Set up one automated system that creates all client onboarding forms (intake, agreements, and payment) prefilled and ready in a secure portal.
Build Time & Skill
45-60 min
Advanced
What you'll learn
How to create an automated onboarding system that generates multiple pre-filled forms as tasks when you add a new client
Manual client onboarding drains time and creates friction. You’re juggling multiple forms, copying information between documents, and chasing clients through endless email threads for basic information they’ve already given you once. With Cognito Forms, you can automate the entire onboarding process.
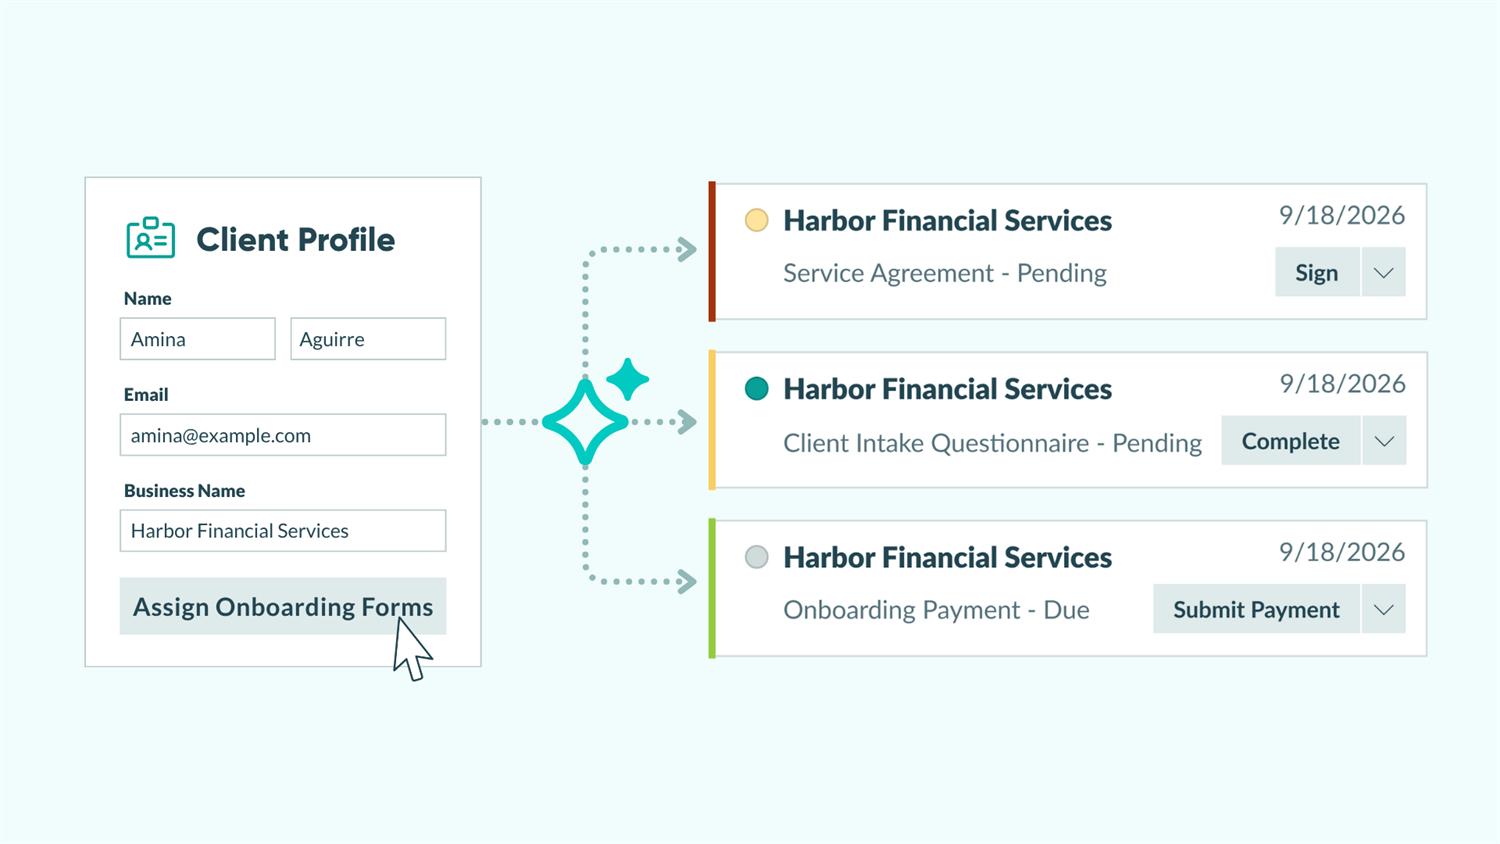
Add a new client to your list, click one button, and watch as the system instantly generates all their onboarding forms with their information already filled in. Your client logs into your portal, sees exactly what they need to complete, and works through everything at their own pace while you track progress in real-time. This automated approach helps you:
- Eliminate repetitive data entry. Enter client information once and watch it populate across all onboarding forms automatically, ensuring accuracy and saving hours of manual work.
- Deliver professional, consistent experiences. Every client receives the same thorough onboarding process with nothing forgotten or skipped, regardless of which team member initiates it.
- Reduce onboarding time dramatically. Clients complete everything in one place without waiting for you to send the next form or manually prefill their information.
- Keep everyone on the same page. Track which clients have completed which forms, see what’s pending, and never wonder where someone is in the process.
Understanding the Key Components
These features combine to create one seamless automation. Add a client once, and the system handles everything else: creating forms, assigning tasks, and giving clients a complete onboarding experience. Before building, understand how these three features work together:
| Feature | What It Does | Role in This Workflow |
|---|---|---|
| Auto-Create Entries | Automatically generates new entries on target forms when triggered by an action | Creates the intake questionnaire, service agreement, and payment form instantly when you add a client to your list, all prefilled with their information |
| Guest Access | Gives external users secure, password-free access to forms and entries you share with them | Provides clients a portal to log in, view their tasks, complete forms, and track progress without email chains |
| Workflow Tasks | Transforms entries into organized, actionable to-do lists for specific roles | Displays the three auto-created forms as clear tasks in the client’s portal, automatically removing completed items as they progress |
Step-by-Step: Building Your Automated Onboarding System
Create a Client List as your guest list, build three onboarding forms with Person fields, configure Auto-Create Entries to generate all forms when adding a client, set up Task Views so clients see their assignments, and send portal access via email.
Building an automated onboarding system requires careful setup, but once configured, it runs smoothly with minimal maintenance. Follow these six steps to transform your manual process into an automated workflow that saves time and delivers a professional client experience.
Step 1: Create a guest list for clients
Your guest list serves as both your client database and the trigger for your entire onboarding automation. With the click of a single button, it kicks off the process that creates all their onboarding forms.
Creating the guest list form

- Create a new Person Form, and name it “Client List” or “Client Database.”
- The form will already include fields for Name, Email, and IsActive status.
If you are creating your Person Form from a previously created form, be sure you have these fields.
- The form will already include fields for Name, Email, and IsActive status.
- Go to Form Settings and enable Use With Person Field?
- Map your form’s fields to each Person Field setting:
- Name identifies the client.
- Email must match the address clients will use to log in.
- IsActive controls whether a client currently has access to the portal.
- Check Allow people to log in as guest users? This activates your client list as a guest list, allowing clients to access their portal.
If you want clients to update their own contact information, check this box: Allow guests to edit their profile?
Adding your clients
Once your Person form is built with the fields you need, you need to add each client as a new entry in this form.

- Go to the form’s Entries page.
- Create a separate entry for each client with their information.
- You can create entries manually, import them from a CSV or Excel file, or use an integration (like Zapier or Power Automate) to sync from your CRM or another system.
Step 2: Build your onboarding forms
Create the three forms that will be automatically generated for each new client. These forms become tasks in your client’s portal, and they’ll complete them in whatever order makes sense for their situation.
Add Person Fields
Every onboarding form needs a Person field connected to your “Client List” form. This is what enables the automation to prefill client information.

Follow these steps for each form:
- Create a new form with an appropriate name.
- Add a Person field at the top and label it “Client” or “Customer.”
- Verify these settings on each onboarding form’s Person field:
- Look Up People From: Select your “Client List” form
- Default To: Current User (automatically selects the logged-in client)
- Read-Only: Always (prevents clients from changing who they are)
Prefill info and share entries
In order to automatically share the created entry with the client, with information from the “Client List” prefilled, you’ll need to add a couple of things.

Follow these steps for each form:
- Go to Workflow > Roles > Public and select the client’s Person field under Share With. This will automatically share the created entry/task with the client selected in the “Client” Person field on this form.
- For any fields where you want to display information from the “Client List” (like Company Name, Phone, or Email), set their Default Value to reference the Person field:
- Example:
=Client.CompanyNameor=Client.Email - Set these fields to Read-Only if clients shouldn’t change them
- Example:
This configuration ensures that when forms are auto-created and assigned to a client, all their information from the “Client List” flows into the right places automatically.
What makes each form unique
| Form | Purpose | Key fields to add |
|---|---|---|
| Client Intake Questionnaire | Gathers detailed information about the client’s needs and requirements | Services needed, timeline expectations, budget range, specific requirements, and a File Upload field for supporting documents |
| Service Agreement | Presents standard service terms for review and acceptance | Agreement terms section (read-only text), Signature field for client acceptance, Date field, and any negotiable terms or customizations |
| Onboarding Payment | Collects initial payment, retainer, or deposit | Service description, amount due (calculated or fixed), and a field collecting payment, connected to your processor (Stripe, PayPal, or Square) |
- If you’re collecting signatures: The Signature field captures legally binding electronic signatures. Once signed, make the Signature field Read-Only for all roles to prevent alterations after acceptance.
- If you’re collecting payments: Collecting Payment through Cognito Forms handles the entire transaction securely. You can configure whether to collect payment immediately or just authorize the card for later charging.
Step 3: Set up Workflow Actions and Statuses
Before connecting your forms, add a custom workflow action and status to each onboarding form. This gives you better control over tracking and allows the auto-created entries to start in a “Pending Client Completion” status rather than the default “Submitted” status.
For each of the three onboarding forms, follow these steps.
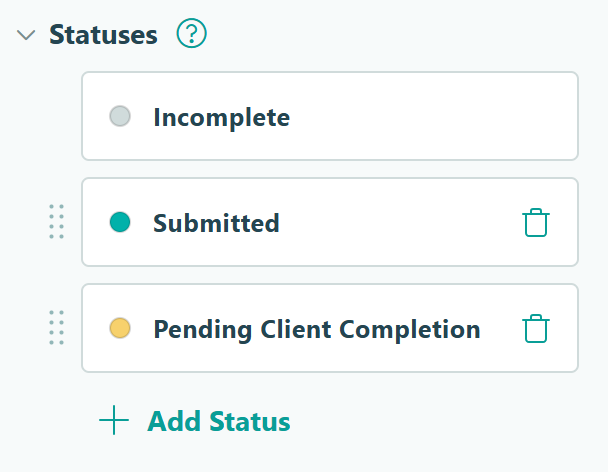
Create Statuses
- Open the form and go to Workflow settings.
- Under Statuses, click + New Status and create a status called “Pending Client Completion.”
Set up Actions

- Under Actions, click + New Action and create an action called “Assign to Client.”
- Configure the action settings:
- Change Status To: Pending Client Completion
- Allow Action: When →
Entry.Status is IncompleteANDEntry.Role is Internal
- Open the “Submit” Action and adjust the Allow Action settings to: When →
Entry.Status is "Pending Client Completion"ANDEntry.Role is "Public"
Repeat for all forms
Repeat the setup of Workflow Statuses and Actions for all three forms to maintain consistency across your onboarding workflow.
Why add these? When Auto-Create Entries generates the forms, you’ll configure them to use the “Assign to Client” Action. This means entries will go to the “Pending Client Completion” Status, making it easy to track which clients have work pending and filter your Task Views accordingly.
Step 4: Configure Auto-Create Entries
This is where the automation happens. You’ll set up your “Client List” form to automatically create all three onboarding forms whenever you click an “Assign Onboarding Forms” button.

1. Open your "Client List" form and go to Workflow settings.
2. Under Actions , create a custom Action called "Assign Onboarding Forms." (If you want the automation to happen immediately when you add a client, you can use the default "Submit" action instead.)
3. Set the Allow Action
logic to For Roles →
Internal
, so clients will never see this Action on the form.
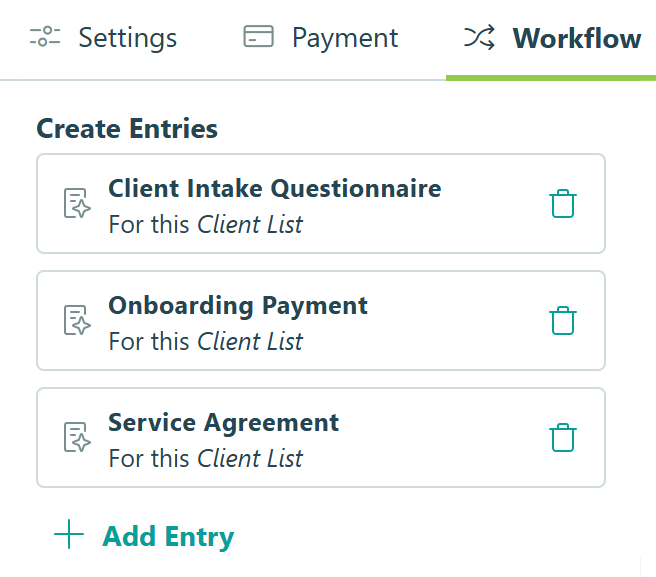
4. Find Create Entries and click + New Entry . Then:
- Select the Target Form. (This will be different each time you repeat this step.)
- Choose the “Assign to Client” Action you created earlier.
- Configure the Prefill Fields by selecting the “Client” Person field on the left and “This Entry” on the right.
5. Repeat Step 4 for each of your onboarding forms.
Now when you click the “Assign Onboarding Forms” button from a client’s entry, the system instantly creates a new entry for all three onboarding forms with the client’s information prefilled through the Person field.
You can create entries on any Action, like “Submit” or any custom Action. Using a custom Action like “Assign Onboarding Forms” gives you more control over exactly when the automation runs, which is helpful if you want to review client information before generating their forms.
Step 5: Set up Task Views for clients
Task Views transform the auto-created entries into organized to-do lists that clients see in their portal. Each form becomes a clear task with all the context they need.
You’ll create one Task View for each of your three onboarding forms, all configured for the Public role (which represents your clients/guests). The setup process is identical for all three forms (only the form name and Task View name change).
For all three onboarding forms, follow these steps:
Create a Task View

- Open the form and go to the Entries page.
- Click the plus sign (+) at the top and select New Task View.
- Give the View a client-friendly name (this is what they’ll see), set the Role to “Public”, and ensure Assign As Tasks is turned on.
You can also add a Due Date for client tasks. Use a fixed date or calculate dynamic deadlines using a Date field’s Default Value setting. Once set, you can send automated reminder emails when deadlines approach or pass, keeping clients on track without manual follow-up. Learn how to set up task reminders.
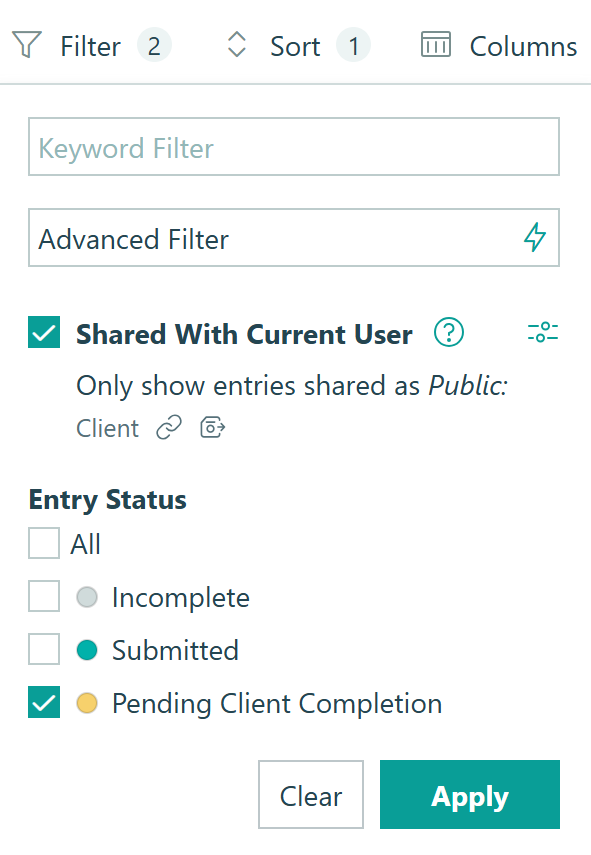
Filter the View
Set up Filters, so completed tasks disappear from the view.
- Click Filter in the top menu.
- Add a filter like “Status is Submitted” (or whatever status represents incomplete work)
- Check the Shared With Current User filter
- Check the settings icon next to it. Verify Share With is configured correctly. This should be shared with the client’s Person field.
- Click Save to finalize your changes.
Now all three onboarding forms can appear as tasks in your client’s portal, each with a clear name and deadline.
Optional addition for past entries
If you want clients to be able to view their entries after completing their tasks, set up a Grid View for each form they will complete.
- From the Entries page, click the plus sign (+) at the top and select New Grid View.
- Give the View a client-friendly name (this is what they’ll see), set the Role to “Public”, and turn off Allow New Entries if you don’t want them to submit new entries from this View.
- Filter the View to only entries in the “Submitted” Status, or whatever works best for your Workflow.
Step 6: Polish your client portal
Before inviting clients, customize the portal experience by going to your Organization Settings and selecting Guest Access. The following enhancements are available:
- Review allowed guest types: Confirm your “Client List” appears and settings are correct.
- Custom links and welcome message: Add your terms of service/privacy policy links for clients accept on first login and a custom welcome message they’ll see on their homepage after logging in.
- Custom branding (Enterprise only): Upload your logo and brand colors in Appearance settings.
We recommend you preview the client portal experience before sending invites. From the Guest Access settings page, find the guest table at the bottom and click the eye icon next to any active guest. You’ll impersonate that guest to preview exactly what they’ll see when they log in.
Step 7: Send clients their portal access
The final step is letting clients know they have tasks waiting and giving them access to log in. You’ll set up an automated email notification to go out when you click the “Assign Onboarding Forms” button. This email will include a link to your organization’s portal.
- Go back to your Client List form and open Workflow settings.
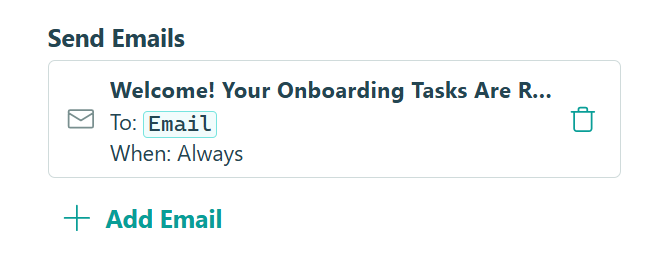
- Under the same Action where you configured Auto-Create Entries (like “Assign Onboarding Forms”), find Send Emails and click + Add Email.

3. Configure the email to send To: the Email field on the form.
4. Add your organization's portal URL somewhere in the email's message.
- Your unique portal URL will look like this:
www.cognitoforms.com/yourorganizationname - You can also send clients directly to the Task Dashboard by linking to the “tasks” page of your portal:
www.cognitoforms.com/yourorganizationname/tasks - Replace
yourorganizationnamewith your actual organization’s Cognito Forms URL. You can find this in your browser’s address bar when you’re logged in.
5. Customize the email message to explain what they'll find. (For example, let them know that they'll need to verify their email address to log in via a one-time code, and they'll have tasks waiting on them, with their information prefilled where possible).
By sending clients to your organization’s portal URL instead of a specific workflow link, they get the full portal experience. They can see all their tasks in one dashboard, track their progress, and access everything in one central place.
The Full Onboarding Experience
Now, when you click the “Assign Onboarding Forms” Action on your “Client List” form, the system automatically creates a new entry on all three forms and assigns each as a task. It also sends the client an email with access to their portal. The entire experience happens in one place without waiting for you to email the next form or requiring clients to manually fill in information they’ve already provided. Clients work at their own pace, and you track their progress in real-time from your admin views.
The entire onboarding process feels seamless and professional for your clients.
You initiate onboarding
When you click the “Assign Onboarding Forms” Action, the onboarding automation is triggered. An email was sent to the client and new entries appear on the forms that you’ve set up to auto-create entries. Now, each time you start the onboarding process for a new client, you only click a single button. It’s that simple.

Clients open and complete tasks
Clients receive a welcome email explaining that their onboarding tasks are ready. The email links to your organization’s portal. When clicked, they’re asked to verify their email address via a one-time code sent to them. After logging in, they see their Task Dashboard, showing exactly what needs to be completed and their due dates. As they work through each form, completed tasks disappear and the task count goes down, making progress clear and streamlined.

Additional Features to Enhance Your Onboarding
Once you’ve mastered this automated onboarding workflow, these advanced techniques take your system even further:
- Auto-generate signed agreement documents. Set up a Custom Document Template that creates a professional PDF version of the signed Service Agreement. All agreement details and the client’s signature from the Signature field can be embedded in the document.
- Set up automated email reminders. Configure reminder emails in your Task View settings to automatically notify clients when deadlines approach or pass. Send reminders at three intervals to keep onboarding moving without manual follow-up.
- Add custom branding to your guest portal. Add your company logo and brand colors to the guest portal through your organization’s Appearance settings. This creates a seamless, professional experience that feels like a natural extension of your business.
Start Automating Client Onboarding Today
Manual onboarding workflows create bottlenecks, increase errors, and frustrate everyone involved. With Cognito Forms’ automated multi-form system, you transform a scattered, time-consuming process into a streamlined experience that runs itself.
Add a client once, and the system generates all their onboarding forms, prefills their information, assigns tasks, and gives them everything they need in one central portal. You eliminate hours of manual work while delivering a professional, organized onboarding experience that sets the right tone for your client relationships.
FAQ
You can auto-create up to 1,000 entries from a single Action. This guide covers three onboarding forms, but you could easily add more. For example, you might include additional forms for project kickoff, resource allocation, or team introductions. Each form you add to the Create Entries settings will be generated automatically when you trigger the action.
Incomplete forms remain as tasks in their Task Dashboard until completed. You can set up automated reminder emails in the Task View settings to nudge clients when deadlines approach or pass. Additionally, you can monitor progress from your admin entry views to see which clients have incomplete onboarding and reach out personally if needed.
Absolutely. Simply add another form under Create Entry on the Action. Any new clients added after that change will get the additional form. For existing clients who’ve already been onboarded, you will need to manually create entries on the new form for them.
No, clients can complete the onboarding forms in whatever order works best for them. All three tasks appear in their Task Dashboard simultaneously, and they can tackle them based on their own priorities.
If you do need forms completed in a specific sequence, you can auto-create an entry on the next form when the client clicks an Action on the first form. For example, make the payment form only accessible after the client clicks the “Sign & Submit” Action on the Service Agreement. That Would look something like this:
- Internal Role triggers onboarding from an “Assign Onboarding Forms” Action.
- The client is only assigned a task for a Service Agreement form.
- When the client clicks “Sign & Submit” on the Service Agreement, the Workflow automatically creates the entry for the Onboarding Payment form.