Easily build a professional, well-structured intake questionnaire without any technical background, so your first meeting is productive instead of spent playing catch-up.
Build Time & Skill
20-30 min
Beginner
What you'll learn
How to build an intake questionnaire from scratch, with tips about organizing it with sections and pages, adding conditional logic, and testing it before sharing it with clients
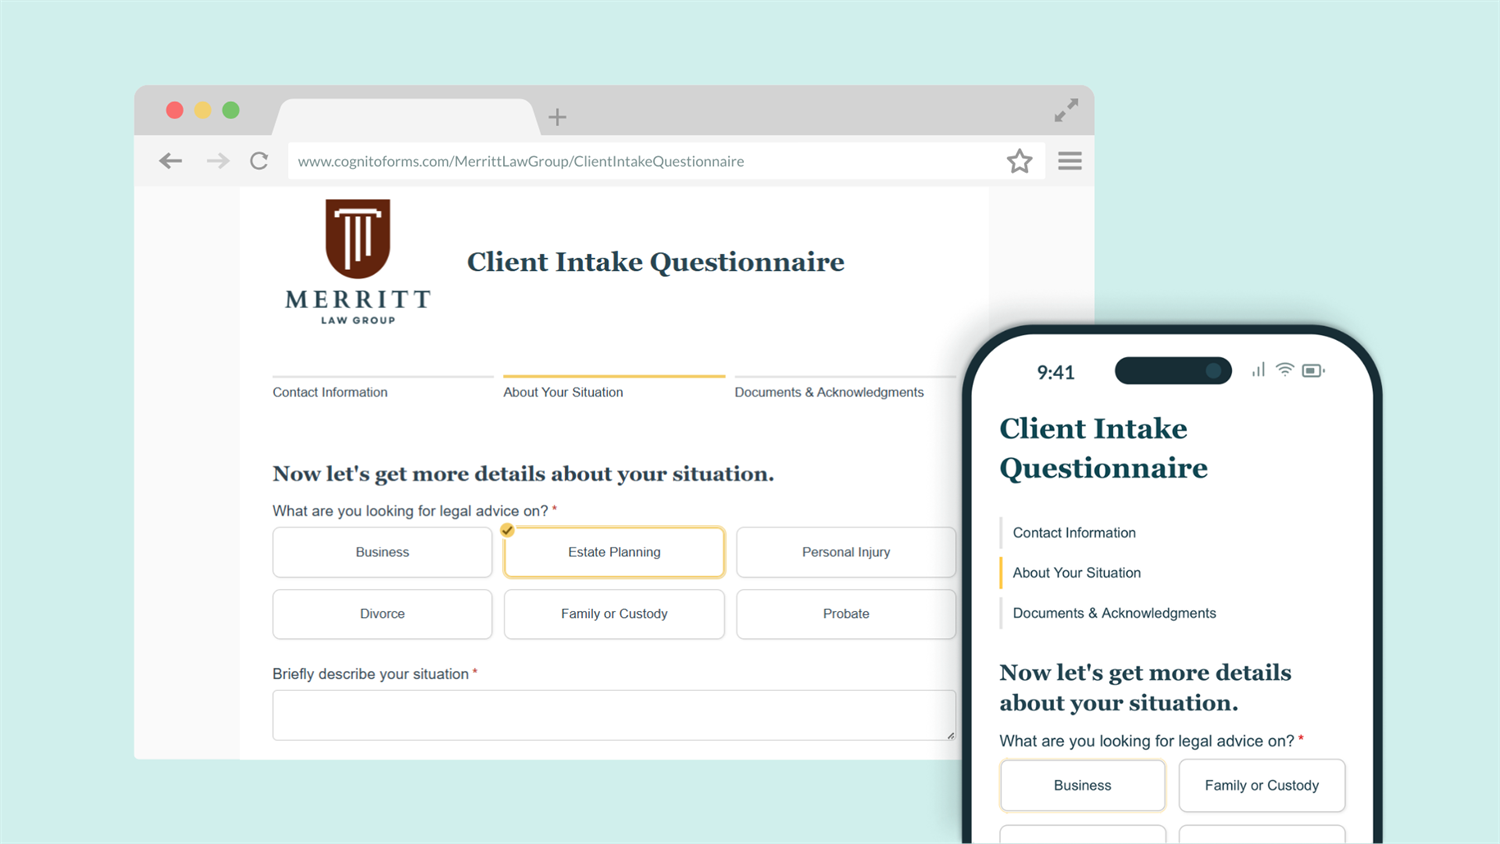
Whether you’re collecting information from new clients, patients, or employees, a well-built intake questionnaire does the heavy lifting for you. Instead of juggling email threads and phone calls, one form collects everything in one place; organized, accurate, and ready when you need it.
This guide walks you through building an intake questionnaire in Cognito Forms from start to finish. By the end, you’ll have a working form that:
- Gathers consistent information. Every client answers the same structured questions, so nothing gets missed and follow-up emails become rare.
- Shows only relevant questions using conditional logic, so no one answers things that don’t apply to them.
- Saves time before your first appointment. When clients complete intake in advance, you spend less time on basics and more time on the work they’re paying you for.
- Looks professional from the start. A clean, organized form signals that your process is thoughtful, and builds client confidence before the engagement even begins.
Step-by-Step: Building Your Intake Questionnaire
To build an intake questionnaire in Cognito Forms, create a new form on the Build page, add fields for the information you need, organize them with sections and pages, require the essential fields, and share it with clients via a public link.
Step 1: Create your form and add fields
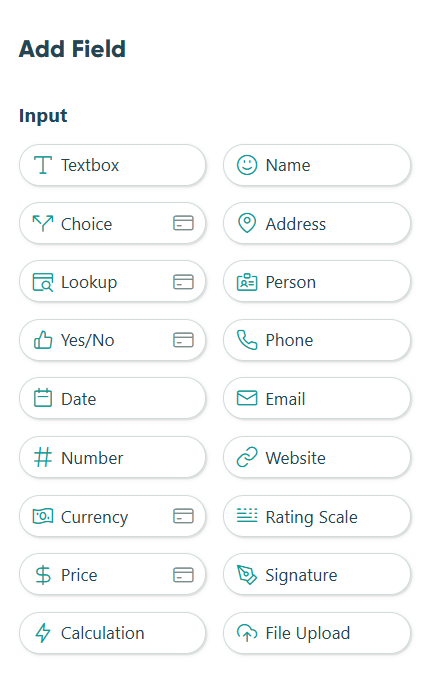
Start by creating a blank form in your Cognito Forms account. You’ll land on the Build page, where you’ll design every part of your questionnaire using a drag-and-drop interface. Cognito Forms offers a wide range of field types, and choosing the right one for each question ensures accurate data and a smooth experience for clients.
To do this:
- Create a new form from scratch, from a template, or using our AI form generator.
- Give it a clear name, like “Intake Form” or “New Client Questionnaire.”
- Click any empty placeholder on the Build page.
- The Add Field menu opens on the left. Select your field type to place it on the form.
- After adding a field, rename it in the Field Label.
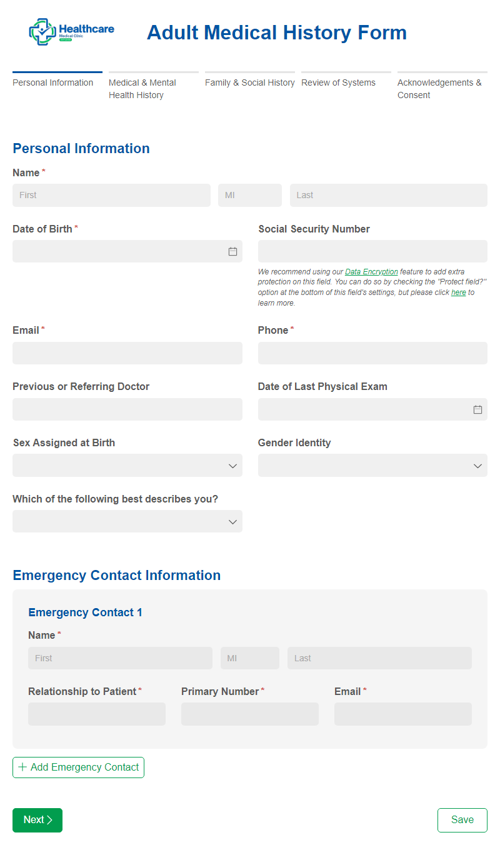
Most intake questionnaires follow a similar pattern: start with contact information (Name field, Email field, Phone field), move into background or service-specific questions (Text fields and Choice fields), and close with any document requests (File Upload).
Step 2: Organize questions with sections and pages
A long list of questions is harder to complete than a well-organized one. Grouping related questions into sections and splitting longer forms across multiple pages makes your questionnaire feel more manageable and helps clients focus on one topic at a time.

Using sections
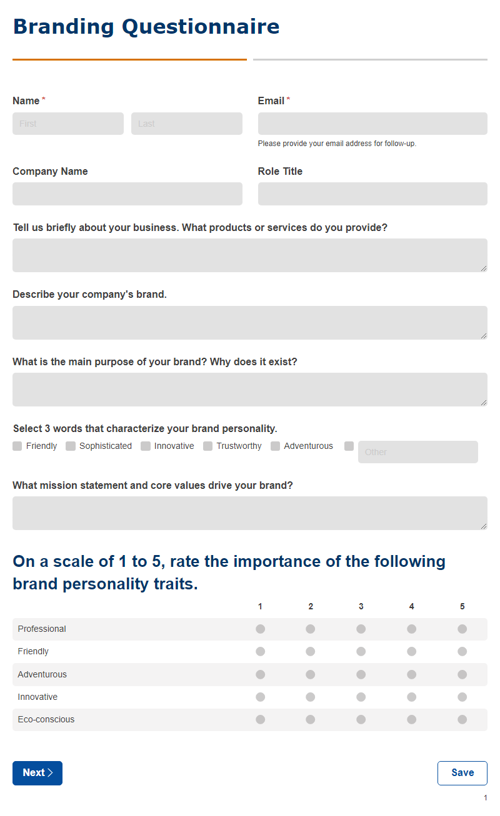
Sections visually group related fields under a shared heading. A typical intake form might use three sections: Contact Information, About You, and Your Goals.
To add a section:
- Select Section from the Add Field menu.
- Give it a descriptive label, then add fields inside it. You can drag fields between sections to rearrange them at any time.

Adding page breaks
For longer questionnaires, Page Breaks split your form into separate screens so clients aren’t overwhelmed by a single long scroll. Each Page Break adds a “Next” button that advances the client to the following section.
To add a Page Break:
- Add a Page Break between the sections or fields you want to separate.
- Adjust the Next Button Text to something like “Continue”, if desired.
- From the form settings page, find Progress Bar.
- Adjust the form’s Progress Bar style, change each page’s title, and show or hide page titles and page numbers.
Step 3: Collect documents, signatures, and acknowledgments
Many service professionals need more than typed answers. Law firms may need a copy of an existing contract or prior correspondence. Consultants may need financial statements or prior agreements. Agencies may need brand assets or style guides. And most service businesses need some form of client acknowledgment before the relationship officially begins. This step covers three field types that work together to handle all of that in one place.
Adding a File Upload field
The File Upload field lets clients attach files directly to their submission. Every uploaded file is stored with the entry in your Entries page, without email attachments or separate file requests.

To do this:
- Click an empty placeholder on the Build page and select the File Upload field.
- Rename the field label to something specific. For example, “Upload Your Current Contract” or “Attach Any Relevant Documents.”
- In the field settings on the left, you can:
- Set Require this field to Always, if the upload is mandatory before submission.
- Limit the number of files using the Maximum Number of Files setting (up to 20 files).
- Restrict which file types are accepted (e.g. PDFs only or image files only) using the Allowed File Types setting. What you specify here is case sensitive, so be sure to add both versions of a certain file type (
PNGandpng).
Add Help Text to the File Upload field so clients know exactly what to attach and in what format. For example: “Please upload a PDF of your current service agreement, if you have one.”
Closing with a signature and acknowledgment
End your form with a Content field, Yes/No field, and Signature field for acknowledgment. Together, they confirm that the client has reviewed their answers, agrees to your terms, and authorizes you to move forward.

To do this:
- Add a Content field with your terms or conditions listed.
- Then, add a Yes/No field directly below it.
- Write the acknowledgment statement as the field label. For example: “I understand that submitting this form does not establish an attorney-client relationship.”
- In the field settings, select Require Yes Response to Always so the form can’t be submitted until the client actively checks the box.
- Lastly, add a Signature field and rename the field, if desired.
- Mark the field as Required if a signature is necessary before you’ll act on the submission.
To ensure the signature can’t be altered after submission by anyone, set the Signature field’s Read-Only setting to When → Entry.Status is not "Incomplete"
Step 4: Require fields and add Help Text
Requiring fields ensures clients can’t skip questions you genuinely need answered. Help Text gives them the context to answer those questions correctly the first time.

Requiring a field
Required fields prevent clients from submitting the form or moving to the next page of the form until they answer the required question(s). They also display a red asterisk next to their label so clients know they can’t leave them blank.
To require a field:
- Click the field you want to make required.
- In the field settings on the left, find Require This Field.
- Select Always to require it every time someone fills out the form.
- Select When to require it only under specific conditions (for example, only when a client selects a particular service type).
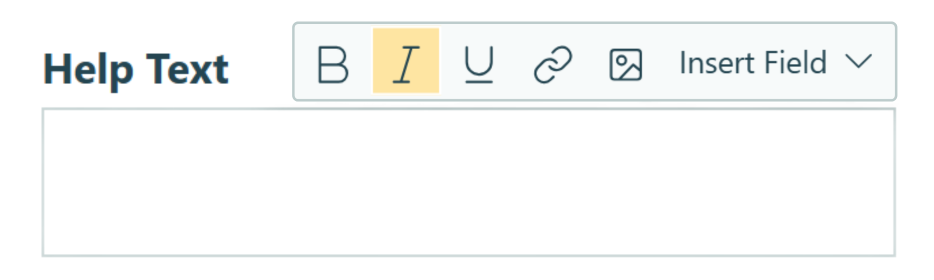
Adding help text
Help Text appears underneath a field label or input area. It’s useful for any question where the expected input isn’t immediately obvious. Add your desired text to the field’s Help Text area in the field settings.
Step 5: Show only relevant questions
Not every question applies to every client. A firm or agency that works with both individuals and businesses likely asks very different intake questions depending on who’s filling out the form. Showing everyone every question adds friction and can confuse clients who encounter fields that don’t apply to them.
Cognito Forms’ Conditional Logic lets you show or hide fields based on a client’s previous answers, with no code required. Your form adapts in real time, displaying only the questions that are relevant to that specific person.

To set this up:
- Click the field you want to show conditionally.
- In the field settings, find Show This Field and set it to When.
- In the Conditional Logic Builder, define your rule.
- For example: Show when
"Client Type" is "Business"
- For example: Show when
Step 6: Set up an email confirmation
When a client submits their intake questionnaire, they should receive a confirmation right away. It reassures them that the submission went through, and it gives you a clean record of what they sent.

To set up an email confirmation:
- Open the Submit Action.
- Under Send Emails, click + Add Email.
- In the To field, click Insert Field and select the Email field from your form. This automatically routes the confirmation to whatever address the client entered.
- Write a subject line and a brief message. For example: “We received your intake form. Here’s what to expect next.”
- Under Include, check Entry Details if you want clients to receive a copy of their own answers alongside the confirmation. Check Attach Document to send them a PDF file of their answers with the signature included.
Step 7: Test and share your questionnaire with clients
Your form is built. Now you need to make sure everything works as expected and share it with clients.

To do this:
- Use Preview Mode to fill out your form as a client would. Verify your pages and sections look right, conditional logic works as you intended, and everything makes sense.
- Submit a test entry from the form’s Public Link to check emails and PDF attachments.
- Once everything looks good, navigate to the Publish page for your form. Choose the method of sharing your form that works best for you.
Please Note: Anything submitted in Preview mode will not be recorded, as it’s only intended to test how the form looks and functions before publishing it live.
More Ways to Enhance Your Intake Questionnaires
Once your intake questionnaire is up and running, these features can extend what it does and connect it to a larger process:
- Let respondents save their progress and finish later with Save & Resume. This is especially helpful for longer questionnaires that require information they may not have on hand when they first open the form.
- Collect legally binding electronic signatures. Add a Signature field at the end of your questionnaire, turning it into a combined intake and consent document in a single submission.
- Automatically generate a formatted PDF summary of a respondent’s answers the moment they submit. With Document Generation, you can instantly send them their document, store in their file, or use it as a starting point for follow-up work.
- Turn your intake process into a self-service client portal where everything lives in one place. With Guest Access, you can let clients submit multiple forms, track progress, or return to update their information over time.
Start Collecting Better Information Today
A well-built intake questionnaire removes the friction from your first client touchpoint. It replaces back-and-forth emails with a clean, organized process that works the same way for every client, every time. Cognito Forms gives you everything you need to build one without writing a single line of code. Open your account, create a new form, and start asking better questions today.
Start with a template
Rather start from a pre-built foundation? Browse our intake and questionnaire templates to find one that fits your needs. You can customize any template to match your company's brand and the information you need to collect.
-d01c572.png)
FAQ
Set up another email notification in your Workflow settings. Open the Submit action, click + Add Email under Send Emails, and enter your own email address in the To field. You’ll receive a notification each time a client submits. Check Entry Details under Include to see their answers directly in the email.
No. Cognito Forms does not cap the number of fields on a form. That said, shorter forms tend to see higher completion rates. Ask only what you genuinely need at the intake stage, and consider gathering additional details in follow-up conversations once a client relationship is established.